Home > Blog > Studio Gear > Mastering Gear
Disclosure: Some of the links below are affiliate links, meaning that at no additional cost to you, we will receive a commission if you click through and make a purchase. Read our full affiliate disclosure here.
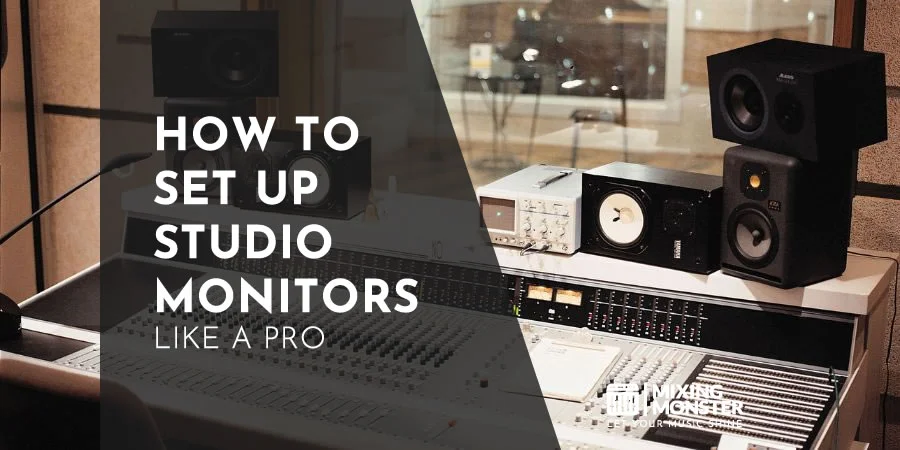
Setting up studio monitors is crucial in creating an ideal listening environment for music production, mixing, and mastering. It’s about achieving the perfect balance where your audio sounds as accurate as possible, which can significantly impact the final output of your projects.
To set up your studio monitors properly, it’s essential to understand the basics regarding monitor types and their corresponding uses—factors like room acoustics, monitor size, and positioning influence sound quality. Monitors should be placed to form an equilateral triangle with the listening position, and the room should be treated acoustically to minimize sound reflections. Integrating subwoofers and choosing accessories like monitor stands can enhance the listening experience.
Diving into the subject of studio monitor setup, you’ll discover invaluable techniques to transform your workspace into an acoustic sweet spot. Beyond the technical aspects, this article will guide you through indispensable practices such as integrating subwoofers with studio monitors and selecting the right size and type for your needs. Allow this exploration to empower your creative space, paving the way to elevated audio experiences.
KEY TAKEAWAYS:
- Proper studio monitor setup is foundational to sound accuracy in music production.
- An equilateral triangle formation is central to monitor positioning for optimal listening.
- Room treatment and monitor size selection further refine sound quality.
Table Of Contents
1. Understanding Studio Monitor Basics
2. Room And Acoustic Considerations
3. The Equilateral Triangle Principle
4. How To Set Up Studio Monitors Properly
5. Acoustic Treatment And Isolation
6. Integrating Subwoofers With Studio Monitors
7. Selecting The Right Studio Monitor Size And Type
8. Essential Accessories For Studio Monitors
9. Advanced Studio Monitor Setup Tips And Techniques
10. Setting Up Your Studio Monitors Properly
11. FAQ

1. Understanding Studio Monitor Basics
Before diving into the specifics of studio monitors, it’s critical to develop a foundational understanding of what they are and their important role in any home studio setup.
Understanding Studio Monitors
A studio monitor is a type of loudspeaker specifically designed for audio production applications where it is essential to reproduce the sound being recorded or mixed accurately. Unlike consumer-grade speakers, which might enhance specific frequencies to make music sound more appealing, studio monitors are engineered to provide a flat frequency response.
This allows you to hear your mix as it truly is. Studio monitors come in various types, including nearfield studio monitors, smaller and intended for listening at close distances, and far-field monitors, which are larger and designed for listening from further away.
The Role Of Studio Monitors In Your Home Studio
In your home studio, studio monitors are the gateway to making informed decisions about your audio’s balance, panning, EQ, and dynamics.
They allow you to accurately hear the details and depth of your mix, making them indispensable tools for music production, mixing, and mastering. Effective use of home studio monitors can mean the difference between a good mix and a professional-sounding production. Whether you opt for nearfield or far-field monitors will depend on the size of your room and the distances you’ll typically be listening from.
Your choice of monitors should reflect your workspace’s needs and listening habits to ensure you achieve the best possible mix for your audio productions.
2. Room And Acoustic Considerations
Your room’s acoustics greatly influence sound quality in setting up studio monitors. Properly addressing room characteristics and acoustic anomalies is as important as the monitors.
Optimizing Your Listening Environment
Room acoustics play a crucial role in the performance of your studio monitors. Reflections from walls, ceilings, and floors can cause frequency response issues, leading to inaccurate sound reproduction. To optimize your listening environment, strategically place acoustic panels in key positions directly in front of and behind the monitoring position to absorb these reflections effectively.
Acoustic treatments can help control bass response, which tends to become more pronounced and uneven in smaller rooms. Bass traps in room corners can mitigate the buildup of low-frequency energy, ensuring a clearer and more balanced sound.
The Impact Of Room Size And Shape On Acoustics
The size and shape of your room significantly influence its acoustics. A rectangular room is preferred for studio spaces due to the predictable behavior of room modes—resonances that occur at specific frequencies dictated by the room’s dimensions.
To reduce the impact of these modes, your monitors should ideally be positioned along the shorter wall to minimize the distance sound waves travel before reflecting, thus minimizing phase issues and standing waves.
The placement within a rectangular room also influences stereo imaging and frequency response. Monitors should be set up in an equilateral triangle with the listening position, with speakers at ear level, to ensure the most accurate sound stage.
Striking the right balance in terms of room size is pivotal. While a larger room generally provides a more expansive sound field, it requires more acoustic treatment to manage reflections and reverberation. Conversely, a smaller space may require fewer treatments but can suffer more noticeably from acoustic problems.
3. The Equilateral Triangle Principle
The Equilateral Triangle Principle is foundational for accurate studio monitor placement and critical listening. This method aims to create the ideal ‘sweet spot’ by arranging your monitors and listening position to form an equilateral triangle.
Setting Up The Ideal Studio Monitors Listening Position
To establish the ideal listening position, you must situate yourself so that the distance between the two studio monitors and your seat forms an equilateral triangle. This precise setup means that the distance from each speaker to you is identical to the distance between the two speakers. Your sweet spot is at the vertex of this triangle, where you should be positioned for the most accurate stereo imaging.
How To Measure And Place Your Studio Monitors Accurately
Measure Distances:
- Measure the distance between the two monitors to ensure they are spread apart correctly.
- Verify that each monitor is the same distance from your listening position using the same measurement.
Speaker Placement:
- Tweeter Height:
Position the tweeters at ear level to ensure the high frequencies are aimed directly at your ears. - Angles Matter:
Each monitor should be angled toward you, forming a 60-degree angle with your listening position at the apex.
Use this method to optimize your listening experience and ensure accurate sound reproduction.
4. How To Set Up Studio Monitors Properly
Careful consideration of monitor height, angle, and room placement directly influences the quality of your mix. This section will guide you to set up your studio monitors for precision listening.
Proper Studio Monitor Height And Angle For Precision Listening
Your studio monitors should be positioned so the tweeters are at ear level, ensuring the high frequencies are aimed directly towards your ears. Consider adjustable monitor stands to achieve the correct height if your monitors are too high or too low.
The angle of the monitors is equally vital; they should be directed inwards, forming a 60-degree angle with you at the apex of an equilateral triangle.
Monitor Setup Checklist:
- Tweeters at ear level
- Angled to form a 60-degree apex with your position
The Importance Of Distance From Walls And Corners
The distance of your monitors from walls and corners affects bass response and can introduce unwanted reflections and standing waves. Position monitors at least a few inches from the wall and avoid the corners to prevent bass buildup. Ideally, monitors should be placed against the longest wall of your room to optimize direct sound and minimize early reflections.
Studio Monitor Positioning Tips:
- Distance from rear wall: Maintain several inches to a foot
- Avoid placement in corners: Prevents excessive bass accumulation.

5. Acoustic Treatment And Isolation
Proper acoustic treatment and isolation are critical to achieving pristine sound quality in your studio setup. You’ll need to smartly apply acoustic panels and bass traps to tame unwanted frequencies and use isolation pads and stands to minimize vibrations affecting your monitors.
Using Acoustic Panels And Bass Traps
To fine-tune your studio’s frequency response, strategically place acoustic foam panels on your walls; precisely, aim to cover 22-30% of the wall behind your desk to manage mid to high frequencies. Acoustic treatment principles suggest focusing on the area behind your monitors for the best impact.
For low-frequency issues, bass traps are your best bet. They are essential in the corners of your room where bass frequencies tend to build up. Implementing these can make a dramatic difference in the clarity of your sound by absorbing lower frequencies that can otherwise create a muddy mix.
The Role Of Studio Monitor Isolation Pads And Stands
Studio monitor isolation pads serve one primary function: they decouple your monitors from their resting surface. This separation helps to prevent vibrations from transferring to the desk or the stands, which could color your sound and obscure accurate frequency response. Types of accessories for monitor isolation make a significant difference in reducing these unwanted resonances.
Moreover, using monitor stands brings your equipment to ear level for optimal listening and includes built-in mechanisms for additional isolation. These can range from pucks and springs to advanced dampening materials, each designed to keep your monitors steady and free from distortions caused by vibrations.
6. Integrating Subwoofers With Studio Monitors
Adding a subwoofer can enhance your listening experience by setting up your studio monitors and filling in the low-frequency range. Precise calibration is essential for seamless integration, ensuring your sub adds to rather than distracts from your mix.
When To Consider Adding A Subwoofer
Benefits Of A Subwoofer:
You should consider incorporating a subwoofer into your setup when you need a detailed bass response. A subwoofer can reproduce low-frequency sounds that your studio monitors alone may struggle to deliver. This is especially relevant if your work involves music or audio tasks requiring full-range sound reproduction.
- Type Of Audio Work:
A subwoofer will provide low-end richness and depth if you produce bass-heavy music or deal with sound effects and film scores. - Monitor Size:
Your studio monitor size influences your decision. Monitors with smaller woofers, typically less than 8 inches, will benefit significantly from a subwoofer’s extended frequency range.
Calibrating Subwoofers For Cohesive Sound
Steps For Studio Monitor Calibration:
- Positioning:
Place your subwoofer at the same distance from your listening position as your studio monitors. Avoid corners where bass can build up unnaturally. - Crossover Frequency:
Adjust your subwoofer’s crossover frequency to complement your studio monitors. The crossover frequency determines the point at which your subwoofer will take over from your monitors. - Volume Matching:
Match the volume of your subwoofer with your studio monitors. You don’t want the subwoofer to overpower or be undetectable compared to the rest of your system. - Phase Adjustment:
Check the phase alignment between your subwoofer and studio monitors. Incorrect phase settings can cause the subwoofer and monitors to cancel each other out, resulting in a weak bass response.
Tools For Studio Monitor Calibration:
- Use a sound level meter or calibration microphone to ensure accurate results.
- Employ audio calibration software to fine-tune settings for optimal sound.
By carefully adding and calibrating a subwoofer, you create a more accurate and full-spectrum audio environment, essential for professional-grade audio production.
7. Selecting The Right Studio Monitor Size And Type
Choosing the right studio monitor size and type is essential for accurate sound reproduction, ensuring that the monitors effectively fit the room’s acoustics and your listening positions.
Matching Monitor Size With Room Dimensions
Studio monitor size should correspond with your room size for optimal audio quality. To prevent overwhelming bass buildup, a small room usually requires monitors with a smaller woofer size, between 4 and 6 inches. Conversely, larger spaces can accommodate bigger monitors, typically from 8 inches above, allowing full-range sound without limited acoustics.
- Small Room (< 100 square feet):
4″ to 6″ woofers - Medium Room (100-200 square feet):
6″ to 8″ woofers - Large Room (> 200 square feet):
8″+ woofers
Aligning your monitor setup with room dimensions achieves a balanced mix and maintains a clear and accurate soundstage.
Comparing Nearfield, Midfield, And Farfield Monitors
Nearfield studio monitors are designed for listening at close range, typically from 3 to 5 feet. They are ideal for smaller spaces where the listening position is closer to the monitors, minimizing room acoustics’ impact on the sound.
Midfield monitors are suitable for medium-sized rooms and should be roughly 5 to 10 feet from the listening area. They offer a wider sweet spot and more robust low-frequency response than nearfield monitors.
Farfield monitors thrive in large spaces and are placed 10 feet or more away from the listening position. These monitors provide powerful output and extensive frequency range, effectively utilizing the room’s acoustics.
Here is a quick comparison:
- Nearfield:
Close listening, less room impact, small-medium rooms. - Midfield:
Medium distance, wider sweet spot, medium rooms. - Farfield:
Distant listening, full room utilization, large rooms.
Choose your type based on the typical listening distance in your space and the room’s acoustic characteristics.
8. Essential Accessories For Studio Monitors
Investing in the right accessories for your studio monitors is crucial to achieve optimal sound quality. These include reliable cables, audio interfaces, and monitor controllers that ensure clear, uninterrupted auditory transmission from source to output.
Cables, Audio Interfaces, And Monitor Controllers
Cables:
Your setup demands high-quality cables to preserve signal integrity. You’ll primarily use XLR cables for balanced connections that reduce noise, which is especially beneficial in professional studio environments. Other options include TRS cables for balanced connections or TS cables for unbalanced situations, typically shorter-distance connections.
| Type | Benefit | Use Case |
|---|---|---|
| XLR | Minimizes interference | Professional Studios |
| TRS | Balanced audio transfer | Medium Distance Runs |
| TS | Cost-effective | Short Distance, Low EMI |
Audio Interfaces:
Your choice of audio interface matters hugely. It’s the bridge between your computer and your monitors. Aim for a USB audio interface with ample outputs and inputs to accommodate your current and future needs. Ensure it supports standard sampling rates for clear, high-resolution audio.
Monitor Controllers:
A monitor controller is indispensable to fine-tuning your listening experience. This lets you adjust levels and switch between sources or speakers without the need to access software sliders. It provides tactile control and helps maintain consistent volume levels.
The Necessity Of High-Quality Cables And Interconnects
Balanced Cables:
For error-free audio signals, balanced cables like XLR and TRS are your allies against electromagnetic interference (EMI), ensuring the purity of sound, even across longer distances.
High-Quality Interconnects:
Remember to skimp on interconnects. Investing in high-quality interconnects can make a pronounced difference in audio clarity. These comprehensive paths for your audio hold the minute details of your sound, so set your studio for success with the best the market offers.
9. Advanced Studio Monitor Setup Tips And Techniques
Advanced techniques can enhance your listening experience when setting up studio monitors and ensure precision in sound reproduction. This section will go into detail about utilizing EQ and room correction for fine-tuning, as well as tips for maintaining your equipment.
Fine-Tuning With EQ And Room Correction Software
You can make crucial adjustments using corrective EQ settings to address any imbalances in the frequency spectrum. Ensuring high-frequency drivers are set accurately prevents ear fatigue and maintains clarity. Utilize room correction software to analyze and adjust your environment’s acoustics automatically.
Look for software options allowing detailed spectrum analysis and create filters to offset any issues specific to your room. Monitor calibration is also key; it ensures the sound from your monitors remains true to the original recording.
Tips For EQ And Room Correction:
- Use correction software like Sonarworks or ARC System to take measurements and apply automatic corrections.
- Manually adjust the high-trim setting on your monitors to tailor the high-end response to your room.
Regular Maintenance And Upkeep Of Your Monitors
Consistent maintenance and upkeep are critical for long-lasting performance. Periodically check connections and cables for any signs of wear or damage. Dust and clean your monitors, paying particular attention to the delicate high-frequency drivers, which can affect sound quality. Address any troubleshooting issues promptly to avoid compounding problems.
Maintenance Checklist:
- Monthly cleaning of exterior surfaces and dust filters.
- Inspect cables and ports for integrity and secure connections.
- Listen for any irregularities in sound that could indicate an issue with the monitor.
By following these advanced tips and techniques, you can achieve an optimal setup that captures the nuances of your sound and maintains the quality of your studio monitors over time.
10. Setting Up Your Studio Monitors Properly
Setting up your studio monitors is critical in creating an environment conducive to professional mixing and mastering. A proper setup directly impacts the precision of your mix and the overall performance within a recording studio.
Recap And Final Thoughts On Professional Studio Monitor Setup
Ensure that your studio monitors are positioned in an equilateral triangle from your listening position, with the tweeter of each monitor at ear level for the best sound experience. Proper alignment is vital for accurate sound reproduction and critical listening during mixing and mastering sessions.
The tips you’ve received here on setting up your studio monitors should contribute significantly to the quality of your audio work, from recording to the final stages of a mix. Remember, the listener’s position relative to the monitors can significantly affect the perceived balance of frequencies, so it’s crucial to situate yourself correctly within the sound field.
Consistently referencing your work on various playback systems can also provide insight into how your studio monitor setup translates to different listening environments. This practice is key for mastering tracks that sound good on various systems, from high-end audio equipment to standard consumer-grade speakers.
By following these guidelines and continuously refining your approach, you’ll ensure your studio setup supports the best possible performance in your audio production work!
11. FAQ
1) What are the best practices for positioning studio monitors in a small room?
In a small room, place your studio monitors at ear level and ensure they are positioned away from walls to reduce unwanted reflections. Keeping them equidistant from your listening position is beneficial to maintain a precise stereo image.
2) How do I properly connect my studio monitors to an audio interface?
Use balanced cables like TRS or XLR to connect your studio monitors to your audio interface. This minimizes signal interference and maintains sound quality. Ensure the output level on your interface matches the input sensitivity on your monitors for optimal performance.
3) What is the ideal angle for studio monitor placement for optimal sound?
Position studio monitors so they form an equilateral triangle with your listening position, typically with each monitor angled between 30 to 60 degrees toward you. This helps achieve a balanced stereo image and proper sound localization.
4) How can I effectively apply the 38% rule to speaker placement in my studio?
According to the 38% rule, place your listening position 38% away from the front wall of your room. This helps minimize standing waves and room modes, providing a clearer and more reliable bass response.
5) What considerations should I take into account for studio monitor stand selection?
Choose stable and height-adjustable stands, allowing your monitors to be positioned at ear level. Isolation pads or decouplers can also minimize vibrations and acoustic coupling with the surface they’re on.
6) At what volume level should I set my studio monitors during mixing?
Set your studio monitors to a comfortable listening level where you can hear all frequency ranges clearly without ear fatigue. Typically, this is around 83 dB SPL, which allows for reliable mixing decisions and accurate playback.

