Home > Blog > Studio Gear > Home Studio Gear

Disclosure: Some of the links below are affiliate links, meaning that at no additional cost to you, we will receive a commission if you click through and make a purchase. Read our full affiliate disclosure here.
Starting a home recording studio is one of the best ways to unlock countless creative possibilities. Whether you’re a musician, a producer, or simply obsessed with sound, having the ability to capture professional-level audio from your own space is quite liberating. The fact that you can record whenever the mood hits? That’s a huge reason why home studios are gaining popularity, whether you’re just starting or have been at it for years.
Building a home recording studio that works means you’ll need a computer, a digital audio workstation (DAW), an audio interface, microphones, monitors, and some acoustic treatment—and depending on how fancy you want to get, you might spend anywhere from $500 up to $3000 or more.
A basic home studio setup requires the essentials. Still, if you’re going all-in, you’ll want a variety of microphones, some outboard gear, and a serious approach to treating your room.
Creating music in a well-planned home recording space gives you complete control over your production. Whether you’re laying down vocals, tracking instruments, or just making beats on your laptop, the proper setup means you can get professional results without shelling out for expensive commercial studio time.
KEY TAKEAWAYS:
- You can build a basic home studio with just a few pieces of gear and not a ton of cash
- Acoustic treatment isn’t just a buzzword—it does make a huge difference
- Your DAW and audio interface are at the heart of any modern home studio
Table Of Contents
1. Home Recording Studio Setup Fundamentals
2. Planning Your Home Recording Studio Setup
3. Essential Equipment for Your Home Recording Studio
4. Acoustic Treatment for Your Home Studio
5. Setting Up Your Recording Gear
6. Recording Techniques and Best Practices
7. Upgrading and Expanding Your Home Studio
8. Key Takeaways for Setting Up a Home Recording Studio
FAQ

1. Home Recording Studio Setup Fundamentals
Putting together a home recording studio isn’t just about grabbing whatever gear looks cool. You need to consider what you actually require, how you’ll utilize it, and what you can realistically afford. Buying stuff on a whim usually leads to regret (and empty pockets).

Understanding the Basic Components of a Home Studio
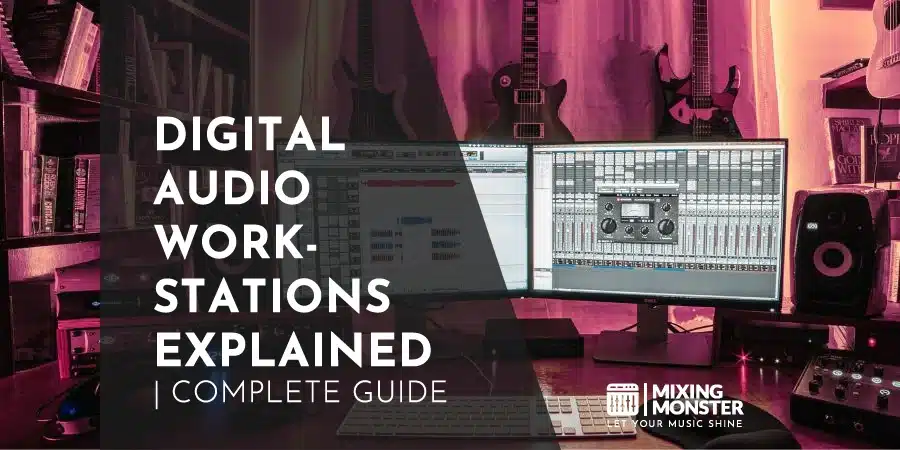
Your Digital Audio Workstation (DAW) is the brain of your recording setup. It’s the software where you’ll record, edit, and mix everything on your computer.
An audio interface is what lets you plug in mics and instruments, turning those analog signals into digital ones. A good interface means clean recordings and less annoying lag.
Studio monitors and acoustic treatments are non-negotiable if you care about the quality of your sound. Unlike regular speakers, studio monitors are designed to deliver a flat, honest sound—no sugarcoating.
Here’s what you’ll need, at minimum:
- Microphones (dynamic or condenser, depending on what you record)
- Cables and mic stands
- Audio interface
- DAW software
- Studio monitors
- Headphones

Identifying Your Recording Goals and Genre
What kind of music are you making? Different styles need different setups. If you’re into electronic music, you’ll want MIDI controllers and synths; if you’re recording a rock band, you’ll need more mics to capture everything live.
If you’re aiming to go pro or work with clients, you’ll need gear that meets industry standards—there’s no getting around that. Producers with clients, especially, can’t afford to have unreliable equipment.
Think about:
- What instruments will you be recording the most
- How many things do you want to record at once
- What your clients (if any) expect
- Any genre-specific requirements
Determining Your Budget and Space Constraints
Setting up a home studio can cost anywhere from a few hundred dollars to $10,000 or more. If you’re starting, stick to the basics and upgrade as you improve—and hopefully become more successful.
The size of your room matters, too. Small spaces may require near-field monitors and some creative DIY acoustic solutions.
How to split your budget (roughly):
- Computer and DAW
- Audio interface
- Monitors/Headphones
- Microphones
- Acoustic treatment
Try to pick a quiet room, away from street noise or loud neighbors. If you don’t have a dedicated space, portable acoustic panels can be a lifesaver.
2. Planning Your Home Recording Studio Setup
A little planning goes a long way. A well-thought-out home studio will help you achieve better results, stay inspired, and avoid wasting money and space.

Defining Your Recording Needs and Equipment List
Take a moment to consider your recording goals truly. Jot down a list of must-have gear based on what you plan to record.
Setting up a home studio is much easier if you budget for the essentials, typically including monitors and microphones. Don’t overspend on things you barely use.
Avoid purchasing specific high-end gear that people fuss about. Focus on gathering solid entry-level gear from well-known brands in the field.

Choosing the Right Room for Your Studio
Try to pick a spot with as little outside noise as possible. A spare bedroom is a classic home studio choice: it’s usually big enough and already has outlets and light.
What to look for in a room:
- At least 100 square feet is nice, but not required
- Some natural light helps, but not too much glass
- Plenty of power outlets
- Far from noisy appliances or traffic
- Ceilings at least 8 feet high (if possible)
If possible, avoid rooms with perfectly parallel walls—they can create weird echoes and muddy up your sound.
Creating a Floor Plan and Optimizing Workflow
Create an efficient layout that aligns with your workflow to optimize productivity. Keep your workstation within arm’s reach of the gear you use most.
Set up zones for:
- Recording (where you’ll put mics and instruments)
- Mixing (your central listening spot)
- Storage (for cables, stands, etc.)
- Cable management (trust me, it gets messy fast)
- Equipment racks, if you have outboard gear
For optimal sound, try to form an equilateral triangle with your head and the speakers. Please leave a little breathing room around everything so you don’t overheat your gear or make it impossible to swap things out.


3. Essential Equipment for Your Home Recording Studio
Getting the right gear is half the battle. A solid home studio setup is all about finding equipment that works well together and helps you get the sound you want. Digital or analog, it’s the combo that counts.
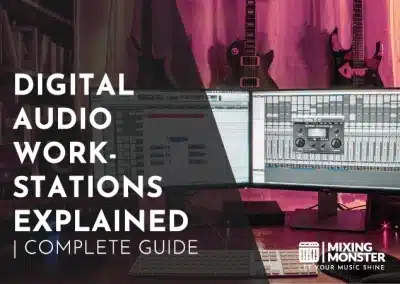
Computer and Digital Audio Workstation (DAW) Software
Your computer is the heart of your studio—there is no way around it. Whether you’re using a Mac or PC, ensure you’ve at least 16GB of RAM and a decent multicore processor. We recommend 8-12 core CPUs. Many people swear by Apple’s MacBook Pro for its stability and speed, but numerous PCs can also deliver the same results.
")
Your DAW is the primary software where everything happens: recording, editing, mixing, and more.
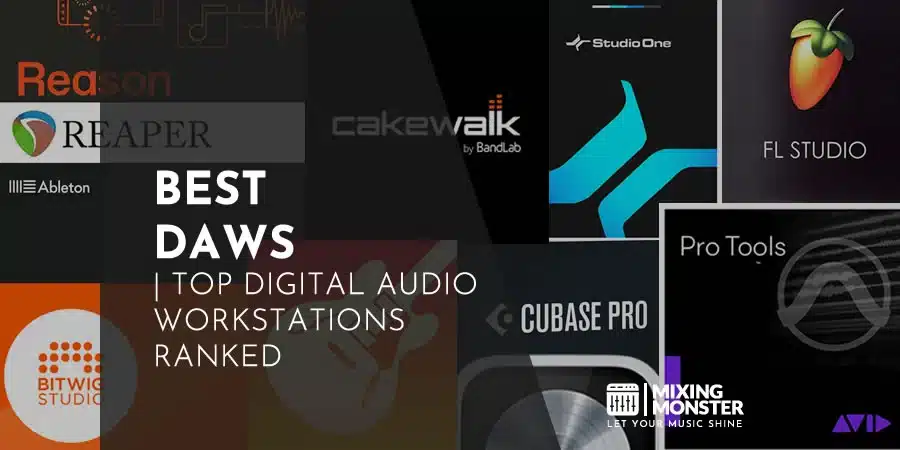
Some of the most popular DAWs:
- Pro Tools – pretty much the industry standard
- Logic Pro – Mac only, incredible built-in sounds
- Ableton Live – a favorite for electronic and live performance
- FL Studio – tons of beatmakers swear by it
- Reaper – super affordable but still pro-level
Audio Interfaces and Preamps
Audio interfaces convert analog signals into digital ones, enabling you to connect microphones and instruments. Good preamps in your interface mean your mics will sound cleaner and fuller.
What matters most:
- How many inputs and outputs do you need?
- Are the preamps any good?
- Does it support high sample rates and bit depth?
- Is latency low enough for real-time monitoring?
- USB or Thunderbolt connection—what works with your computer?
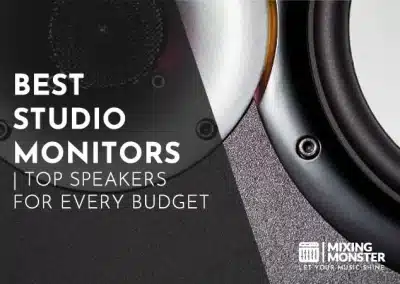
Studio Monitors and Headphones
Decent monitors are a must for mixing. Near-field monitors, set up at ear level in a treated room, will provide the most accurate sound.
Things to think about:
- Active vs. Passive: Active have built-in amps, so they’re easier for most home studios
- Size: 5–8 inch woofers are usually enough
- Frequency response: Look for something as flat as possible
Headphones are just as important, especially for tracking or late-night mixing.
You’ll want:
- Closed-back for recording (less bleed)
- Open-back for mixing (more natural sound)

Microphones for Recording Vocals and Instruments
Different jobs need different mics. The Shure SM57 and Rode NT1 are classics for a reason—they deliver exceptional results.
Types you’ll probably want:
- Large-diaphragm condensers: Best for vocals
- Dynamic mics: Great for amps, drums, loud stuff
- Small-diaphragm condensers Are Used for Acoustic guitars, cymbals, and other instruments.

Don’t forget the little things:
- Pop filters for vocals
- Sturdy mic stands and decent cables
- Shock mounts to cut down on rumble

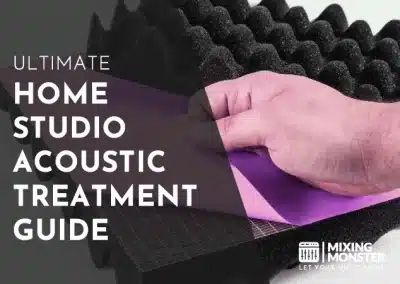
4. Acoustic Treatment for Your Home Studio
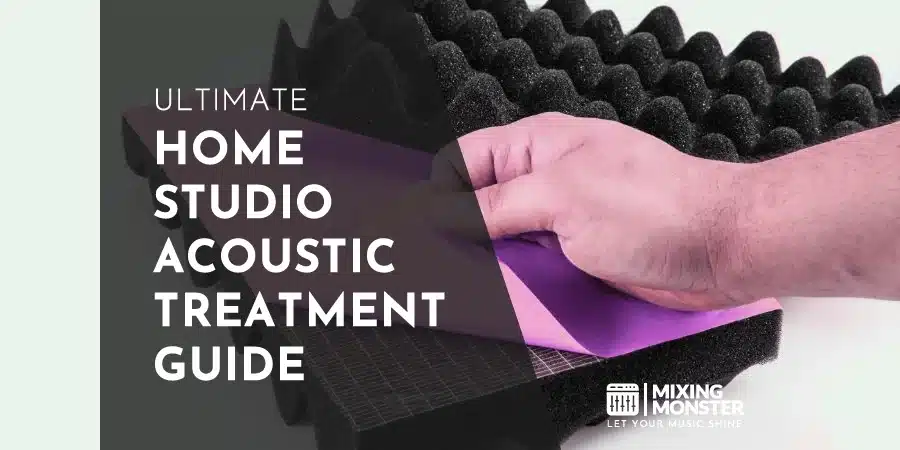
Acoustic treatment is what turns your bedroom or spare room into a real studio. If you skip this, you’ll always be guessing at your mixes. A few well-placed panels and bass traps can make a night-and-day difference—no joke.
Understanding Room Acoustics and Sound Absorption
Sound bounces off rigid walls, which can mess with how you hear your music. Those reflections can make mixing a nightmare and ruin otherwise good recordings.
Standing waves and room modes appear at specific frequencies, depending on the size and shape of your room. They’ll make some notes way too loud, and others vanish.
Early reflections from your walls and ceiling can mess up your stereo image and frequency response. Try the mirror trick: sit at your mix spot and have a friend move a mirror along the walls. Wherever you see your speakers in the mirror, that’s where you need to put panels.
DIY Acoustic Panels and Bass Traps
Bass traps are your best friend for taming boomy low end, especially in corners.
You can build your own using:
- Rigid fiberglass or mineral wool (4–6 inches thick is best)
- Simple wooden frames
- Breathable fabric (don’t use plastic!)
For mids and highs, make acoustic panels out of:
- 2-inch-thick insulation
- Lightweight wood frames
- Wall mounting brackets
Start with bass traps in every corner you can—seriously, it’s worth it. Then, put panels at those first reflection points on your side walls and ceiling. It’s not glamorous, but your ears will thank you.

Soundproofing Your Recording Space
Honestly, proper soundproofing isn’t just about installing some foam—it requires real structural modifications to your walls, floors, and ceiling. For most of us, though, it’s smarter to start by sealing up those sneaky air gaps around doors and windows. Weatherstripping and a good door sweep can significantly improve the energy efficiency of your home.
If you’re willing to put in a bit more effort, adding mass to your walls, such as extra drywall layers or mass-loaded vinyl, can help. Decoupling the walls from the main structure is another effective way to prevent sound from escaping.
If you’re serious about isolation (maybe you’ve got loud neighbors or want to crank up the volume), building a room-within-a-room is the gold standard:
- Double walls with an air gap in between
- Floating floor construction (yep, it’s as involved as it sounds)
- Isolated ceiling using resilient channels
Whatever you do, go for dense materials and avoid connecting inner and outer walls too rigidly—otherwise, sound will still find a way through.


5. Setting Up Your Recording Gear
Dialing in your recording setup isn’t just about gear—it’s about making the space work for you. A good setup boosts sound quality, keeps your workflow smooth, and honestly makes you want to spend more time in there. The way you lay out and connect everything sets the vibe for your home studio.

Connecting Your Equipment and Optimizing Signal Flow
At the heart of it all, audio interfaces connect your microphones, instruments, and monitors. Don’t skimp on cables—use high-quality XLRs for microphones, TRS for line-level equipment, and so on.
Try to keep your signal path as clean as possible. Bundle and organize your cables with ties, and keep them away from power cords to dodge any weird hums or interference. Labeling cables might feel tedious, but you’ll thank yourself when something goes sideways mid-session.
It’s also worth considering a power conditioner, as it protects your gear and eliminates the annoying noise caused by unstable power.
And, by the way, keep backup cables handy. Nothing kills a session’s momentum like a dead XLR with no spare in sight.
Configuring Your DAW and Audio Settings
Buffer size matters more than you’d think. Go low (128-256 samples) when tracking to minimize latency, and increase it (512-1024 samples) when mixing to prevent your computer from overheating.
Your DAW should be set to a sensible sample rate, and bit depth—44.1 kHz/24-bit or 48 kHz/24-bit are pretty standard these days.
Get your audio routing sorted in the DAW to match your interface, including inputs, outputs, and the entire setup. Save time by creating templates for your standard recording setups.
Enable auto-save (seriously, do it) and backup sessions to an external drive. Lost work is the worst.
Creating an Ergonomic Workspace for Productivity
Set your studio monitors up so they form a triangle with your head, with equal distances all around and at ear level. It’s a classic for a reason.
Lighting matters more than you’d expect. Get some adjustable desk lamps to avoid squinting at your gear for hours.
Pick a comfortable chair. Good lumbar support and adjustable height are must-haves. Your arms should rest easily at keyboard level, not hunched up or dangling.
Get a desk designed for studio use, with designated spaces for your monitors, keyboard, and rack gear. Rack units are a lifesaver for keeping outboard stuff organized.
Keep your most-used gear within reach. Stash cables, mics, and accessories in drawers or shelves so you’re not scrambling mid-take.
6. Recording Techniques and Best Practices
Nailing your recording technique is the real secret sauce for pro-sounding tracks at home. The way you capture audio, combined with some careful editing and mixing, can make even a modest home setup sound professional.

Microphone Placement and Recording Vocals
Mic placement is everything for clean, crisp vocals. Aim for 6-8 inches from the singer’s mouth, with the mic angled slightly upward—this helps avoid those harsh “p” pops.
Pop filters are your friend here. They reduce breath noise and sibilance, and honestly, they make things easier.
Don’t ignore the room. Hang acoustic panels or heavy blankets to tame reflections, and try to record away from the walls if possible.
Watch your levels—keep them between -18 dB and -12 dB. Too hot and you’ll clip; too cold and you’ll get hiss. It’s a balancing act.
Recording Instruments in Your Home Studio
Each instrument’s got its quirks when it comes to recording. For acoustic guitar, aim the mic 6-12 inches from where the neck meets the body—this is a nice sweet spot.
Bass guitar? Try both direct input (DI) and mic’ing the amp. It gives you more options when you’re mixing later.
Drums are a beast of their own. Start with the kick and snare—place the kick mic just inside the front head hole, and put the snare mic 2-3 inches above the rim. Tweak as needed; every kit’s a little different.
Editing and Mixing Tips for Polished Tracks
Good plugins can elevate your mix to the next level. Start simple: EQ, compression, reverb. You don’t need a million effects to sound pro.
Apply high-pass filters to non-bass tracks to clear out muddiness and give your bass and kick some breathing room.
Compression is powerful but easy to overdo. Start with a 3:1 ratio, adjust the threshold, and aim for a 3-6 dB reduction on the loudest parts. Trust your ears.
For depth, experiment with reverb by using different amounts for each group of instruments. Keep your bass stuff mostly dry, and let your background instruments swim a bit.
7. Upgrading and Expanding Your Home Studio
Smart upgrades can change your sound and workflow. Investing in better gear, proper acoustic treatment, and more monitoring options will open up new creative doors. Consider where your studio could use a little TLC.
Identifying Areas for Improvement in Your Setup
Start with basic acoustic treatment—bass traps and foam panels are your friends for taming those tricky frequencies. You’ll hear the difference in your mixes, promise.
The shape of the room and where you place your speakers matter significantly more than most people think. A well-treated space reduces unwanted echoes and standing waves.
If you can, add more speaker options. Reference monitors help you hear your mix the way others will—on everything from headphones to car stereos.
Key Areas to Evaluate:
- How’s your acoustic treatment?
- Are your monitors and listening positions dialed in?
- Is your cabling solid or a mess?
- Enough computer power for your sessions?
- Does your interface have enough I/O?
- Is your cat constantly chewing on your cables!?
Investing in High-Quality Equipment and Software
Once you’ve outgrown the entry-level gear, professional-grade equipment does make a difference. Better preamps and converters mean cleaner, clearer recordings.
Expand your mic locker if you can—dynamic, condenser, and ribbon mics all have their place depending on what (and who) you’re recording.
Priority Investments:
- A solid audio interface
- Studio monitors that don’t lie to you
- A versatile mic collection
- Reliable backup systems (seriously, don’t skip this)
- Pro-quality DAW plugins
Exploring Advanced Recording Techniques and Genres
Try out new microphone techniques—multi-mic setups can enhance a recording if you get them right.
Every genre has its quirks. Learning what works for rock, hip-hop, or jazz can change how you approach your sessions.
Level up your skills with advanced processing techniques, such as parallel compression or mid-side recording. More tools in your kit = more creative options.
Advanced Techniques to Master:
- Room mic placement
- Stereo recording tricks
- Multi-track drum setups
- Getting the best out of guitar amp mics
- Optimizing your vocal chain
8. Key Takeaways for Setting Up a Home Recording Studio
Setting up a home studio isn’t something you rush. Take some time to plan and invest in the essentials first.
Start with a quiet room and basic acoustic treatment. DIY panels and bass traps can do wonders for taming reflections, and you don’t have to break the bank.

Essential Equipment List:
- Computer with DAW software
- Audio interface
- Decent microphones
- Studio monitors
- Good headphones
- Mic stands
- XLR cables
- Pop filters
Make your workspace ergonomic. Extended sessions are challenging enough without the added discomfort of neck pain. Your desk should accommodate all your needs and have monitors at the ideal height for optimal viewing.
You can get a basic home studio setup for around $500, but costs depend on what you need and what you’re willing to DIY.
Never underestimate room acoustics. Even moving furniture around can help, and a few well-placed panels make a bigger difference than most people realize.
Take care of your gear and cables. A little maintenance goes a long way toward keeping things running smoothly. And don’t forget to start your journey!
Happy home recording!

FAQ
1) How can I set up a home recording studio on a budget?
You can get started for under $300 if you’re smart about where you spend your money. Prioritize what you need and look for deals that suit your needs.
Use household items for basic acoustic treatment—blankets, rugs, and strategic furniture placement help tame reflections.
Buying used gear from reputable sellers can stretch your budget further than you might think.
2) What essential equipment is required to start a home recording studio?
For a basic home recording setup, you’ll need a computer, DAW software, an audio interface, studio headphones, and at least one good microphone.
Select gear that suits your specific needs—vocals, instruments, or both—there’s no need to overbuy at the start.
3) Which software is best for beginner home recording studio enthusiasts?
GarageBand is a solid (and free) option if you’re using a Mac. Audacity is free and works on both Windows and Mac, though it’s barebones.
Reaper and Studio One Artist are affordable, paid options with pro features and easy-to-learn layouts—great for newbies.
4) What are some creative ideas for designing a home recording studio space?
Select a quiet room away from street noise, and install bass traps in the corners to refine the low-end sound.
Move your furniture around to break up sound reflections, and if you can, set up separate zones for recording and mixing.
5) How can I achieve professional audio quality in my home recordings?
Don’t let poor acoustics or subpar gear compromise your sound. They make a bigger difference than people expect.
Maintain consistent mic placement and gain staging throughout every session. It’s a small thing, but it adds up.
Organize your cables and keep them away from power cords. It’s a simple way to reduce noise and headaches.
6) How much should I expect to invest when building a basic home recording studio?
If you’re just getting started, you’ll likely spend anywhere from $500 to $1,500 to cover the basics—think audio interface, a decent microphone, headphones, and some simple acoustic panels. It’s not pocket change, but it’s not astronomical, either.
You can purchase a quality USB mic for around $100 these days, and beginner-friendly audio interfaces typically range from $100 to $300. There’s a lot of choice, but you don’t have to go wild on your first purchase.
As for DAW software, prices vary significantly. Some solid free options exist, while the full-featured pro versions can cost around $300. Thankfully, many companies offer lighter, more affordable editions for home users if you’re not ready to dive in headfirst.
Related Articles


Featured


You Might Also Be Interested In