Disclosure: Some of the links below are affiliate links, meaning that at no additional cost to you, we will receive a commission if you click through and make a purchase. Read our full affiliate disclosure here.
Mixing music is both an art and a science, a critical process in music production that brings balance, clarity, and depth to your recordings. An artist or producer’s ability to combine multiple layers of audio into a cohesive track makes all the difference in how a song is received and perceived. When executed skillfully, a good mix can captivate listeners, elevate the artist’s work, and define the sonic identity of the music.
Understanding how to mix music requires a foundation in the basics, from setting levels and panning to applying EQ and compression. It’s further about creating an experience for the listener, with each instrument sitting perfectly on the soundstage. As a mixer, you must navigate technical aspects and make creative decisions to ensure the final product reflects the intended vision. With a grasp of fundamental techniques and the nuances of your tools, a mixing session can transform raw recordings into polished, professional-sounding songs.
Expect to uncover the layers of complexity behind a well-crafted mix. Whether you’re a beginner looking for foundational knowledge or an experienced mixer aiming to sharpen your skills, this guide will provide insights and actionable steps to enhance your music production. From preparing your mix to applying advanced techniques, each section aims to guide you, ensuring you walk away with practical skills and a deeper understanding of audio mixing.
KEY TAKEAWAYS:
- Setting up a home studio necessitates strategically selecting core equipment and software.
- Personalizing the space for acoustics and comfort significantly impacts production quality.
- We can create a functional and practical home recording studio even with a modest budget.
Table Of Contents
1. Understanding The Basics Of How To Mix Music
2. Preparing Your Mix
3. Essential Mixing Techniques
4. Advanced Mixing Techniques
5. Technical Aspects Of Mixing
6. Best Practices For Mixing
7. Signal Chain And Plugin Recommendations
8. Hardware Recommendations For Mixing
9. Mixing Tips And Hacks
10. Continuous Learning And Improvement
11. Wrapping Up Audio Mixing And Next Steps
12. FAQ

1. Understanding The Basics Of How To Mix Music
Mixing music is a fundamental skill that transforms individual sound elements into a polished, cohesive track. It’s essential for achieving professional sound quality in any music production.
What Is Mixing, And Why Is It Important?
In the context of music, mixing is the process of blending all the different sound sources recorded during a session into a single stereo track. It’s crucial because it balances out the various elements, ensuring that no single instrument or vocal overpowers another.
A good mix enhances the emotional impact and clarity of the music, providing listeners with the best possible experience.
Critical Elements Of A Great Mix
A great mix hinges on several key elements:
- Balance:
Levels should be set to ensure each part complements rather than competes with the others. - Panning:
Determines the spatial placement of sounds within the stereo field. - EQ (Equalization):
Used to sculpt the frequency content of each sound, minimizing conflicts and enhancing clarity. - Dynamics:
Compression and gating help manage the mix’s dynamic range. - Effects:
Reverb, delay, and modulation can add depth and texture. - Automation:
Adjusting levels and other parameters dynamically throughout the song.
Setting Up Your Home Studio For Mixing
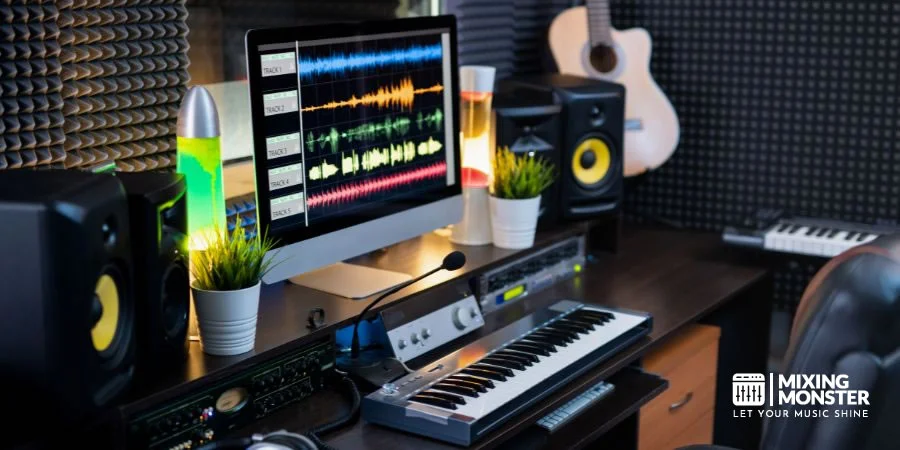
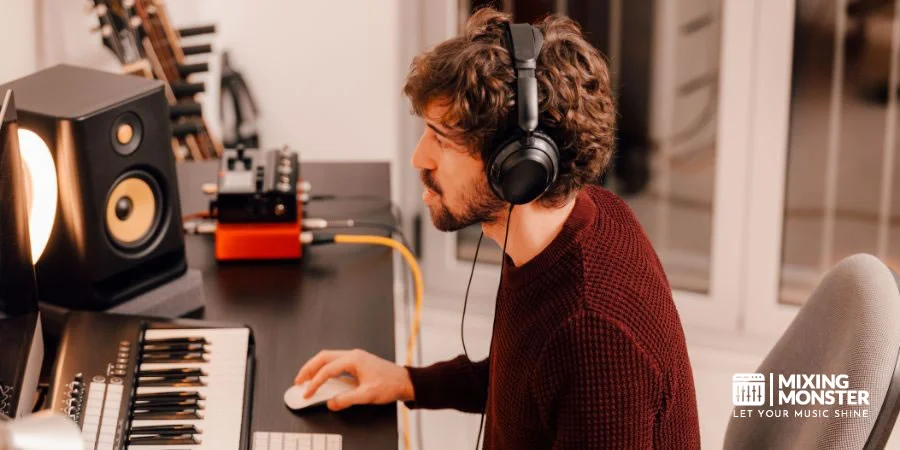
To begin mixing music at home, you will need a few essential tools: a computer with digital audio workstation (DAW) software, a good pair of studio monitors or headphones, an audio interface, and some outboard gear or plugins for additional processing.
The room in which you mix should be acoustically treated to provide a more accurate soundstage. This setup allows you to become a mix engineer in your own space, capable of creating a static mix that can then be refined into your final mixdown.
2. Preparing Your Mix
Before diving into the mix, ensure your tracks are well-organized, properly labeled, and the audio is clean. Gain staging should set the foundation for a balanced mix; meticulous editing will provide clarity and cohesion.
Organizing And Labeling Your Tracks
Organize your multi-track recording by sequentially arranging and grouping similar elements. Use color coding to distinguish between different instruments, such as vocals, drums, snare, and kicks. Name each track meaningfully, like “Lead Vocal” or “Snare Top,” to maintain clarity throughout the mixing process.
Gain Staging And Balancing Levels
Start gain staging to ensure each track’s signal level is set optimally before applying effects. This provides headroom and prevents clipping. Balance the levels by adjusting the gain so the vital elements like vocals and kick drums sit well together, establishing a precise blend.
Cleaning Up And Editing Audio
Cleaning is critical. Remove any noise, clicks, or undesired silence from your tracks. Edit the timing of your audio clips to tighten performances, paying extra attention to the rhythmic elements like drums. Ensure vocals are pristine and consistent, with breath sounds and sibilance controlled to perfection.
3. Essential Mixing Techniques
Mastering the essential mixing techniques is crucial for creating a polished and professional-sounding track. This section will focus on the foundational tools and methods that help shape your music.
Volume And Balance
Setting the right volume for each track ensures that your mix is clear. Start with the lead vocal or primary instrument, then adjust the faders of other elements to support the main feature.
Panning For Stereo Imaging
Panning positions the elements of your mix across the stereo field, enhancing the listening experience. Use panning to create a sense of space, placing instruments in a manner that reflects a live setting or fosters an engaging audio landscape.
Equalization (EQ) For Tonal Shaping
EQ is a pivotal tool for tonal shaping and correcting frequency imbalances. Tailoring the EQ settings helps distinguish the instruments and cleans up mud in the lower frequencies.
Common EQ Settings:
| Frequency Range | Purpose | Suggested Setting |
|---|---|---|
| Low (< 80 Hz) | Add weight to bass | Boost for warmth |
| Low-Mid | Reduce muddiness | Cut if necessary |
| High-Mid | Clarify vocals | Boost for clarity |
| High (> 5 kHz) | Add air to the mix | Gentle boost |
Compression For Dynamic Control
Compression helps manage the dynamic range, ensuring no part of your track overpowers another. It provides balance and consistency by controlling the peaks and raising the lower volumes.
Common Compression Settings:
| Element | Threshold | Ratio | Attack Time | Release Time | Knee |
|---|---|---|---|---|---|
| Vocals | -20 dB | 3:1 | Fast (~2 ms) | Medium | Soft |
| Drums | -10 dB | 4:1 | Medium | Medium | Hard |
| Bass | -15 dB | 4:1 | Fast (~5 ms) | Fast | Medium |
Reverb And Delay For Depth And Space
Reverb and delay introduce depth and space, emulating the natural reflections you’d hear in physical spaces. Apply reverb to create a sense of place and delay to add rhythmic texture.
Common Reverb Settings:
| Reverb Type | Room Size | Pre-delay | Decay Time |
|---|---|---|---|
| Plate | Medium | 30 ms | 1.5 s |
| Hall | Large | 50 ms | > 2 s |
| Room | Small | 15 ms | < 1 s |
Common Delay Settings:
| Delay Type | Feedback Amount | Delay Time | Filter |
|---|---|---|---|
| Tape Delay | 30% | 1/4 note | High-pass |
| Analog Delay | 25% | 1/8 note | Low-pass |
| Digital Delay | 20% | Dotted 1/8 | Bandpass |
Saturation And Distortion For Warmth And Character
Adding saturation or subtle distortion can enhance warmth and character, particularly for bass or vocals. Use these effects judiciously to add harmonic richness without cluttering your mix.
4. Advanced Mixing Techniques
In this section, you’ll explore advanced strategies to elevate your multi-track recordings. We’ll focus on techniques that enhance sonic quality, ensure dynamic control, and create a powerful, professional mix.
Stereo Widening And Imaging
Stereo widening and imaging play a pivotal role in creating a spacious mix. By carefully adjusting delays and phase relationships, you can position elements within the stereo field, giving your mix a broader and more immersive sound.
Tools like stereo enhancers and mid-side processing plugins are essential for fine-tuning the stereo image.
Automation For Dynamic Mix Control
Leveraging automation allows you to introduce nuanced changes over time. Be precise with your volume automation to ensure each element sits perfectly in the mix at the right moment. Moving beyond static levels, utilize automation on effects parameters to add interest and movement, making your mix more engaging.
Bussing And Routing For Efficient Workflows
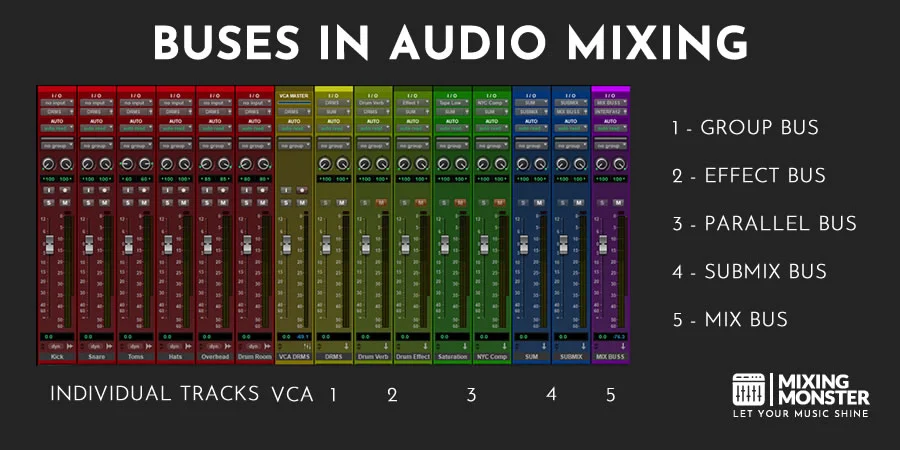
Efficient bussing and routing can streamline your mixing process. Grouping tracks that belong together, like drums or backup vocals, onto a bus allows for collective control. Routing these groups to auxiliary channels for shared processing can achieve consistent and balanced results, save time, and maintain a coherent sound.
Sidechaining For Punchy And Clear Mixes
Sidechaining is fundamental to punch and clarity, especially in rhythm-centric music. By compressing a track triggered by another (often the kick drum), you can create space in the mix, allowing the driving elements of your rhythm section to cut through without overpowering other mix components.
Serial Vs. Parallel Processing
Understanding when to use serial or parallel processing can significantly affect your mix’s depth and texture. In serial processing, you chain effects in a sequence, where each effect impacts the signal processed by the previous one. Meanwhile, parallel processing means blending the original signal with processed copies to retain clarity while adding color.
Multiband And Mid-Side Processing
Multiband and mid-side processing are sophisticated tools for shaping your mix’s frequency range and spatial aspects. Multiband compression splits the frequency spectrum into bands that can be compressed independently, precisely controlling dynamics. Meanwhile, mid-side processing adjusts the side signal separate from the center, enhancing stereo width without affecting the mono core

5. Technical Aspects Of Mixing
In this section, you’ll gain a practical understanding of essential technical facets necessary for a polished mix. These include effectively integrating MIDI, ensuring mono compatibility, the implications of phase and polarity, the significance of file formats, and sound quality considerations.
Using MIDI In Your Mix
Incorporating MIDI into your mix requires a strategic approach. Use your DAW to ensure MIDI tracks align with audio tracks regarding timing and musicality. Lean on the quantization feature to tighten performances without sacrificing the human feel. This can be crucial for maintaining the integrity of your music in both the mixing and mastering stages.
Ensuring Mono Compatibility
Mono compatibility is pivotal for ensuring your mix translates well across all playback systems. To achieve this, regularly check your mix in mono to identify phase issues that could cause mix elements to disappear or sound unbalanced. Solving these early on preserves the quality and clarity of your recording across various listening environments.
Understanding Phase And Polarity
Awareness of phase and polarity is fundamental to preventing audio cancellations. Use your DAW’s phase tools to compare the waveforms of tracks recorded simultaneously, like a snare top and bottom microphone. If you observe waveforms moving in opposite directions, adjust the polarity on one to align them, ensuring a fuller and more cohesive sound.
Choosing The Right File Formats, Sample Rates, And Bit Depths
Selecting appropriate file formats, sample rates, and bit depths profoundly impacts your mix’s resolution and quality. To retain definition, aim for at least a 44.1kHz sample rate and a 24-bit depth.
Be mindful when converting files; use high-quality technical aspects to avoid degradation. The file format often depends on the final deliverable, but stick with WAV or AIFF for professional applications to ensure uncompromised audio fidelity.
6. Best Practices For Mixing
Achieving a polished and professional sound in your music production relies on more than just the right mixing tools; it involves a series of strategic approaches and techniques. Here, we’ll outline best practices that can elevate the quality of your mixes.
Referencing And Comparing To Professional Mixes
Regularly reference and compare your work to professional mixes in similar genres to ensure your mix meets industry standards. This practice gives you perspective on your mixing levels and helps to match the quality standards of commercial releases. Use this Avid resource to learn how to mix music and understand what a polished final product should sound like.
Monitoring And Listening Environments
Your listening environment and monitoring setup are critical for accurate sound assessment. It’s essential to use high-quality studio monitors or headphones and to acclimate to how they translate sound.
You want to trust what you’re hearing to make informed decisions. Acoustic treatment in your room can significantly improve your listening accuracy, ensuring the mixes you create translate well to other playback systems.
Metering And Gain Staging
Proper gain staging is the foundation of a clean mix. Before you start mixing, keep an eye on your meters to ensure that each track’s gain is set to an optimal level.
This allows for headroom and prevents clipping. Use volume faders to balance the mix, making minor adjustments for the right blend. Remember, the fader levels are critical in shaping your mix’s dynamics and overall balance.
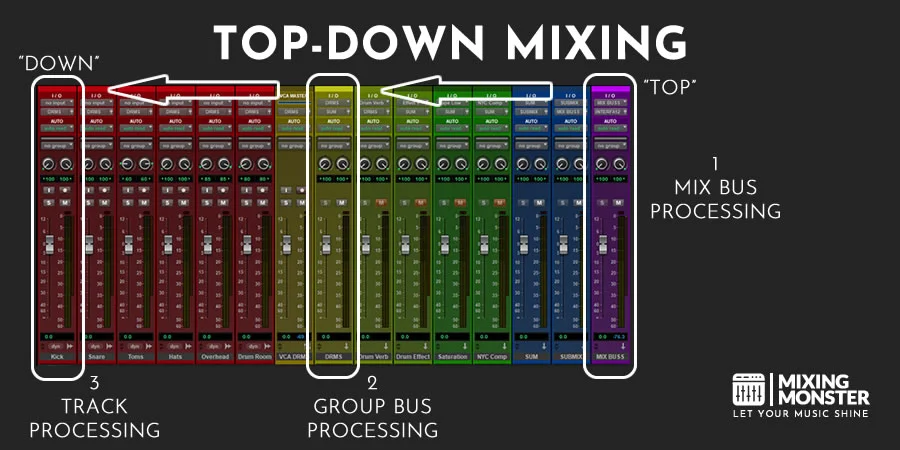
Top-Down Mixing Method
The top-down mixing method starts with applying EQ, compression, and other broad effects to your master or group channels first rather than individual tracks.
This technique can streamline your workflow and help maintain consistency across the mix. For instance, applying slight compression to a drum bus can glue the kit together before you fine-tune individual drum tracks.
7. Signal Chain And Plugin Recommendations
Your signal chain and the plugins you choose are critical components in shaping the quality of your mix. Managing these aspects can significantly enhance your final product’s clarity, depth, and dynamic range.
Optimal Signal Flow For Mixing
Begin your mixing process by setting a clear and organized signal flow within your DAW. A typical flow starts with gain staging to ensure that your tracks are at optimal levels for processing.
Next, an EQ is inserted to sculpt the tone, followed by dynamics processing, such as compression, to control the dynamic range. Effects such as reverb or delay should come after these foundational processes, as they are used to create space and depth in your mix.
Essential Plugins For Each Mixing Stage
High-quality preamp emulation plugins can provide warmth and character during the initial stage. For the EQ stage, consider a versatile plugin capable of broad strokes and surgical precision.
Select a compressor that can transparently control dynamics or add character. Essential effects plugins include a convincing reverb, a versatile delay, and a modulation tool (like a chorus or flanger) for creative texture.
- EQ:
Choose plugins with both musical and precise filtering. - Compression:
Look for transparent and character options. - Reverb/Delay:
Multiple types ensure versatility for different tracks.
Detailed Settings And Tips For Key Plugins
EQ Tips:
When EQing, start with subtractive EQ to remove any unwanted frequencies. This can clean up your mix before you consider boosting.
Compression Settings:
A good starting point for compression is a 2:1 ratio with a medium attack and release. Adjust from there based on the material.
Reverb And Delay Tips:
Use delay on your reverb to separate it from the source signal, making your mix less muddy. With delay, sync the time to your track’s tempo for a coherent rhythm.
8. Hardware Recommendations For Mixing
In music production, the right hardware can significantly improve the quality of your mix. High-caliber tools are essential for capturing the nuances of audio and ensuring your music creation sounds polished and professional.
Audio Interfaces And Converters
Your audio interface is the heart of your home studio setup, translating analog signals into digital ones and vice versa with precision. Look for interfaces with high-quality converters to ensure fidelity in your recordings.
Brands like Universal Audio and Focusrite are widely acclaimed for their superior sound quality. The number of inputs and outputs is also crucial; more I/Os gives you greater flexibility for larger projects.
Studio Monitors And Headphones
Accurate sound reproduction is critical when mixing music, so investing in excellent studio monitors is non-negotiable. Yamaha HS series or Adam Audio offer detailed and flat-frequency responses to help you make informed decisions about your mix.
For headphones, look for models that offer clear, flat responses, such as those from Sennheiser or Audio-Technica. These allow you to scrutinize the finer points of your mix even in a non-ideal acoustic environment.
Control Surfaces And Mixers
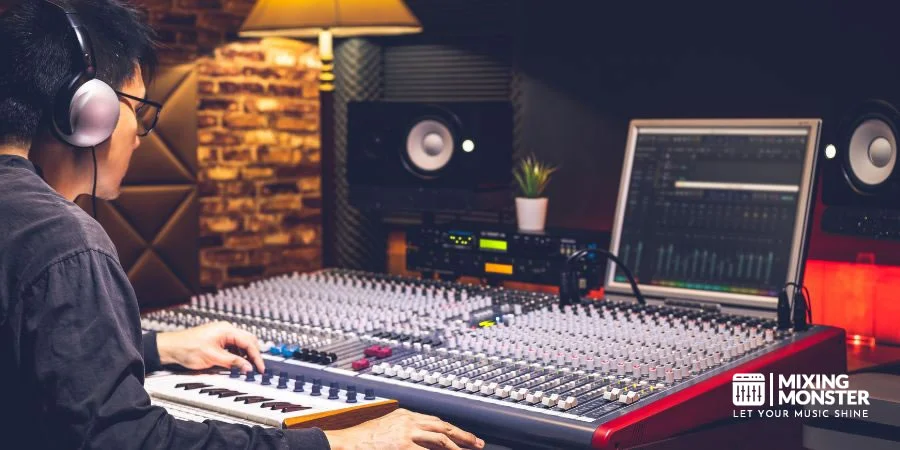
A control surface provides a physical interface to aid in the tactile manipulation of your digital audio workstation (DAW), which can lead to more intuitive mixing. Options from Behringer and Mackie offer a range of controls over your DAW, mimicking the feel of a traditional mixer with contemporary production’s flexibility.
On the other hand, mixers like the SSL SiX give you analog warmth and hands-on control that can be critical for some music creators’ workflows.
9. Mixing Tips And Hacks
In mastering the craft of audio mixing, employing advanced techniques and clever shortcuts can significantly enhance your productivity and the sonic quality of your mixes.
Creative Use Of Effects And Processing
Consider using audio effects to enhance and creatively transform sounds to elevate your mixes. A technique such as sidechain compression can be used to manage levels and add rhythmic vitality to pads or bass lines.
Explore dynamic EQs for responsive frequency sculpting or apply subtle saturation to add warmth and character. Strategic application of reverb can create depth, but remember that less is often more—avoid muddiness by selectively applying reverb to key elements of your mix.
For example, the Avid guide to audio mixing emphasizes the need to understand each track before effect processing.
Unique Panning And Stereo Imaging Techniques
Effective panning and stereo imaging distinguish a professional mix. Instead of static panning positions, automate panning to add movement that engages the listener.
To avoid a cluttered mix, give each instrument its own stereo space. You can achieve this through stereo spreaders or by duplicating a track and delaying one side slightly. For additional width, try the Haas effect: panning two identical sounds, one to the left and one to the right, and delaying one by 10-30 milliseconds.
Always check your mix in mono to ensure that no element loses presence when panning effects collapse to a single channel. Platforms like LANDR on professional mixing walk through the adjustment of levels and pan positions for a cleaner sound.
Time-Saving Automation Tricks
Automation is a mix engineer’s ally in shaping the mix dynamically over time. Automating volume faders can help smooth transitions and maintain balance as the track progresses.
You can also automate effects parameters—like the decay time on a reverb or the feedback on a delay—to create a build-up or drop. Use automation to bring up a solo’s level or subtly modulate filter cutoffs during a bridge.
If you work in phrases or patterns, copying and pasting automation curves can achieve consistent results while saving time. ProducerSphere’s best mixing tips note that efficient automation tailors each element harmoniously within the whole track.
10. Continuous Learning And Improvement
Advancing your skills in music mixing is an ongoing process that requires dedication to continuous learning and improvement. In this journey, you’ll engage with professional mixes, stay abreast of the latest industry developments, and hone your listening abilities to discern intricate sound details.
Analyzing And Deconstructing Professional Mixes
Regularly dissect mixes that resonate with industry standards to elevate your mixing prowess. Take tracks from renowned producers and attentively listen to the mix, identifying the techniques that create balance and evoke the intended emotions. Replicate those methods in your work, experimenting to see what aligns with your style.
Staying Up-To-Date With Mixing Techniques And Technologies
As new mixing techniques and technologies emerge, make an effort to integrate them into your practice. Read relevant articles and watch tutorials to learn how to use novel equipment and software updates. This will not only improve the quality of your mixes but also ensure your methods align with contemporary expectations.
Developing Your Ears And Critical Listening Skills
Your ears are the most vital tool in your mixing arsenal. Develop sharp critical listening skills by comparing your work against top-tier records. Pay close attention to how artists and producers blend elements to convey clear and impactful soundscapes.
Consistent practice will refine your understanding of sound nuances, boosting your mixing techniques toward professional levels.
11. Wrapping Up Audio Mixing And Next Steps
As you approach the end of your audio mixing journey, it’s crucial to consolidate your knowledge and consider continuous improvement. Here are the essential takeaways and directions for advancing your skills.
Recap Of Key Mixing Concepts And Techniques
- Understanding Your Tools:
Familiarize yourself with the variety of your DAW’s features, like EQ, compression, and reverb. - Balancing Levels:
Prioritize setting the correct volume for each track to ensure clarity and impact. - Stereo Panning:
Place sounds within the stereo field to create width and space. - Use Of EQ And Compression:
Apply these to enhance sound quality and dynamic consistency. - Creative Effects:
Experiment with effects like delay or modulation to add richness to your mix. - Automation:
Introduce changes over time to maintain listener interest. - Critical Listening:
Always listen to your mix on different systems to gauge its translation.
Importance Of Practice And Experimentation
Developing your mixing skills is an incremental process. It’s vital to practice regularly and to experiment with different techniques. There’s no universal approach to mixing, as each project has unique challenges and creative demands. The more you mix, the more you develop your ear and style.
Further Learning And Audio Mixing Resources
To continue growing as an audio engineer:
- Leverage a variety of learning resources. These may include tutorials, books, online courses, and community forums.
- Engage with other mixers to exchange tips and feedback.
- Remember, the field of audio mixing is dynamic, so stay updated with industry trends and software updates.
Happy music mixing!
12. FAQ
1) What essential equipment is needed to start mixing music?
To start mixing music, you’ll need a computer with adequate processing power, a reliable audio interface, studio monitors, headphones, and possibly MIDI controllers for tactile control over your software.
2) What software do professional DJs use to mix music?
Professional DJs often mix music using software such as Serato DJ, Traktor Pro, and Ableton Live due to their comprehensive features and robust performance capabilities.
3) What are some techniques for beginners to learn music mixing?
Beginners should focus on learning EQ, compression, panning, and levels to balance the mix. It’s also beneficial to start mixing individual elements before moving to the whole mix.
4) How can I mix music tracks smoothly at home?
To mix music tracks smoothly at home, ensure your workspace is acoustically treated, use reference tracks to gauge your mix, and hone your skills in blending transitions by adjusting EQs and using crossfades.
5) Can I mix music effectively using only my smartphone or tablet?
While a smartphone or tablet won’t offer the same level of precision and control as a computer and dedicated equipment, apps are available that can provide a basic platform for music mixing on the go.
6) What are some common mistakes to avoid while mixing music?
Common mixing mistakes include:
- Overusing effects.
- Neglecting ear fatigue by mixing for too long without breaks.
- Mixing at excessively high volumes.
Instead, keep levels moderate and regularly compare your mix with commercial tracks.

