Home > Blog > Mixing > Mixing Techniques
Affiliate Disclaimer: We may earn a commission if you purchase through our links
Balancing mixing levels is akin to an artist painting a masterpiece in audio mixing. It’s about fine-tuning each element to achieve a harmonious blend where every note and beat coexists in perfect equilibrium. Mastering the art of adjusting excellent levels in audio engineering has become more crucial than ever to finding the ideal balance for your mix.
Balancing mixing levels is a crucial audio engineering skill that ensures each mix component is heard clearly and cohesively. This process involves adjusting volume levels, gain staging, and techniques like compression to maintain dynamic range and prevent audio clipping.
Understanding how to balance mixing levels is not just about technical know-how; it’s about shaping the very essence of your sound. Explore these concepts further and unlock the secrets to achieving impeccably balanced audio mixes.
This article sums up several critical aspects of leveling in audio mixing.
Feel free to explore each section further by reading our linked supportive articles!
Table Of Contents
1. Mixing Levels Explained
2. Gain Staging: Setting The Foundation
3. Volume Adjustment: Fine-Tuning Levels In Your Mix
4. Creating A Static Mix Using Faders
5. Compression: Taming Transients And Dynamics
6. Maintaining Dynamic Range And Headroom
7. Preventing Clipping And Distortion
8. Metering Audio Levels: Precision In Monitoring
9. Advanced Techniques For Perfect Audio Level Adjustment
10. Mixing Levels: Finding The Perfect Balance For Your Mix
11. FAQ

1. Mixing Levels Explained
What Are Mixing Levels?
Mixing levels in audio production refers to adjusting the volume of individual tracks in a mix to ensure a balanced, clear, and harmonious sound. It’s the foundation of a good mix, influencing how each element – from vocals to instruments – interplays within the sonic landscape.
The Importance Of Level Balancing In Audio Mixing
Balancing levels is crucial for achieving a professional and pleasing audio mix. It ensures that no single element overshadows others and that the overall sound is cohesive and engaging. Proper level balancing enhances the listener’s experience, making it literally the most important aspect for any audio production.
Key Concepts: Gain Staging And Volume Adjustment
Gain staging and volume adjustment are two pivotal concepts in mixing levels. Gain staging involves setting the initial input levels of audio tracks for optimal sound quality and headroom. Volume adjustment is fine-tuning these levels during the mixing process to achieve the desired balance.
Challenges In Controlling Mixing Levels
Controlling mixing levels can be challenging due to different audio tracks’ varying dynamics and frequencies. Issues like masking, where one sound overpowers another, and maintaining headroom to avoid clipping are common challenges during mixing.
2. Gain Staging: Setting The Foundation
What Is Gain Staging?
Gain staging manages the volume levels of audio signals throughout the recording and mixing stages. It’s about ensuring each track is set to an optimal level, providing enough headroom to prevent clipping while maintaining the signal’s integrity.
Best Practices For Gain Staging
Effective gain staging involves:
- Setting appropriate input levels during the recording
- Monitoring levels at each stage
- Adjusting levels accordingly
It’s crucial to avoid pushing levels too high, leading to distortion, or too low, resulting in a weak signal. Consistent monitoring and adjustment are essential.
Tools And Techniques For Gain Staging
Various tools aid in gain staging, including metering plugins and hardware level meters.
Techniques involve:
- Carefully setting preamp levels.
- Using faders for the initial level setting in your DAW (Digital Audio Workstation).
- Applying normalization judiciously.
Understanding and utilizing these tools and techniques can significantly enhance the quality of your mix.
How To Apply Effective Gain Staging
- Record At Optimal Levels:
Ensure the initial recording levels are not too high to avoid clipping or too low to prevent noise. - Monitor Preamp Levels:
Regularly check and adjust preamp levels for optimal signal strength. - Use Faders For Initial Level Setting:
Set the foundational levels in your DAW using faders before applying any processing. - Normalize Tracks Judiciously:
Apply normalization where necessary, but avoid making it a default practice. - Regularly Refer To Metering Tools:
Use metering tools to ensure levels are consistent and within the desired range.
Want to dive deeper into gain staging techniques? Here you go:
3. Volume Adjustment: Fine-Tuning Levels In Your Mix
Strategies For Effective Volume Control In Mixing
Volume control is more than just moving faders up and down. It’s about understanding each track’s role in the mix and adjusting levels to complement the whole arrangement.
Start by setting a reference track and use it as a guide for balancing others. Employ subtle adjustments and frequently reference your mix on different sound systems to ensure consistency.
Learn more about using reference tracks effectively here:
Balancing Individual Track Levels
Each track in a mix should contribute to the overall sound without overpowering others. Start with the most crucial element, often the vocals or lead instrument, and adjust other tracks around it. Notice how different parts interact and adapt to achieve clarity and harmony.
The Role Of Panning In Level Adjustment
Panning is a powerful tool in volume adjustment, helping to create space in a mix. You can avoid frequency clashes and achieve a more open, three-dimensional sound by strategically placing elements in the stereo field. This not only helps with leveling but also enhances the overall listening experience.
Here is another article explaining audio panning in detail:
4. Creating A Static Mix Using Faders
Defining A Static Mix
A static mix is the initial stage of the mixing process, where you set basic levels for each track using faders without involving dynamic processing like EQ or compression. This step is crucial as it lays the groundwork for the overall balance and tone of the mix.
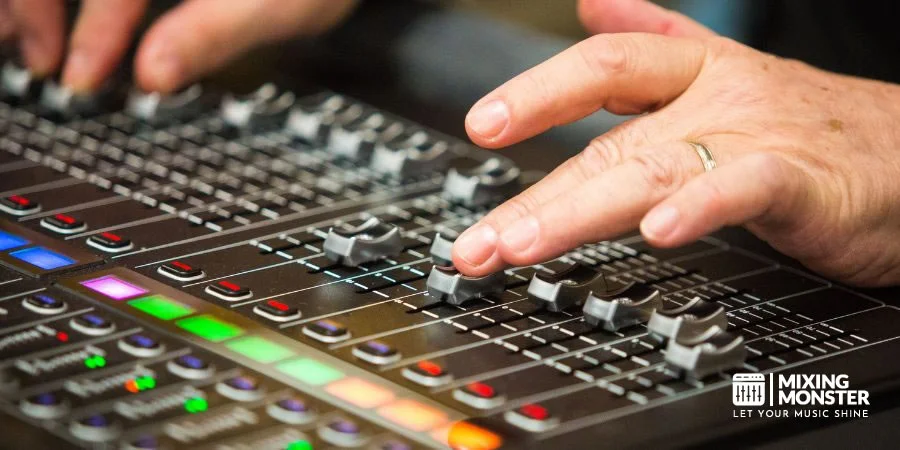
This step is one of the most important in audio mixing! There is a reason why a mixing board “puts” the volume faders in the front of the mixer…
Step-By-Step Guide To Static Mixing
Begin by setting all faders to zero and slowly bringing them up individually. Start with the most critical elements of your mix, usually the rhythm section or the lead vocals. Adjust each track until you achieve a balanced mix where every element is audible and complements the others. Remember, this is about achieving a rough balance that will be refined later.
Tips For Efficient Fader Use In Mixing
Efficiency in fader use involves where you set them and how you group and automate them. Utilize grouping for similar tracks to control their overall level simultaneously. Consider using fader automation to dynamically adjust levels throughout the track, adding more life and movement to your mix.

5. Compression: Taming Transients And Dynamics
Basics Of Compression In Mixing
Compression is a pivotal tool in mixing to control the dynamic range of audio tracks. It reduces the volume of louder signals while keeping the quieter parts more audible. Compression ensures consistency across your mix, making each element sit well in the overall sound.
How To Use Audio Compression Effectively
- Start by setting the threshold level where compression begins to affect the audio.
- Adjust the ratio to determine how much compression is applied.
- Use the attack and release settings to control how quickly compression starts and stops.
- Make sure to not “crush” transients too much, preserving the dynamics of the track
It’s crucial to listen carefully and make adjustments based on the specific needs of each track.
Overview Of Audio Compression Settings
| Compression Parameter | Purpose | Tips for Use |
| Threshold | Sets level where compression begins | Set according to the dynamic range of the track |
| Ratio | Determines compression intensity | Use lower ratios for subtle compression |
| Attack | Controls how quickly compression starts | Faster for taming transients, slower for natural sound |
| Release | Dictates how quickly compression stops | Adjust based on the rhythm and tempo of the track |
| Make-up Gain | Compensates for volume loss due to compression | Use sparingly to avoid over-amplification |
Avoiding Over-Compression In Mixing
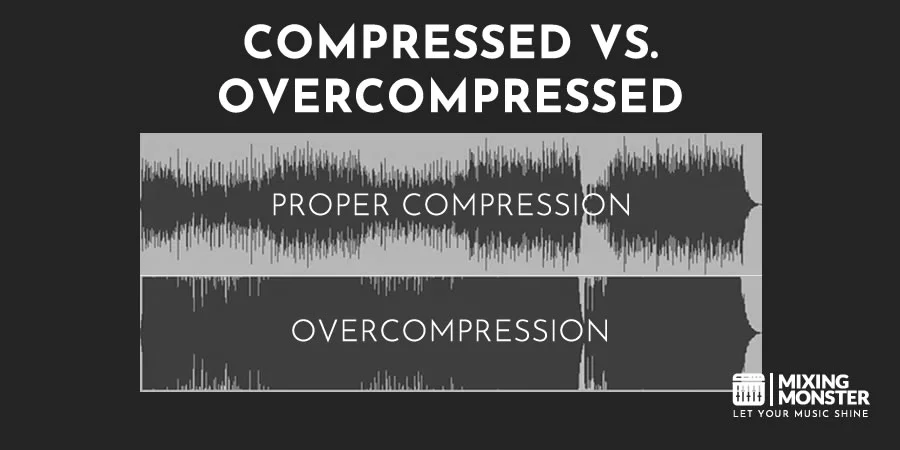
While compression is useful, overdoing it can lead to a lifeless and squashed mix.
To avoid over-compression:
- Be moderate with the ratio and make-up gain settings.
- Always compare the compressed signal with the original to ensure you’re enhancing, not degrading, the sound.
- Remember, the goal is to tame dynamics, not eliminate them.
Learn how to compress audio in mixing in this article:
6. Maintaining Dynamic Range And Headroom
Understanding Dynamic Range And Headroom
Dynamic range in audio mixing refers to the difference between the loudest and softest parts of an audio signal. Conversely, headroom is the amount of space left before the signal reaches the maximum level, preventing clipping. Both are essential for a clear and vibrant mix, allowing for nuances in loudness without distortion.
Dive deeper into dynamic range in this article:
Don’t lose your head when trying to understand headroom:
Techniques For Preserving Audio Dynamics
To preserve audio dynamics, avoid pushing levels too high. Use tools like compressors and limiters judiciously to control peaks while maintaining the natural dynamics of the track. It’s also vital to regularly monitor levels, ensuring sufficient headroom throughout the mixing process.
Balancing Audio Loudness And Clarity
Striking a balance between loudness and clarity is vital. This involves controlling the overall volume and understanding the frequency spectrum. EQ can be used to carve out spaces for different elements, ensuring each one is heard clearly without overpowering the mix. The aim is to achieve a full, rich sound that is loud and clear.
7. Preventing Clipping And Distortion
Identifying And Avoiding Audio Clipping
Clipping occurs when the audio signal exceeds the maximum level that equipment can handle, resulting in harsh distortion. To avoid clipping, monitoring levels closely is crucial, especially during recording and mixing. Keeping an eye on metering tools helps ensure that signals remain within a safe range.
Techniques To Minimize Audio Distortion
To minimize distortion:
- Start by recording at conservative levels.
- Use gain staging effectively to maintain optimal levels across all tracks in mixing.
- Apply compression and limiting strategically to manage transient spikes.
- Remember, distortion can sometimes be creative, but it should always be a deliberate choice, not an accident.
8. Metering Audio Levels: Precision In Monitoring
Metering Levels In Audio Mixing
Metering is an essential aspect of audio mixing, providing visual feedback on the levels of audio signals. It helps make informed decisions about gain staging, balancing levels, and applying dynamic processing. Accurate metering is critical to avoiding clipping and ensuring a well-balanced mix.
Understanding LUFS in audio metering is crucial for any audio engineer:
Types Of Audio Level Meters And Their Uses
Various types of meters are used in audio mixing, each serving a specific purpose. Peak meters show the highest audio signal level, while RMS meters provide a more average level, reflecting perceived loudness. LUFS meters are crucial for meeting broadcast standards, showing the perceived loudness over time. Understanding and using these meters effectively is vital for precision in mixing.
Interpreting Meter Readings For Optimal Audio Leveling
Interpreting meter readings correctly is vital for achieving optimal leveling. Peak readings help prevent clipping, while RMS readings help balance the mix. LUFS readings are essential for ensuring your mix meets industry loudness standards. Regularly referring to these meters during mixing helps maintain control over the audio levels.
9. Advanced Techniques For Perfect Audio Level Adjustment
Automation In Audio Level Adjustment
Automation is a powerful tool in mixing, allowing for precise control over the levels of each track at different points in a song. By automating fader movements, you can ensure smooth transitions, highlight key moments, and maintain balance throughout the track. It adds dynamic interest and can significantly enhance the overall impact of your mix.
Learn more about automation in mixing here:
Using EQ To Assist In Mixing Levels
Equalization (EQ) is not just for tone shaping; it also plays a crucial role in level adjustment. You can help tracks sit better in the mix by cutting or boosting specific frequencies. For instance, cutting low frequencies in non-bass elements can reduce muddiness, making the mix more transparent. EQ adjustments should be made with the individual track and the entire mix in mind.
Creative Audio Leveling Techniques
Exploring creative techniques like side-chain compression, where the level of one track is linked to another (typically the kick drum and bass line), can add rhythm and groove to your mix. Experimenting with stereo imaging tools to widen or focus the sound can also impact perceived loudness and clarity. These advanced techniques require a keen ear and a creative approach but can significantly elevate the quality of your mix.
10. Mixing Levels: Finding The Perfect Balance For Your Mix
Recapping Insights From Mixing Levels
Achieving the perfect balance in your mix is an art that combines technical skill with creative intuition. This journey through mixing levels has armed you with essential techniques, from gain staging and volume adjustment to compression and EQ. Each step is crucial in sculpting a sonically pleasing and professionally polished mix.
Mixing Levels: The Most Important Skill In Mixing
Mixing levels is arguably the most critical skill in audio mixing. It’s about more than just making sure sounds are audible; it’s about creating a cohesive and engaging listening experience. The balance of levels impacts the emotional response to music, highlighting the importance of this skill in crafting impactful audio works.
And always remember: louder isn’t always better:
Happy leveling!
11. FAQ
- What Is The Most Important Aspect Of Balancing Mixing Levels?
The most critical aspect is achieving a harmonious balance where every element is audible and contributes to the overall mix. This involves careful gain staging, precise volume adjustment, and the strategic use of tools like EQ and compression. - How Does Gain Staging Affect The Overall Mix?
Gain staging sets the initial level of each track, ensuring optimal signal quality and preventing issues like clipping and distortion. It’s the foundation upon which a balanced and dynamic mix is built. - What Are Some Common Mistakes To Avoid In Level Adjustment?
Common mistakes include over-compressing tracks, neglecting panning, not leaving enough headroom, and failing to consider the interaction between different frequencies, leading to a mix that needs to be more transparent. - Can Compression Be Used To Fix All Leveling Issues?
While compression is a valuable tool for managing dynamics, it’s not a cure-all. More reliance on compression can lead to a lifeless mix. Using it judiciously and in conjunction with other mixing techniques is essential. - How Important Is Headroom In A Final Mix?
Headroom is crucial in preventing clipping and distortion in the final mix, especially during mastering. It allows for dynamic range and ensures the mix can be adequately processed and optimized for different playback systems.


