Disclosure: Some of the links below are affiliate links, meaning that at no additional cost to you, we will receive a commission if you click through and make a purchase. Read our full affiliate disclosure here.
Mastering loudness is a critical step in producing audio that stands out and competes in the crowded world of music. It’s not just about volume; it’s about the clarity and quality of the sound at any level.
Loudness in mastering refers to the perceived volume of audio and is an essential component in shaping the final sound of a recording. Mastering engineers use various techniques to achieve a consistent and desirable loudness level without compromising the dynamic range, ensuring the mastered track sounds good on different playback systems and falls within the loudness standards of streaming services.
As you dive deeper into audio mastering, you’ll learn the significance of maintaining the perfect balance between loudness and dynamic range. Whether you’re an aspiring audio engineer or a music enthusiast looking to understand the nuances of sound, mastering loudness will equip you with the knowledge necessary to distinguish a professional-sounding track from the rest.
KEY TAKEAWAYS:
- Setting up a home studio necessitates strategically selecting core equipment and software.
- Personalizing the space for acoustics and comfort significantly impacts production quality.
- We can create a functional and practical home recording studio even with a modest budget.
Table Of Contents
1. The Fundamentals Of Mastering Loudness
2. The Technical Process Of Mastering For Loudness
3. Loudness Dynamics And Metering Tools In Mastering
4. Compression Techniques In Audio Mastering
5. Equalization In Mastering For Loudness
6. Maintaining Clarity While Boosting Volume
7. Understanding Perceived Loudness And Listener Fatigue
8. Achieve Proper Loudness Levels In Mastering
9. FAQ

1. The Fundamentals Of Mastering Loudness
Mastering loudness involves technical knowledge and artistic sensitivity. It’s about ensuring your music meets industry standards and retains its emotional impact.
Understanding Loudness Units (LUFS)
Loudness Units Full Scale (LUFS) is the standardized measurement that aims to normalize perceived loudness. Your tracks should target specific LUFS values depending on the medium they are intended for. This ensures consistency in playback volume across different platforms and devices.
The Dynamic Range In Mastering
Dynamic range refers to the difference in decibels between the quietest and the loudest part of a track. A broader dynamic range allows for more expressiveness and can preserve the musicality. During mastering, you must balance impactful loudness and maintain dynamic range without issues such as clipping and distortion.
The Loudness War In Music
The loudness war depicts a trend where masters grow increasingly louder to stand out at the expense of dynamic range. This can lead to fatigue and a loss in sound quality. Awareness and careful mastering decisions can prevent your music from falling victim to this practice. Focusing on RMS (Root Mean Square) values can help achieve a more balanced sound.
2. The Technical Process Of Mastering For Loudness
Mastering for loudness carefully balances the final sound’s impact without causing distortion. This section will teach you about setting output ceilings, loudness normalization for streaming platforms, and genre-specific loudness considerations.
Setting The Output Ceiling In Mastering
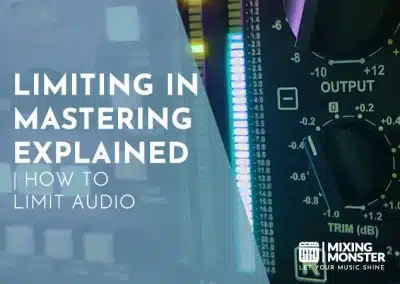
The output ceiling is the maximum level your audio signal can reach before it starts to clip. To ensure maximum loudness without clipping, you typically set the output ceiling below 0 dBFS—often at -0.1 dBFS or -1 dBFS. Limiting is commonly used here to bring the quieter parts of a track up to this ceiling and improve overall loudness.
Loudness Normalization For Streaming Platforms
Streaming platforms use loudness normalization to create a consistent listening experience. Master your tracks according to the platform’s recommended loudness levels, which usually use LUFS (Loudness Units relative to Full Scale) to measure loudness. For instance, Spotify recommends a loudness target of -14 LUFS, while YouTube suggests -13 LUFS.
Genre-Specific Mastering Loudness
Different genres have different loudness standards, with electronic and pop genres often mastered louder than jazz or classical music. Your aim should be to maintain genre standards while ensuring your master compares favorably against others within the same genre.
Genre-Specific Mastering Loudness Table
| Genre | Approximate LUFS |
|---|---|
| Electronic | -8 to -6 |
| Pop | -9 to -7 |
| Rock | -9 to -7 |
| Classical | -23 to -18 |
| Jazz | -18 to -14 |
Platform-Specific Mastering Loudness Table
| Streaming Platform | Target LUFS | Output Ceiling |
|---|---|---|
| Spotify | -14 | -1 dBFS |
| Apple Music | -16 | -1 dBFS |
| YouTube | -13 | -1 dBFS |
| Tidal | -14 | -1 dBFS |

3. Loudness Dynamics And Metering Tools In Mastering
Understanding loudness dynamics and effectively employing metering tools are critical for mastering audio. Your grasp of these concepts ensures the final master meets both technical standards and artistic expectations.
Implementing RMS And Peak Level Meters
RMS (Root Mean Square) and peak-level meters are fundamental to mastering. RMS meters display the average level of audio signal power, reflecting perceived loudness, whereas peak-level meters show the highest level of the audio signal.
You aim to balance RMS for a consistent loudness experience and manage peaks to prevent unwanted distortion. Aim for a healthy RMS value relative to the peak level to preserve energy and dynamics for mastering purposes.
Visualizing Transients And Sustained Energy
Understanding and visualizing transients—the brief, high-energy spikes in the audio signal—and sustained energy is crucial for preserving a track’s dynamic nature. Transients can greatly affect RMS and peak readings, and careful metering ensures these elements are neither over-compressed nor lost.
Tools like loudness metering and visualizations in mastering aid in identifying transient information and overall energy in your tracks, enabling you to make informed decisions regarding compression, limiting, and overall dynamic balance.

4. Compression Techniques In Audio Mastering
Understanding how to apply compression in audio mastering properly is crucial for maintaining the dynamic integrity of your music while achieving competitive loudness levels. This section explores balancing compression and dynamics and effectively using tools like limiters and compressors.
Balancing Compression And Dynamics In Mastering
Compression is a fundamental tool used to even out a recording’s dynamic range, making it sound more unified. When you master audio, your goal is to apply compression in a way that retains the track’s life and excitement.
This means the reasonable use of dynamic range compression to control peaks and enhance quieter sections without squashing the life out of the mix.
- Threshold Settings:
Set the threshold carefully to target only the dynamic peaks you need to tame. - Ratio And Attack/Release:
Choose a ratio that evens out dynamics without losing transients, and tailor attack and release times to maintain natural-sounding music.
With the right settings, your track will withstand loudness normalization algorithms used by streaming platforms without suffering from the negative effects of overcompression.
Utilizing Mastering Limiters And Compressors
In mastering, both limiters and compressors play key roles. While a compressor helps shape the music’s overall dynamism, a limiter is tasked explicitly with preventing digital clipping and ensuring that the audio does not exceed a specific loudness.
- Compressor Uses:
A compressor subtly glues the mixed elements together and controls the dynamic range throughout the song. - Limiter Finality:
Apply a limiter at the end of your master chain to catch errant peaks and solidify your loudness level without distortion.
For more detailed control, consider using multiband compression, as it allows you to compress different frequency ranges independently. This can be particularly effective when dealing with complex mixes where other elements need different treatments.
Remember, these tools aim to achieve loudness transparently without sacrificing the music’s dynamic expression.

5. Equalization In Mastering For Loudness
In mastering loudness, equalization (EQ) is critical for managing frequency ranges and ensuring that your track has the proper energy distribution. The strategic use of equalizer settings can significantly affect perceived loudness without compromising clarity.
Managing Frequency Range And Energy
When working on a track, managing the frequency range effectively is essential. Attempting to enhance loudness often involves:
- Reducing Low-End Energy:
Too much bass can cause a track to sound muddy. Cutting unnecessary low frequencies gives your track a more balanced energy distribution. - Focusing On Mid-Range Clarity:
Properly managing mid-range frequencies helps to maintain the presence and energy, which is critical for the perceived loudness. - Controlling High-End Sharpness:
A slight boost in the higher frequencies can add a perception of “air” and “brightness,” but be careful not to introduce harshness.
Strategic Use Of Equalizer Settings
The EQ settings you choose should serve the goal of achieving both a loud and dynamically balanced master. This involves:
- Precise Cuts And Boosts:
Use narrow cuts to eliminate problematic frequencies and broad, gentle boosts to enhance desired areas without causing frequency masking. - Volume Compensation:
After you apply EQ changes, adjust the output gain to match the perceived loudness pre-EQ. This ensures a fair comparison when A/B testing the changes. - Stereo Information:
Pay attention to how EQ adjustments affect the stereo width. Consider subtle boosts in stereo frequencies to add a sense of space and perceived loudness.
6. Maintaining Clarity While Boosting Volume
In mastering, your goal is to increase volume without compromising the integrity of the mix. Achieving loudness and clarity requires precision to avoid distortion and maintain sufficient headroom.
Avoiding Unintentional Distortion In Mastering
When you apply limiting to raise the volume, be wary of unintentional distortion. Clipping occurs when the signal exceeds the maximum level that a system can handle, resulting in harsh and unwanted distortion.
To ensure clarity, keep an eye on your meters and listen carefully for artifacts as you incrementally increase the gain. Limiters can be your ally here, but they are not a one-size-fits-all solution; each track will require a unique touch.
Understanding Audio Headroom And Gain Reduction
Headroom in audio refers to the space between the peak levels of your mix and the maximum allowable level before clipping.
Preserve headroom by effectively using gain reduction tools like compressors and limiters. The gain reduction should be a deliberate choice, reducing the levels of the loudest peaks to help the overall track sound louder.
When you manage headroom properly, you prevent digital distortion and ensure that dynamic range is retained for a clean, powerful sound.
7. Understanding Perceived Loudness And Listener Fatigue
Perceived loudness plays a critical role in mastering audio tracks effectively, where the goal is to achieve a balance that satisfies listeners without causing fatigue. Recognizing how the human ear interprets sound intensity and taking steps to prevent listener fatigue is essential to creating successful masters.
The Psychology Of Loudness Perception
Perceived loudness is how your brain interprets sound’s power reaching your ears. The physical loudness levels do not solely determine it; the sound’s frequency spectrum and duration also influence it.
An algorithm within our auditory system weighs various frequencies differently, as the human ear is more sensitive to some frequencies than others.
For example, sounds in the mid-frequency range, where human speech is most prominent, are generally perceived to be louder than those on the extremities (the very low or high ends of the spectrum).
Preventing Listener Fatigue In Mastering
Listener fatigue stems from prolonged exposure to sound at high loudness levels, leading to discomfort and a diminished listening experience.
To prevent listener fatigue during mastering:
- Prioritize Dynamic range:
Aim for a master that breathes with natural dynamics rather than uniformly loud. - Utilize modern loudness metrics, like LUFS (Loudness Units Full Scale), to gauge the perceived loudness of your track.
- Implement appropriate compression and limiting to control peaks while maintaining clarity and avoiding a squashed sound profile.
8. Achieve Proper Loudness Levels In Mastering
Achieving the correct loudness in mastering is both a science and an art. It requires combining technical knowledge and creative judgment to ensure your music sounds its best on any playback system.
Best Practices To Achieve Proper Loudness In Mastering
When you’re mastering your tracks, keep in mind these best practices to reach optimal loudness levels:
- Understand Your Targets:
Know the ideal loudness targets for your distribution platforms, such as Spotify’s integrated -14 LUFS or iTunes’ -16 LUFS. - Use The Right Tools:
To increase loudness while preserving dynamic range, employ a combination of compressors and limiters. Plugins that visualize loudness, such as LUFS meters, are indispensable. - Listen Critically:
Use your ears—not just your eyes—to decide loudness. Ensure that your track maintains clarity and punch at the target loudness level. - Preserve Dynamics:
Avoid making your master as loud as possible. Retaining the music’s dynamic character is essential for emotional impact. - Refer To Professional Masters:
Compare your track to well-mastered reference tracks in similar genres to gauge proper loudness levels.
Wrapping Up Mastering Loudness
Your final goal is a master that translates well across all playback systems and retains its musicality. Loudness should serve the music, not dominate it. Following the listed best practices ensures your tracks are competitively loud and express their full dynamic and expressive potential.

9. FAQ
1) How loud should my master be for various streaming platforms?
Different streaming platforms have unique loudness norms, but most hover around -14 LUFS as a standard. Maintaining this loudness helps ensure the platform’s normalization process keeps your track from being turned down. Learn more about mastering loudness for streaming platforms.
2) What loudness level should I aim for when mastering a track?
Your mastering loudness level should aim for a balance between preserving dynamic range and achieving competitive commercial loudness. Aiming for -14 to -9 LUFS is a good benchmark for most genres, though this can vary—more on loudness levels in mastering.
3) Can you explain the relationship between LUFS and dB in mastering?
LUFS, or Loudness Units Full Scale, measures perceived loudness over time, while dB, or decibels, measures sound intensity. In mastering, LUFS is used to standardize loudness across various platforms, providing a better indication of how listeners will perceive a track than just dB alone.
4) What LUFS level is considered too loud for a professional master?
A professional master is considered too loud if it exceeds -6 LUFS, which can lead to a loss of dynamic range and induce listener fatigue. Masters need to have some dynamic expression rather than being uniformly loud.
5) What is an appropriate LUFS target when mastering dynamic range?
Aim for a LUFS target that preserves your music’s natural ebb and flow when mastering dynamic range. Typically, this could mean aiming for around -14 LUFS for a master that balances loudness with dynamic content, allowing for musicality and expressiveness.
6) How do I achieve and measure the true peak loudness in mastering?
Use a true peak meter to achieve and measure true peak loudness. Aim to keep peaks below -1 dBTP (decibels True Peak) to prevent distortion and ensure headroom. True peak metering is vital for assessing how your master will convert to analog sound without clipping. Understanding true peak loudness is essential in the mastering process.
Related Articles
Featured Articles


You Might Also Be Interested In