Home > Blog > Editing > Editing Techniques
Affiliate Disclaimer: We may earn a commission if you purchase through our links
Diving into basic audio editing techniques can drastically elevate your sound and make your recordings sparkle with professional polish. Whether you’re a podcast host, a burgeoning musician, or simply looking to improve the quality of your audio files, understanding these techniques is your ticket to capturing your audience’s attention and delivering an immersive sonic experience. Buckle up and get ready to transform your raw audio into crystal-clear soundscapes.
Basic audio editing techniques, such as trimming, fading, volume leveling, and noise reduction, can significantly enhance the quality of your recordings. These fundamental skills are a launchpad to more advanced methods, offering listeners a clean, balanced, and immersive auditory experience.
Are you ready to make your recordings stand out and immerse your listeners in a world of sound they’ve never heard before? Unleash the full potential of your audio with basic audio editing techniques, turning simple recordings into polished, professional sonic masterpieces.
Table Of Contents
1. Understanding The Importance Of Audio Editing
2. Introduction To Basic Audio Editing Software
3. Fundamental Audio Editing Techniques
4. Advanced Audio Editing Techniques
5. Tips And Best Practices For Audio Editing
6. Start Editing Your Audio
7. FAQ

1. Understanding The Importance Of Audio Editing
What Is Audio Editing?
Audio editing is the cornerstone of crafting and finessing audio files to meet a specific standard or aesthetic. It involves various techniques, including cutting, trimming, and splicing sound clips, adjusting volume levels, removing noise, and adding effects.
Mastery of basic audio editing techniques can empower you to create high-quality audio that stands out for a podcast, music track, or video soundtrack.
Need a detailed overview of what audio editing is? This article might help:
Reasons For Audio Editing
Why should we care about audio editing? Put, audio editing brings the best out of your raw recordings. It removes distracting elements like background noise or awkward silences, smoothens transitions, and can elevate a dull recording to a polished, professional output.
Moreover, it’s essential for anyone involved in creating audio-visual content, making it a necessary skill in the digital world.
Impact Of High-Quality Audio On Listener’s Experience
The quality of your audio can dramatically affect your audience’s experience. Imagine listening to a podcast episode filled with annoying background noise, inconsistent volume levels, and abrupt transitions; it’s pretty off-putting.
High-quality audio, on the other hand, offers listeners a seamless and immersive experience, keeping them engaged and improving the overall perception of your content. If the content is king, then high-quality audio is undoubtedly the crown that adds sparkle.
Understanding and utilizing basic audio editing techniques are crucial to enhance your audio. Ready to explore the world of audio editing? Let’s dive in!
2. Introduction To Basic Audio Editing Software
Before mastering basic audio editing techniques, you must familiarize yourself with the various software tools available to aid your process. Here are a few popular options:
Audacity: A Comprehensive Tool
Audacity is a popular choice among beginners due to its user-friendly interface and the fact that it’s free. Despite being a cost-free software, it’s packed with a range of features that cover most basic and some advanced editing needs, making it an excellent starting point for audio editing novices.
Adobe Audition: Advanced Features
Adobe Audition is worth considering for those seeking a more advanced set of features. It’s a professional-grade audio editing software that provides many tools and options to refine your audio.
While it’s paid software, its precision, and quality can justify the expense, particularly for those aiming for high-level audio production.
Digital Audio Workstations: The Gold Standard
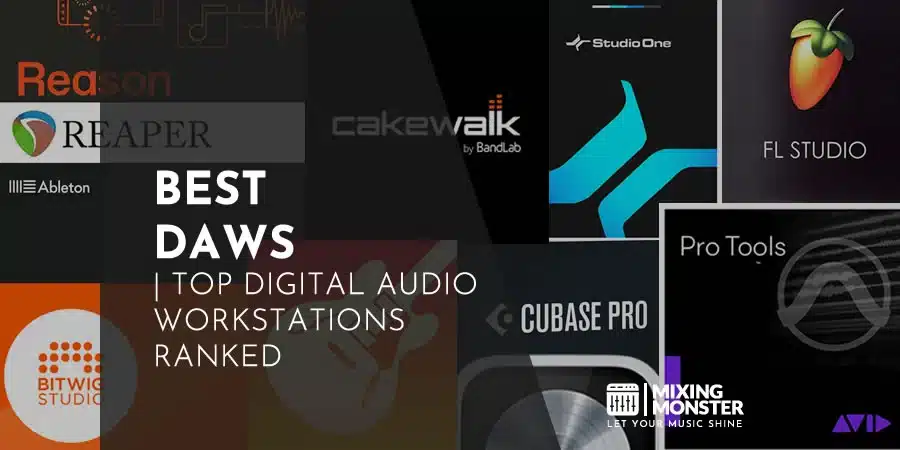
If you’re venturing into music production, consider exploring Digital Audio Workstations (DAWs). DAWs like Pro Tools, Ableton Live, Cubase and FL Studio offer extensive audio editing capabilities, MIDI sequencing, multitrack recording, and more.
While they may require a steeper learning curve, the depth of control they provide over your audio is unparalleled. We highly recommend learning how to use a suitable DAW when editing audio:
Comparing Audio Editing Software: Which One Is Right For You?
Now that we’ve covered a few options, how do you decide which ones are for you? It primarily depends on your needs, experience level, and budget.
If you’re a beginner looking for a free and easy-to-navigate tool, Audacity could be your best bet. Adobe Audition is a fantastic choice if you’re willing to invest and require more advanced features.
A DAW might be the way to go for music producers and those seeking comprehensive control over their audio.
Let’s get to the methods, then! It’s a good idea to test a few options and see which resonates with your workflow before settling down. Remember, the right tool can make your journey with basic audio editing techniques much more enjoyable and productive. Ready to experiment with these tools?

3. Fundamental Audio Editing Techniques
When first getting started with audio editing, it’s essential to grasp a few basic techniques. Here, we’ll cover three fundamental skills: audio trimming, fades, and volume leveling.
Audio Trimming: The Art Of Cutting
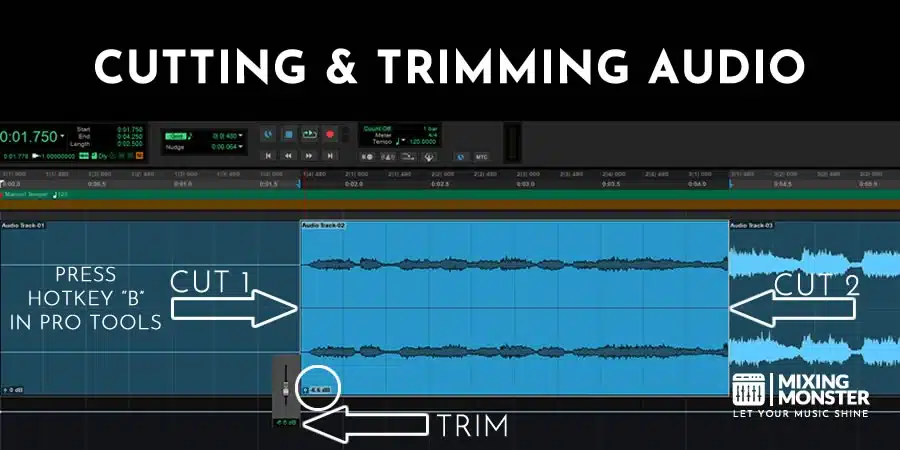
Trimming is one of the first techniques you’ll want to master. It involves cutting out parts of the audio you don’t need, such as awkward silences, unnecessary words, or mistakes in a recording.
How To Trim Audio In Different Software
For example, in Audacity, you can select the section you wish to remove with your mouse and hit the delete button. In Adobe Audition, the razor tool allows you to cut the area out. Specialized DAWs like Pro Tools come with dedicated options to cut audio precisely. It’s a straightforward process but can significantly improve the flow of your audio.
Audio Fades: Creating Smooth Transitions
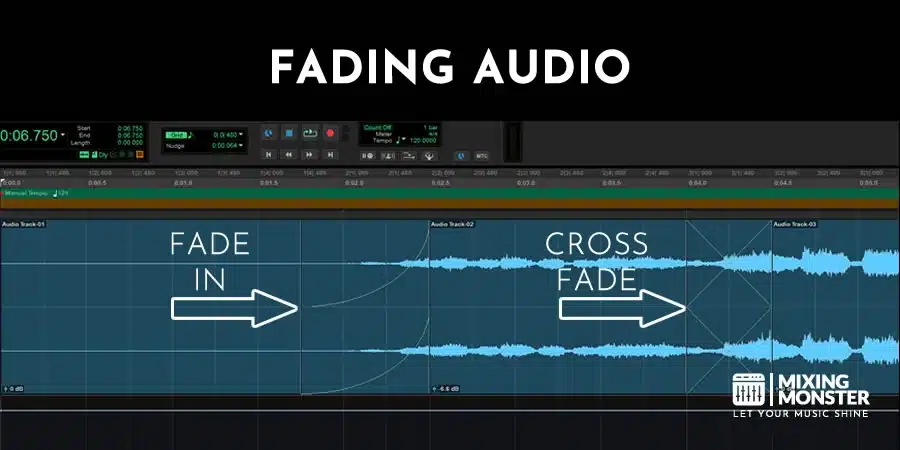
Fades refer to gradually increasing (fade-in) or decreasing (fade-out) the volume of an audio clip. They help smooth transitions between different audio parts, preventing abrupt starts or ends that can be jarring to the listener.
Fade-In And Fade-Out Techniques
Almost all audio editing software will have a fade option. In Audacity, for example, you can select the portion of the audio you want to fade and then choose either ‘Fade In’ or ‘Fade Out’ from the ‘Effect’ menu. DAWs like Pro Tools come with multiple options that allow surgical audio fading.
Volume Leveling: Achieving Consistent Sound
Nothing disrupts a listener’s experience more than constantly adjusting the volume because the levels are inconsistent. Volume leveling ensures that your audio maintains a consistent book throughout, providing a smoother and more pleasant listening experience.
The Importance Of Proper Audio Leveling
Volume leveling can be achieved by manually adjusting volume levels where necessary or using a normalization effect that most editing software offers. For instance, Audacity’s ‘Normalize’ effect can help level your audio to a target volume.
Mastering these fundamental audio editing techniques will set a solid foundation for your audio editing journey. They might seem simple, but they can drastically improve the quality and flow of your audio.
Ready to take your skills to the next level? Let’s explore some advanced techniques!

4. Advanced Audio Editing Techniques
Once you’ve got the basics, it’s time to dive deeper. Here, we’ll explore three advanced audio editing techniques that can bring professional-level polish to your recordings: noise reduction, multitrack editing, and EQ and compression.
Noise Reduction: Cleaning Your Audio
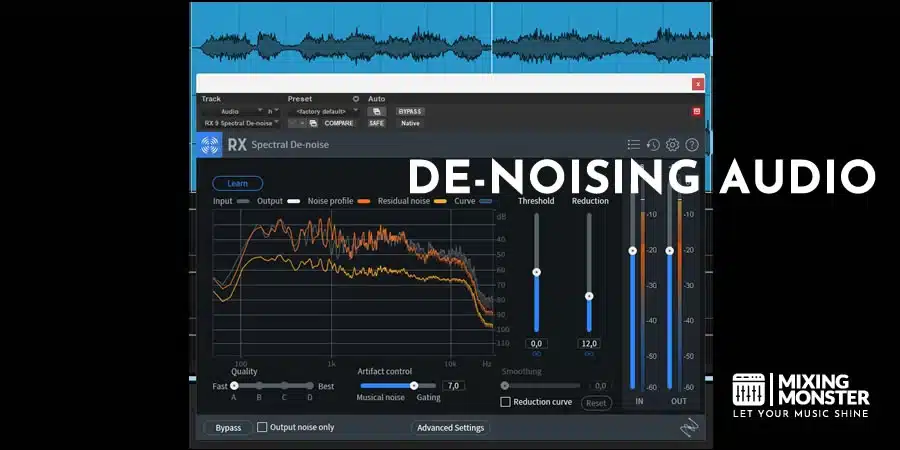
Noise reduction is the process of removing unwanted sounds from your audio. This could be anything from background chatter to the hum of an air conditioner. While it’s best to minimize these noises during recording, sometimes that’s impossible, and noise reduction can save the day.
Identifying And Removing Unwanted Noise
Many audio editing software provides noise reduction effects. For example, in Audacity, you can select a segment of the audio containing only the noise you want to eliminate. Then, you can use the ‘Noise Reduction’ effect to analyze and remove that noise from the entire recording.
Specialized software like “iZotopes RX” software suite offers highly effective ways to handle unwanted noise.
Multitrack Editing: Working With Layers
Multitrack editing allows you to work with multiple audio tracks simultaneously, each on a separate layer. This is essential when working with multiple sound sources, such as different podcast speakers or music track instruments.
Layering Audio Tracks For Fuller Sound
In a Digital Audio Workstation like Pro Tools, you can easily add new tracks, arrange them vertically, and move and edit each track independently. This allows for complex arrangements and gives you control over each sound source.
EQ And Compression: Enhancing The Sound Quality
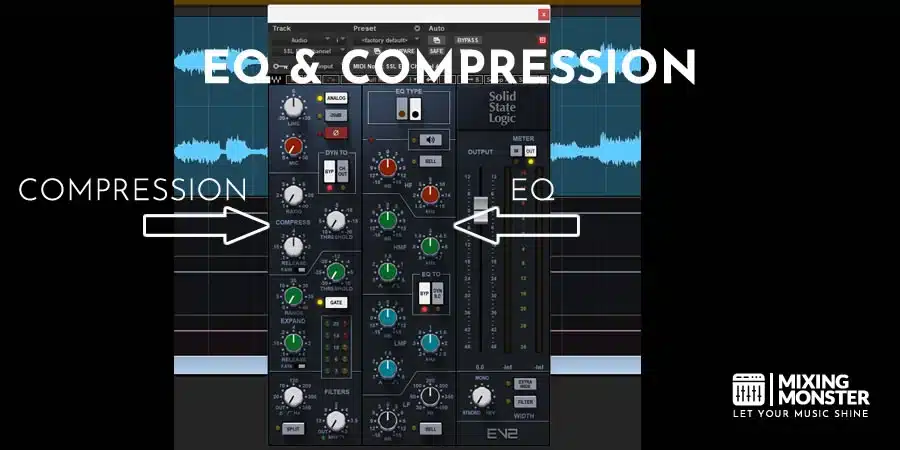
Equalization (EQ) and compression are two techniques that can significantly enhance the quality of your sound. EQ allows you to adjust the balance of different frequency components, and compression can even out the dynamic range of your audio, making quiet sounds louder and loud sounds quieter.
Understanding EQ And Compression Settings
While these techniques require some learning and experimentation to master, they can bring professional-level polish to your audio. Most audio editing software will offer EQ and compression effects, each with unique settings and parameters.
By incorporating these advanced audio editing techniques into your editing process, you’ll be well on your way to creating high-quality, professional-sounding audio.
Ready to further elevate your editing skills? Let’s dive into some tips and best practices!

5. Tips And Best Practices For Audio Editing
As with any creative process, certain practices can enhance your workflow and the quality of your end product regarding audio editing. Here, we’ll explore three essential tips every audio editor should remember.
Saving And Backing Up Your Work
Regularly saving and backing up your work cannot be overstated. Nothing is more devastating than losing hours of meticulous edits because of an unexpected software crash or computer shutdown.
Make it a habit to hit save after every significant change. Furthermore, consider using cloud storage or an external hard drive to keep a backup of your project files.
Listening Through Multiple Sources
Testing it through multiple sources is crucial to ensure your audio sounds good on all devices. A common mistake is using only one pair of speakers or headphones while editing. What sounds good on your studio monitors might translate poorly to laptop speakers or earbuds.
Taking Breaks For Accurate Audio Perception
Our ears can quickly fatigue after prolonged listening periods, leading to inaccurate audio perception. A good rule of thumb is to take a 15-minute break for every hour of editing. Regular breaks can reset your ears and give you a fresh perspective when you return to your edits.
With these tips in your toolkit, you can confidently navigate your audio editing journey. But we’re still going. It’s time to roll up your sleeves and start editing your audio!
6. Start Editing Your Audio
With your newfound knowledge of basic audio editing techniques, you can dive in and start polishing your recordings. Remember, it’s a learning process; the more you practice, the more proficient you’ll become.
Feel free to make mistakes as you experiment with different techniques and tools. Often, it’s through these mistakes that you’ll discover new ways to enhance your audio and develop your unique editing style.
Now that you’re familiar with the concepts and practices behind audio editing, why not put your skills to the test? In our follow-up article, we’ll guide you step-by-step on how to edit audio, providing practical examples and exercises to cement your knowledge:
Remember, great audio is more than just clear sound. It’s about crafting an immersive sonic experience that leaves a lasting impression on your listeners. So, are you ready to transform your recordings into captivating audio experiences?
Happy Editing!


7. FAQ
- What Are The Best Free Audio Editing Software?
Audacity is widely regarded for its powerful features and user-friendly interface. There are several high-quality free audio editing software available. Other options include Tracktion T7, Cakewalk by BandLab, and GarageBand for Apple users. - How To Reduce Background Noise In Audio Recordings?
You can reduce background noise by using noise reduction effects in your audio editing software. This involves selecting a segment of the audio that contains only the noise and using this to identify and remove the noise throughout the recording. - How To Improve The Quality Of An Audio Recording?
Improving audio quality involves various techniques such as noise reduction, volume leveling, EQ and compression, and using high-quality recording equipment. Remember, the best way to ensure high-quality audio is to record as cleanly as possible. - Is It Necessary To Have Professional Training For Audio Editing?
While professional training can be beneficial, it’s not necessary per se. With the wealth of online resources, anyone can learn the basics of audio editing. The key is to practice and experiment with different techniques. - Can Audio Editing Improve Bad Quality Recordings?
While audio editing can significantly enhance the quality of a recording, it’s crucial to note that it can’t work miracles on poorly recorded audio. Techniques like noise reduction, EQ, and compression can help to some extent but cannot entirely compensate for a bad recording. It’s always best to focus on getting the cleanest recording possible at the source.

