Disclosure: Some of the links below are affiliate links, meaning that at no additional cost to you, we will receive a commission if you click through and make a purchase. Read our full affiliate disclosure here.
Mastering music can seem daunting, but it’s essential to creating a polished and professional sound. Mastering makes your song louder, better, and more adaptable to different listening environments.
Whether you’re a beginner or an experienced mixer, understanding how to master your tracks can make all the difference in achieving a great final product.
Mastering music involves several vital elements that refine your mix to ensure it sounds its best on all playback systems. This includes adjusting the levels, adding equalization to balance the frequency spectrum, and applying dynamics processing to control the volume.
Mastering music at home can be done using tools like digital audio workstations (DAWs). Properly mastered tracks also adhere to specific audio file formats and sample rates to maintain quality during distribution.
By mastering your music, you ensure that your tracks meet industry standards and are more enjoyable for listeners. You’ll learn techniques like audio analysis, referencing tracks, and using LUFS for mastering volume.
By exploring this guide, you’ll gain valuable insights into mastering and enhancing your music’s quality and appeal.
KEY TAKEAWAYS:
- Mastering improves song quality and adaptability.
- It involves equalization, dynamics processing, and file formatting.
- Home mastering ensures tracks meet industry standards.
Table Of Contents
1. Mastering Fundamentals: Overview Of How To Master Music
2. The Music Production Process
3. Audio Analysis and Reference Tracks In Mastering
4. Mastering With Digital Audio Workstations and Tools
5. Audio File Formats and Sample Rates
6. Equalization and Frequency Spectrum
7. Dynamics Processing
8. Mastering Volume, Loudness, and LUFS
9. The Final Touch: Enhancing the Master
10. Preparing for Distribution
11. Online Mastering and Technological Advancements
12. Key Takeaways For How To Master Music As A Beginner
13. FAQ

1. Mastering Fundamentals: Overview Of How To Master Music
Mastering music involves shaping the dynamics, enhancing loudness, and ensuring the mix is perfect for the listener. It requires careful adjustments to ensure clarity and consistency across all media formats.
The Role of a Mastering Engineer
A mastering engineer plays a vital role in the final stage of music production.
They bring out the best in your mix by adjusting EQ, compression, and limiting to create a polished sound. They also ensure that your track has the proper headroom, usually around -6 dB, to avoid clipping.
Mastering engineers use their skills to enhance the track’s dynamics, ensuring the quiet parts are clear and the loud parts are punchy. This helps the music “breathe” and gives it a professional edge.
The Mastering Process
The mastering process starts with preparing your mix. Ensure it is well-balanced and exported as a high-quality WAV or AIFF file, preferably 24-bit depth, and 44.1 kHz or higher quality.
Next, the engineer will work on equalization to balance the frequencies and compression to control the dynamics.
Limiting increases loudness, making the track comparable to radio-ready music.
Additional techniques such as stereo widening, harmonic enhancement, and noise reduction might be used to fine-tune the track.
The final master is then created and ready for distribution across various platforms. Through these steps, mastering ensures that your music sounds consistent and professional, no matter where it’s played.
2. The Music Production Process
Mastering music involves several key stages, including transitioning from mixing to mastering and maintaining a balanced dynamic range.
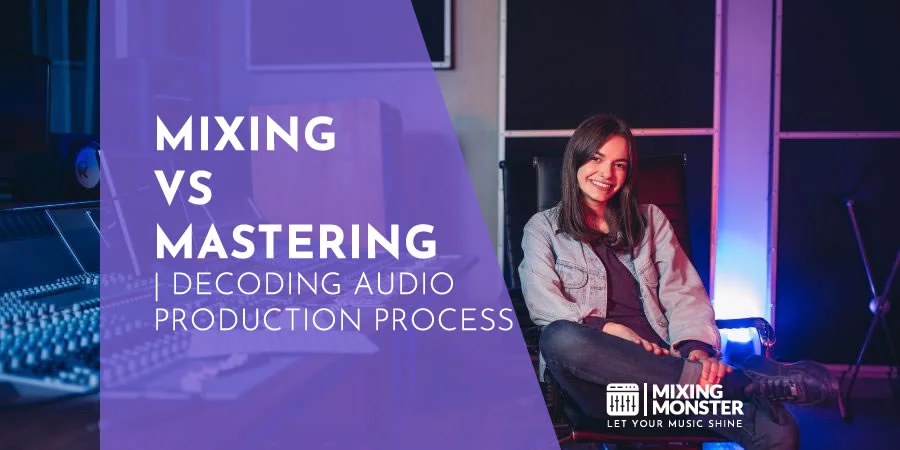
From Mixing to Mastering
The music production begins with mixing, where individual tracks are balanced and enhanced.
As you move to mastering, the goal is to ensure the final mix sounds polished. At this stage, it would help if you focused on equalization, compression, and limiting. These tools help create a consistent, professional sound.
Audio engineers adjust levels, EQ, and panning during mixing to clarify each instrument. Mastering, however, focuses on the entire track, making subtle adjustments to the final mix.
Using a Digital Audio Workstation (DAW), you can apply various effects to smooth out any remaining imperfections.
Preserving Dynamic Range
Preserving dynamic range is crucial for a natural sound.
Dynamic range is the difference between a track’s loudest and quietest parts. Over-compression can flatten this range, making the music sound lifeless.
Audio engineers aim to enhance the music’s emotional impact by maintaining an appropriate dynamic range. To preserve dynamic range, avoid excessive compression.
Gentle usage helps retain the track’s natural feel. Adjusting the compressor settings carefully ensures that louder sections stand out without overshadowing softer ones.
Maintaining dynamics makes the music more engaging and prevents listener fatigue. Dynamic range is vital in conveying the emotion and energy of the music, making it a key element in the mastering process.
3. Audio Analysis and Reference Tracks In Mastering
In mastering, audio analysis and using reference tracks are crucial for achieving clarity and tonal balance. You must perform critical listening to identify any mix issues and choose reference tracks that define the sound profile you aim for.
Critical Listening In Mastering
Critical listening involves paying close attention to every detail in your track. Focus on elements like the frequency spectrum and dynamics. You’ll need a good monitoring system and a properly calibrated audio interface to ensure accurate listening.
Listen for issues such as muddiness, harshness, or a lack of clarity. Take notes on what stands out. Comparing your mix to a reference track can help spot these issues.
Analysis tools can graphically show where your mix falls short. You can make better-informed decisions to adjust EQ, compression, and other settings by referencing these visuals.
Your primary goal is to make your track sound balanced and professional. This means paying attention to both the high and low ends of the frequency spectrum.

Choosing Mastering Reference Tracks
Selecting the right reference track is essential. These tracks are typically professionally mixed and mastered songs that exhibit the sonic qualities you want in your work.
Look for tracks within the same genre to make a fair comparison. Use tools like Audiolens to capture the sonic profile of these tracks. This application analyzes audio from any source and provides frequency balance and dynamics data.
Import your chosen reference track into your mastering software. Compare your track’s tonal balance and frequency spectrum with the reference’s.
Adjust your EQ, compression, and other effects to match the qualities of the reference track. This will help you achieve a more polished final product.
4. Mastering With Digital Audio Workstations and Tools
Choosing the right Digital Audio Workstation (DAW) is crucial when mastering music. You must also know which tools to use within your DAW for the best results.
Selecting the Right DAW
Selecting the right DAW can affect your workflow and the quality of your final track.
Popular DAWs for mastering include Pro Tools, Logic Pro, Ableton Live, and Cubase. These DAWs offer various features to cater to different needs.
Pro Tools is widely used for its powerful editing and mixing capabilities.
Logic Pro offers a user-friendly interface and is ideal for Mac users.
Ableton Live is great for those who also perform live sets.
Cubase is known for its strong MIDI capabilities and comprehensive toolset.
Must-Have Mastering Tools
Specific tools are essential to achieve a polished and balanced mix. Plugins for equalization (EQ), compression, and limiting are fundamental.
EQ helps adjust the tone, compression balances the dynamics, and limiting ensures the track doesn’t clip.
Stereo imaging tools enhance the stereo width, making the music sound more spacious.
Harmonic exciters add warmth and brightness.
Limiters set at -0.5 dBFS ensure the track’s peaks are controlled.
Use these tools within your DAW to refine your mix and carefully export the final master. This involves bouncing the track to a high-quality format, like WAV, ensuring it sounds great on all playback systems.

5. Audio File Formats and Sample Rates
Choosing the correct audio file format and sample rate is crucial for achieving the best sound quality in your mastered music.
Here, we’ll break down the differences between popular file formats and explain the importance of bit depth and sample rates.
WAV vs. AIFF vs. MP3
WAV (Waveform Audio File Format) and AIFF (Audio Interchange File Format) are commonly used for high-quality audio. Both formats are lossless, meaning data is not lost during compression. This makes them excellent choices for mastering, as they preserve the original sound quality.
WAV files are versatile because they are widely supported across various platforms and devices. They typically have a sample rate of 44.1 kHz or 48 kHz and a bit depth of 16 or 24 bits.
AIFF is predominantly used in Apple environments, offering qualities similar to WAV.
It supports the same sample rates and bit depths but is less compatible with non-Apple systems.
MP3 (MPEG-1 Audio Layer 3) is a lossy format, meaning some quality is lost during compression to reduce file size.
While great for streaming and casual listening due to its smaller size, MP3 is not recommended for mastering due to the compromise in audio quality.
Understanding Bit Depth and Sample Rate
Bit depth and sample rate are critical factors in digital audio quality.
Bit depth refers to the number of bits representing each audio sample. Higher bit depths allow for more detail and dynamic range in the sound.
Common bit depths are 16-bit and 24-bit.
Sample rate is the number of samples of audio carried per second, measured in kilohertz (kHz).
The standard sample rate for CDs is 44.1 kHz, but higher sample rates like 48 kHz or even 96 kHz can capture more audio detail, making them preferable for mastering.
A sample rate of 44.1 kHz or higher and a bit depth of 24 bits is generally recommended for mastering. This combination ensures that your final product is high-fidelity and compatible with most playback systems and platforms.
6. Equalization and Frequency Spectrum
Mastering your music requires a clear understanding of equalization and the frequency spectrum.
Learning how to use EQ techniques effectively can achieve a balanced tone. This ensures each instrument has its rightful place in the mix without clashing with others.
EQ Techniques for Mastering
Equalization (EQ) is crucial for shaping the sound of your music. Use EQ to boost or cut specific frequencies. This helps you control the audio’s brightness, warmth, and clarity.
Start using a parametric equalizer, allowing precise adjustments across various frequency bands.
For low-end frequencies (60-250Hz), boost to add thump to your kick drum or bass. Cut these frequencies if your mix is muddy.
In the low mids (250-500Hz), enhance the warmth and body of instruments and vocals. But be cautious, as too much in this range can sound boxy or cluttered.
High mids (2-5kHz) are critical for clarity. Boost these frequencies to make vocals and lead instruments pop. Use gentle cuts if the mix sounds harsh.
Finally, adjust the high frequencies (8-12kHz) to add air and sparkle to your music. Be moderate to avoid a tinny sound.
Balancing the Frequency Spectrum In Mastering
Balancing the frequency spectrum ensures a cohesive and professional-sounding mix. Each frequency range must be managed to avoid conflicts and maintain clarity.
Start by analyzing your mix. Identify which instruments dominate each part of the spectrum. Use an EQ to carve out space for each element.
For example, ensure the kick drum and bass are not fighting in the low end. You can achieve this by cutting a small range of frequencies from one instrument to give space to another.
In the mid-range, balance guitars, vocals, and synths. Use slight EQ adjustments to ensure they complement rather than overpower each other.
The high frequencies add shine but require careful handling to avoid sibilance or harshness. De-essers can help control excessive sibilance in vocals.
7. Dynamics Processing
Dynamics processing shapes a track’s volume and tone. It involves controlling the dynamic range, ensuring a song’s loud and soft parts are balanced. This section focuses on mastering tools like compression and gain staging.
Mastering Compression and Limiting
Compression reduces the difference between a track’s loudest and quietest parts. Compressors control the dynamic range and make the track sound fuller.
The attack sets how quickly compression kicks in after a signal exceeds the threshold, while the release controls how long it takes to stop compressing.
Limiters are like compressors but more extreme. They set a maximum level, preventing the track from peaking or clipping.
Using both tools correctly can give a track consistent loudness without distortion. Adjust makeup gain to compensate for any volume loss during compression.
Gain Staging and Headroom In Mastering
Gain staging involves managing levels at each stage of the audio chain to avoid excessive noise or distortion. Proper gain staging ensures each part of the signal path is optimized, maintaining enough headroom to prevent clipping.
Headroom is the space between the signal’s peak and the maximum levels a system can handle without distortion. It is crucial to keep enough headroom while mixing and mastering.
By balancing the track levels, you can avoid unwanted gain reduction and maintain clarity and punch. Proper gain staging also ensures your limiters and compressors work effectively, maintaining the integrity of the mix.
8. Mastering Volume, Loudness, and LUFS
Knowing how to master volume, loudness, and LUFS is key to ensuring your music sounds good on different streaming platforms. This helps keep your tracks consistent and impactful, no matter where they are played.
Understanding LUFS and Loudness Levels
LUFS stands for Loudness Units Full Scale. This measures the loudness of audio tracks and helps ensure they sound consistent across different platforms.
Many streaming services use -14 LUFS as a standard. Mastering your track around -14 LUFS can help it sound balanced on platforms like Spotify and Apple Music.
When tracks are above -14 LUFS, these services might lower the volume, affecting the song’s dynamics.
Here’s a table of recommended LUFS for different genres:
| Genre | Recommended LUFS |
|---|---|
| Pop | -10 to -14 LUFS |
| Rock | -9 to -13 LUFS |
| EDM | -6 to -8 LUFS |
| Classical | -16 to -20 LUFS |
Knowing the loudness levels helps you make better mastering choices and keeps your track sounding consistent.
Volume and Perception of Impact
Volume is about how loud something is played, but loudness is how we perceive it.
Higher volume sometimes means better sound. Proper mastering balances volume and loudness to make the music impactful without distorting it. Consistency is important for a good listening experience. It can be jarring if one track is much louder or softer than others.
Impact comes from dynamics, the differences between loud and soft parts. Keeping some dynamic range makes the music feel more alive. Compressing too much to achieve loudness can make the track sound flat.
Mastering volume and loudness with the right LUFS for your genre and keeping dynamic range can make a big difference in how listeners perceive your music.
9. The Final Touch: Enhancing the Master
Enhancing the master involves refining the stereo image and using automation to bring your sonic vision to life. These techniques add a polished final touch to your tracks.
Stereo Imaging and Width Techniques In Mastering
Stereo imaging is crucial to make the music sound spacious and immersive.
One common technique is mid-side processing, which allows you to adjust the center and sides of the stereo field separately. This helps in giving the mix a balanced width without losing focus.
- Mid-Side Processing:
Adjusts the center and sides for better width. - Panning:
Positions different elements for a broader stereo field. - Stereo Enhancers:
These plugins can expand the stereo image but should be used sparingly to avoid phase issues.
Mastering engineers also exercise caution when using tools like stereo wideners. These can make the mix sound wider but may introduce phase issues if overused.
Always compare to reference tracks to ensure a natural sound.

Using Subtle Mastering Automation To Fine-Tune The Sonic Vision
Automation in mastering allows you to make minor adjustments throughout the track.
- Volume Automation:
Adjusts dynamics subtly for better flow. - EQ Automation:
Applies dynamic EQ changes to control frequencies in different sections. - Saturation Automation:
Adds or removes harmonic content to enhance warmth and character.
Subtle EQ automation can address frequency imbalances specific to different parts of the track.
Similarly, saturation automation can add warmth and character, giving new life to the music without overwhelming it.
These minor tweaks ensure the final master sounds polished and cohesive, matching the sonic vision perfectly.
10. Preparing for Distribution
To prepare your music for distribution, focus on exporting your final master for various playback systems and bouncing down the final master. Ensuring high quality and compatibility is key for a successful release.
Exporting The Final Master for Different Playback Systems
When exporting the final master, you must ensure it sounds good on all playback systems. This includes testing everything from high-end studio monitors to car speakers and earbuds.
- File Format:
Export your track as a high-quality WAV or AIFF file. These formats preserve the audio quality. - Bit Depth And Sample Rate:
Aim for a bit depth of 24-bit and a sample rate of 44.1 kHz or higher. This helps maintain the clarity and dynamic range of your music.
To further guarantee quality, listen to your track on different playback systems. This helps identify imbalances or issues that might not be obvious on studio monitors.
It’s also crucial to tweak the master to ensure it translates well across all systems.
This is especially important for platforms like streaming services, radio, and other markets.

Bouncing down the Final Master
Bouncing down the final master involves converting your mix into a single stereo track. This step is crucial for preparing your music for distribution.
- Headroom:
Leave enough headroom, typically around -6 dB, to prevent clipping and distortion. - Trimming:
Remove any unnecessary silence at the beginning and end of the track. This ensures a professional and polished final product.
Quality control is essential. After bouncing, listen through the entire track to catch any errors or artifacts.
Once confirmed, your track is ready for distribution.
This step ensures that your music will meet the standards of streaming platforms and other playback systems, making it release-ready.
11. Online Mastering and Technological Advancements
With the rise of online mastering services, artists have more options than ever to achieve professional-sounding tracks without breaking the bank. Technological advancements have enabled AI to play a significant role despite its limitations.
AI Mastering Services And Their Limitations
AI mastering services have revolutionized the music industry. They use artificial intelligence to replicate the work of human audio engineers.
These services are often quicker and more affordable than traditional methods. Companies like CloudBounce use advanced algorithms to enhance audio quality.
Despite their benefits, AI mastering can require a more personal touch from human engineers. The technology relies on presets and algorithms, which might not capture the intricate details of your tracks.
While convenient, AI can only sometimes match the intuition and experience of a skilled human. Therefore, it’s crucial to weigh your options.
Affordable Professional Mastering Options
Online platforms now offer affordable professional mastering options, which is fantastic news for independent artists with limited budgets.
Our online service makes mastering more accessible. You can get high-quality results without spending a fortune.
Mixing Monster will give you top-notch professional mastering without the hefty price tag, thus making professional-quality audio accessible to everyone.

12. Key Takeaways For How To Master Music As A Beginner
Spend time learning the basics of your digital audio workstation (DAW). Knowing how to navigate and use its features is crucial.
Focus On EQ And Compression
EQ and compression are essential tools. Apply EQ to balance frequencies and compression to control the dynamic range of your track.
Compare your tracks with professionally mastered songs. This helps you understand quality standards and guides your adjustments.
Ensure your track levels are balanced. Avoid clipping and maintain enough headroom for mastering.
Use High-Quality Audio Files
Start with the best possible audio. To preserve quality, export your mixes in high resolution, such as 24-bit and 48kHz.
Limiters increase volume but can introduce distortion if overused. Apply gently to avoid ruining your track.
While tools are important, your ears are the best judge. Listen critically and make adjustments based on what you hear.
Check Across Different Systems
Test your mastered track on various playback systems, like speakers, headphones, and cars. It should sound good everywhere.
Take Breaks
Give your ears rest. Take regular breaks to avoid ear fatigue, ensuring you make accurate decisions.
Learn Continually
Mastering is a skill developed over time. Take courses, watch tutorials, and practice regularly to improve.
Happy mastering!

13. FAQ
1) What are the essential steps for mastering music for beginners?
As a beginner, start by organizing your audio files in your DAW. Apply EQ to balance frequencies, use compression to control dynamics, and add limiting to increase loudness. Finalize by checking the mix on different playback systems.
2) What techniques are used to master a song in Logic Pro X?
In Logic Pro X, you can begin by importing your tracks. Use built-in plugins like Channel EQ to balance frequencies, Multiprocessor to multi-band compress, and Adaptive Limiter to control peak levels. Use the Space Designer for reverb to add depth.
3) Can mastering a track be effectively done using FL Studio, and how?
To master a track in FL Studio, organize your project and use plugins like Fruity Parametric EQ 2 for EQ adjustments, Fruity Limiter for limiting, and Maximus for comprehensive compression and limiting. Reference your track on different speakers to ensure consistency.
4) How can one achieve professional mastering results with online tools?
Online tools like LANDR and eMastered offer automated mastering services. Upload your track, select mastering preferences, and the software applies EQ, compression, and limiting. While convenient, constantly review the results and make adjustments if needed.
5) What is the average time required to master a track?
Mastering a track can take a couple of hours to a full day. The exact time depends on the complexity of the mix, the level of detail required, and the engineer’s experience.
6) Is self-mastering a viable option for independent artists?
Independent artists can self-master with the proper knowledge and tools. Consider investing in quality headphones or monitors. Learn about EQ and compression and practice on different tracks. Always compare your work to professionally mastered songs to gauge quality.

