Home > Blog > Mastering > Mastering Insights
Disclosure: Some of the links below are affiliate links, meaning that at no additional cost to you, we will receive a commission if you click through and make a purchase. Read our full affiliate disclosure here.
Did you know that 78% of professionally mixed tracks fail to translate correctly across different playback systems? That’s a staggering statistic that highlights one of audio engineering’s most critical challenges. As streaming platforms dominate music consumption and listeners use everything from high-end studio monitors to smartphone speakers, achieving perfect audio translation has never been more crucial
Audio translation is a technical aspect in audio engineering that describes how sound behaves across different environments and playback mediums – ensuring that an audio source sounds perfect whether it’s played through a car stereo, expensive headphones, or a tiny speaker.
Audio translation isn’t just about technical proficiency; it’s about understanding how sound behaves across different environments and making strategic decisions that preserve your artistic vision regardless of the playback medium.
In today’s diverse audio landscape, mastering translation techniques can make the difference between a mix that sounds amateur and one that commands professional respect. Let’s dive into the essential strategies that will transform your approach to mixing and mastering!
KEY TAKEAWAYS:
- Always check your mixes on multiple playback systems, including studio monitors, headphones, car speakers, and smartphone speakers, to ensure optimal sound quality. This multi-system approach ensures your music translates consistently across all listening environments.
- Proper frequency spectrum management, especially in the midrange and low-end, is crucial for translation success. Use reference tracks and spectrum analysis tools to maintain balanced frequency response across different systems.
- A well-treated listening environment with reliable studio monitors forms the foundation of accurate translation assessment. Without proper monitoring, even the best mixing techniques won’t guarantee consistent playback quality across systems.
Table Of Contents
1. Audio Translation Fundamentals For Modern Audio Engineers
2. Essential Mix Translation Techniques And Strategies
3. Professional Monitoring Setup For Accurate Audio Translation
4. Frequency Spectrum Management Across Different Mediums
5. Advanced Mastering Approaches For Perfect Audio Translation
6. Technology Tools And Software For Audio Translation Testing
7. Key Takeaways For Audio Translation Mastery
FAQ

1. Audio Translation Fundamentals For Modern Audio Engineers
Modern audio engineers face unique technical challenges with translated content. Maintaining signal integrity across different playback systems and ensuring accurate monitoring environments are just the start.
These fundamentals directly shape how well translated audio performs in real-world applications. Subtitles syncing with audio tracks can be trickier than you’d expect.
Understanding Frequency Response Variations Across Systems
Different playback systems come with their own frequency response quirks that affect how translated audio sounds. Consumer headphones typically emphasize bass between 60-200 Hz, while pro monitors maintain a flatter sound.
Engineers must consider these variations when mixing translated content. A voice that’s crisp on studio monitors might sound muddy on cheap earbuds, especially in the 200-800 Hz range where speech intelligibility hangs out.
Critical frequency ranges for speech translation work:
- Fundamental frequencies: 80-250 Hz (vocal weight and warmth)
- Intelligibility range: 1-4 kHz (consonant clarity)
- Presence band: 4-8 kHz (voice projection and clarity)
Translation projects often involve multiple voice actors with varied vocal qualities. Engineers really should check their mixes on different systems—phones, laptops, streaming devices—to make sure speech stays clear everywhere.

Monitoring Environment Impact On Translation Quality
The monitoring environment makes or breaks an engineer’s ability to make solid decisions during translation work. Room acoustics, speaker placement, and ambient noise all contribute to how listeners perceive the final product.
Untreated rooms create reflections that mask subtle audio details. Early reflections within 15-20 milliseconds of the direct sound can cause comb filtering, which buries speech clarity.
Essential monitoring setup requirements:
| Component | Specification |
|---|---|
| Room noise floor | Below -45 dBFS |
| RT60 (reverberation time) | 0.3-0.5 seconds |
| Speaker distance | 6-8 feet from listening position |
| Acoustic treatment | First reflection points covered |
Engineers working with subtitles and audio files need accurate monitoring to catch timing mismatches between spoken words and text displays. A poor monitoring setup can hide sync issues that later jump out on consumer devices.
Critical Listening Skills Development For Better Translation
Effective audio translation calls for listening skills that go beyond traditional mixing. Engineers have to pick up on speech rhythm, pronunciation quirks, and cultural vocal traits that affect how people actually understand the message.
Training centers on spotting subtle timing variations between the original and translated performances. Native speakers often have distinct speech patterns and breathing rhythms, which can disrupt subtitle timing if not carefully considered.
Key listening skill areas:
- Phonetic accuracy: Detecting mispronounced words or unclear consonants
- Rhythm matching: Ensuring translated speech keeps a natural pace
- Emotional consistency: Matching tonal qualities between languages
- Background element balance: Keeping music and effects clear
Regular listening exercises using reference material in different languages help engineers hone these skills. Comparing professional translation work with amateur stuff really highlights what separates good translations from the rest.
Common Audio Translation Failures And How To Identify Them
Audio translation projects can stumble in predictable ways. Engineers who know what to look for can catch these issues early during quality control.
Timing problems show up when translated speech doesn’t match subtitle displays or when dubbed content drifts out of sync with visuals. Comparing audio files against their text elements with waveform analysis reveals these glitches quickly.
Primary failure categories:
- Sync drift: Gradual timing offset that builds up over time
- Level jumping: Inconsistent loudness between translated segments
- Frequency response shifts: Tonal changes between the original and the translation
- Artifact introduction: Digital processing noise or distortion
Engineers should run systematic checks, including A/B comparisons between original and translated versions. Spectral analysis tools spot frequency response issues, and correlation meters catch timing mismatches between subtitles and audio.
Most technical failures come from sloppy file conversion or weak quality control, not creative translation choices. It’s usually the workflow that needs fixing, not the translation itself.
2. Essential Mix Translation Techniques And Strategies
Professional mix translation relies on systematic approaches to reference comparison, stereo field management, dynamic control, and frequency balance. These techniques help audio keep its intended vibe across different playback setups.
Reference Track Selection And Comparative Analysis Methods
Choosing the proper reference tracks is the backbone of good mix translation. Engineers should pick professionally mixed songs in the same genre, with similar instruments and energy.
The reference track needs to match the target loudness and dynamic range for the intended release format. Most commercial releases land somewhere between -14 and -8 LUFS, depending on platform and genre.
Level-matched comparison prevents volume bias during evaluation. Many engineers use plugins that auto-match perceived loudness between the mix and the reference.
Frequency spectrum analysis can reveal tonal imbalances between your mix and the reference. Visual tools help you spot differences in low-end weight, midrange presence, and high-frequency extension that your ears might miss after a long session.
Switching between A/B sources every 15-30 seconds keeps your ears honest. If you listen to one too long, you start adapting and making bad calls.
Mid-Side Processing For Enhanced Stereo Compatibility
Mid-side processing splits the center channel from the stereo sides so that you can tweak each separately. It’s a great way to keep mono compatibility while maintaining that wide stereo image.
Center channel elements usually include lead vocals, bass, and kick drums. You want these focused in the mid channel to avoid phase issues when the mix folds down to mono.
Side channel processing affects stereo-panned stuff like backing vocals, pads, and reverb returns. Boosting highs in the sides can widen the mix without hurting mono playback.
Keep low-frequency info below 80-120 Hz mostly in the mid channel. Bass in the sides can cause phase problems and kill punch on single-speaker systems.
Mid-side EQ lets engineers target stereo width. Brighten the sides with a high-shelf, keep the center neutral for vocal clarity—it’s a balancing act.
Dynamic Range Optimization Across Playback Systems
Dynamic range management keeps the mix punchy and clear, no matter where it’s played. Each system type requires its own approach for optimal translation.
Small speakers benefit from tamed peaks and compressed dynamics. Limiting spikes helps avoid distortion on phones and laptops.
Large sound systems can handle more dynamic range and benefit from preserved transients. Clubs and concerts need punchy drums and clear vocals to cut through the noise.
Automation gives you precise level control without the squashed sound of heavy compression. Manual gain riding lets you keep things dynamic while avoiding nasty peaks that trigger over-limiting.
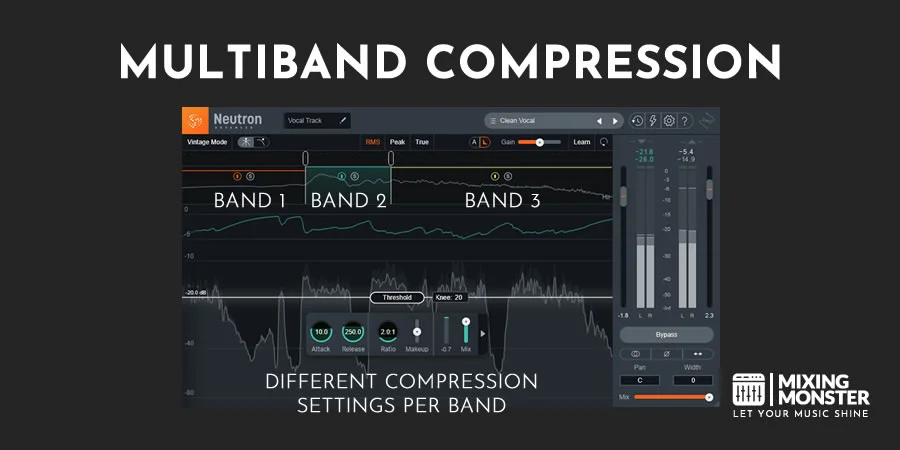
Multiband compression tackles frequency-specific dynamic problems. Compressing the low end prevents bass buildup, while leaving the mids and highs open for clarity.
Low-End Management For Consistent Bass Translation
Bass management really determines how well a mix translates across speakers and rooms. Good low-end control means power and clarity, even on tiny speakers.
High-pass filtering cleans up unnecessary lows from non-bass instruments. Most melodic parts can be filtered above 60-100 Hz with no real loss of character.
Mono summing below 120 Hz stops phase issues that mess with bass. This keeps the low end solid when systems combine stereo channels.
Side-chain compression between kick and bass creates rhythmic movement and keeps the low end clear. The kick can trigger bass ducking, which helps both stand out.
Bass enhancement should target 60-80 Hz for weight and 2-4 kHz for attack. These frequencies translate well across different playback systems, from headphones to big speakers.

3. Professional Monitoring Setup For Accurate Audio Translation
Professional audio translation requires precise monitoring setups to detect subtle linguistic differences and audio artifacts across various formats. Proper speaker placement, wise headphone choices, acoustic treatment, and a clean digital signal chain all lay the groundwork for reliable translation workflows.
Multi-Speaker System Configuration And Placement
When you’re monitoring translations professionally, you really need several reference points. Audio accuracy shifts a lot depending on where and how you’re listening, so a single setup just doesn’t cut it.
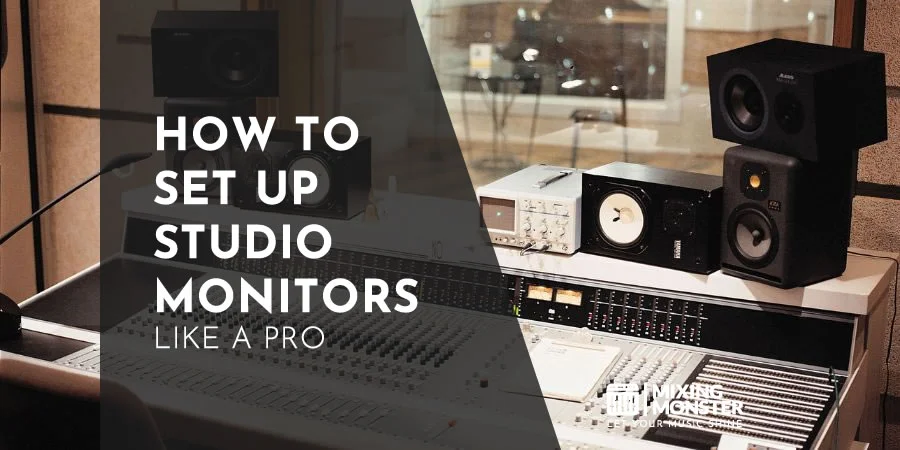
Near-field monitors are typically positioned at a 60-degree angle from your seating position. These become your primary reference for really detailed work.
Primary Monitor Placement:
- Distance: 3-8 feet from the listener
- Height: Tweeters at ear level
- Angle: 30 degrees inward toward the listener
Mid-field monitors help you check translation quality at moderate distances. They’ll show you how your work actually sounds in a typical living room or office.
Far-field monitors round out the chain. They mimic playback in big rooms and reveal problems that pop up when files like WAV, MP3, FLAC, AAC, OGG, and M4A get played on different systems.
Isolation and Positioning Requirements:
- Acoustic isolation pads beneath monitors
- Solid mounting surfaces free from vibration
- Symmetrical placement relative to the room center
- Minimum 2-foot distance from walls
Using multiple speakers enables you to identify inconsistencies that a single monitor might overlook. Each type shows off different translation quirks you’d otherwise miss.
Headphone Selection Strategies For Translation Checking
If you’re serious about translation, you’ll want a few different headphones. Open-back headphones, for example, give you the most accurate frequency response—perfect for those nitpicky listening sessions.
Primary Translation Headphones:
- Open-back design for natural soundstage
- Flat frequency response (±3dB 20Hz-20kHz)
- Impedance matching with available amplification
- Comfortable fit for extended sessions
Closed-back headphones work as your backup reference. They’ll let you hear how translations sound in more isolated or even slightly “boxy” conditions, which can reveal issues in compressed formats like MP3, AAC, and OGG.
It’s also worth throwing some consumer-grade headphones into the mix. Popular models clue you in on how your translation performs on everyday gear.
Essential Headphone Amplification:
- Clean, transparent amplification
- Multiple output impedances
- Volume matching capabilities
- Low noise floor specifications
Mixing with headphones requires specific techniques for accurate monitoring and translation assessment. Getting the right amplification matters—otherwise, you’ll get inconsistent results when switching between headphones.
Room Acoustics Treatment For Reliable Audio Translation Assessment
Room acoustics can significantly impact your translation accuracy. Reflections and weird frequency bumps easily mask audio issues if you don’t treat the space.
Start with the first reflection points—those spots between your monitors and where you sit. That’s where treatment matters most.
Essential Treatment Elements:
- Absorption panels at first reflection points
- Bass traps in room corners
- Diffusion panels on rear walls
- Ceiling treatment for vertical reflections
Measuring the frequency response with pink noise shows you what’s wrong in your room. You want your response curve to stay within ±6dB from 40Hz to 16kHz at your listening spot.
Treatment Placement Priority:
- Side wall first reflection points
- Corner bass trap installation
- Ceiling reflection control
- Rear wall diffusion treatment
Portable solutions work surprisingly well if your setup isn’t permanent. Moveable panels and desktop absorbers help a lot without drilling holes everywhere.
Room shape matters, too. Rectangular rooms with non-parallel surfaces do a better job at reducing standing waves, which can really mess with bass in FLAC and WAV files.
Digital Audio Workstation Monitoring Chain Optimization
Your DAW’s monitoring chain has a significant impact on translation quality. The way you route signals, process them, and manage outputs all matter—sometimes more than you’d expect.
Gain staging is a big deal. If you don’t set it up right, you’ll get distortion or lose dynamic range, and that’s just frustrating.
Core Monitoring Chain Components:
- Audio interface with transparent converters
- Monitor controller for speaker switching
- Headphone amplifier with multiple outputs
- Reference level calibration equipment
Try to keep the signal path clean during translation review. Bypass any processing you don’t absolutely need. Direct monitoring modes help by cutting out latency and weird artifacts.
Calibration Standards:
- Reference level: -18dBFS = 83dB SPL
- Peak headroom: Minimum 18dB above reference
- Frequency response: ±1dB 20Hz-20kHz
- THD specifications: <0.01% at reference level
Routing multiple outputs lets you switch quickly between different monitors. That’s a lifesaver when you’re checking how files perform on various systems.
Buffer size settings can be tricky. Go lower for less latency, but watch your CPU. Bigger buffers keep things stable, but you’ll notice more delay.
Format-Specific Considerations:
- Lossless formats (FLAC, WAV) require full-bandwidth monitoring
- Compressed formats (MP3, AAC, OGG, M4A) need artifact detection capabilities
- Bit depth matching between source files and the monitoring chain
- Sample rate consistency throughout the signal path

4. Frequency Spectrum Management Across Different Mediums
Every playback system wants something a little different from your mix. Frequency balance is one of the most critical factors in achieving mix translation, but every medium presents its own unique challenges.
High-Frequency Content Optimization For Various Systems
High frequencies act completely differently depending on where you listen. Studio monitors give you those crisp highs, but consumer earbuds? They often hype everything above 8kHz, sometimes to a fault.
Streaming platforms often compress audio files, dulling the highs. Engineers fight back by nudging up 10-15kHz during mixing, making sure cymbals and vocal consonants survive the trip.
Key High-Frequency Adjustments:
- Studio playback: Flat response from 8-20kHz
- Consumer headphones: Reduce 12-16kHz by 1-2dB
- Streaming formats: Boost 10-15kHz by 0.5-1dB
- Car systems: Enhance 6-10kHz for road noise compensation
Mobile device speakers can’t handle much above 12kHz. Rolling off those extreme highs helps avoid distortion on tiny speakers.
Midrange Clarity Techniques For Speech And Vocal Translation
Vocal clarity lives in the midrange—specifically, between 1-4kHz. That’s where speech formants and presence hang out.
Podcasts need extra midrange focus because people listen to them on just about anything. Boosting 2-3kHz helps speech cut through ambient noise and bad speakers alike.
Midrange Optimization Strategies:
| Frequency Range | Application | Adjustment |
|---|---|---|
| 800Hz-1.2kHz | Vocal warmth | +1 to +2dB |
| 2-3kHz | Speech presence | +2 to +3dB |
| 3-5kHz | Vocal clarity | +1 to +2dB |
Different media need different midrange tweaks. TV broadcasts really push 1-3kHz for clear dialogue. Radio tends to boost 2-4kHz for that punch and to fight off compression artifacts.
Streaming services love to compress things, which can flatten out the midrange. Engineers usually automate vocal levels instead of smashing them with heavy compression.
Sub-Bass Handling For Club Systems Versus Consumer Speakers
Sub-bass is a headache across playback systems. Clubs can rumble all the way down to 20Hz, but most home speakers start rolling off below 80Hz.
System-Specific Sub-Bass Capabilities:
- Club PA systems: 20-80Hz with massive headroom
- Home stereo: 40-80Hz with moderate output
- Laptop speakers: 120Hz+ only
- Smartphone speakers: 200Hz+ only
Layering bass frequencies is the trick. Put the fundamental at 40-80Hz for home systems, and add harmonics at 80-200Hz so smaller speakers don’t lose all the impact.
Frequency translation techniques move some low-end info up into a range where consumer speakers can actually play it. That way, you keep the punch without overwhelming club systems.
Mobile devices need careful bass management below 100Hz. Too many sub settings can drain the battery and cause distortion.
Spectral Balance Strategies For Streaming Platform Compatibility
Streaming platforms all process audio differently. Spotify, for example, uses AAC and OGG codecs, while Apple Music sticks with AAC, which keeps more high-end detail.
Platform-Specific Considerations:
- Spotify: AAC and OGG compression affects 15kHz+ content
- Apple Music: AAC encoding preserves more high-frequency detail
- YouTube: Heavy compression impacts dynamic range significantly
- Podcast platforms: Speech optimization prioritizes 300Hz-8kHz
The radio frequency spectrum is not an inexhaustible resource, and streaming bandwidth limits can definitely influence audio quality. Sometimes you have to pick between file size and fidelity.
Loudness normalization on streaming sites changes spectral balance, too. If you master too hot, platforms turn you down, and suddenly your frequency balance isn’t what you intended. Targeting -14 LUFS for Spotify and -16 LUFS for Apple Music keeps things where you want them.
Podcasts need a special touch for speech. Boosting around 2-4kHz makes dialogue clearer on everything from phones to car stereos.

5. Advanced Mastering Approaches For Perfect Audio Translation
Getting professional audio translation right means mastering with precision. You need multiband compression for even frequency response, stereo imaging tricks for mono compatibility, and you’ve got to hit those platform-specific loudness standards, no way around it.
Multiband Compression Techniques For System Compatibility
Multiband compression splits translated audio into separate frequency bands so you can process each one differently. This method helps tackle the specific quirks of voice synthesis and dubbed content, since different frequencies tend to behave in their own unpredictable ways.
Low-frequency band (20-250 Hz) usually needs a gentle compression ratio around 2:1 or 3:1. That way, rumble and mouth noises—often a side effect of AI voices—don’t swamp tiny speakers.
The mid-frequency band (250 Hz-5 kHz) is where speech intelligibility lives. Try compression ratios of 3:1 to 4:1, with attack times in the 10- to 30-millisecond range. This keeps vocals clear but tames those annoying peaks.
High-frequency band (5-20 kHz) does best with lighter compression, maybe 2:1. You want to keep the natural sparkle and articulation that helps translated audio feel real.
| Frequency Band | Compression Ratio | Attack Time | Release Time |
|---|---|---|---|
| 20-250 Hz | 2:1-3:1 | 50-100ms | 200-500ms |
| 250 Hz-5 kHz | 3:1-4:1 | 10-30ms | 100-300ms |
| 5-20 kHz | 2:1 | 5-15ms | 50-150ms |
Stereo Imaging Optimization For Mono Compatibility
Translated audio must remain clear, even in mono, especially on phones or public address systems. If you get stereo imaging right, you don’t lose anything important when everything collapses to mono.
Phase correlation monitoring helps you catch cancellation issues between left and right. Keep correlation values above +0.5, or you’ll risk losing frequencies when folks listen in mono.
Center-weighted mixing puts the main vocals right in the center. That way, translated speech stands out, no matter how listeners play it back.
Width control processing lets you spread out non-essential stuff, like background music or sound effects, without hurting mono compatibility. Keep the vocals centered and only widen the parts that won’t matter if they disappear in mono.
Loudness Standards Compliance Across Streaming Platforms
Every streaming platform has its own loudness targets. If you hit these, your translated audio plays at the right volume and avoids those awkward auto-gain jumps that can mess up the sound.
YouTube recommends -14 LUFS for optimal results, without additional compression. Audio translation platforms often need a final tweak to nail this after voice synthesis.
Spotify also goes for -14 LUFS, but with a -1 dBFS peak ceiling. Try to keep your levels here and let the dynamics breathe, or the platform might squash everything.
Podcast platforms usually ask for -16 to -20 LUFS, depending on where you’re uploading. Apple Podcasts, for example, recommends -16 LUFS and at least 6 LU of dynamic range.
True peak limiting at -1 dBFS stops those sneaky intersample peaks that can cause distortion when listeners’ devices convert digital to analog.
Final Translation Verification Workflow And Checklist
A solid verification process catches problems before you release translated audio. It’s a pain to double back after publishing, so a quick checklist saves headaches.
Technical verification covers:
- Loudness measured within target specs
- Phase correlation checked for mono compatibility
- Peak levels under -1 dBFS true peak
- Frequency response analyzed for balance
Content verification checks for:
- Lip-sync accuracy in video
- Natural timing and pacing
- Consistent voice throughout
- No weird artifacts from voice synthesis
Platform testing means playing back on different devices—phones, headphones, and computer speakers. Sometimes you only catch issues when you actually listen to real-world gear.
Final export settings should match the platform exactly. Use the right bit depth and sample rate so you don’t run into compatibility surprises.
6. Technology Tools And Software For Audio Translation Testing
Testing audio translation isn’t a one-size-fits-all thing. You need specialized tools to monitor performance, check quality, and make sure the translation itself is accurate. Some are browser plugins for live monitoring, others are mobile apps for field tests—there’s a tool for every scenario.
Plugin Solutions For Real-Time Translation Monitoring
Browser plugins can give you instant feedback on voice translator app performance during live sessions. These extensions hook right into translation platforms so you can see latency, accuracy, and how snappy the system feels.
Chrome Translation Monitor tracks how long it takes for source audio to become translated output. You receive real-time statistics—processing delays, connection stability, and error rates—while running a session.
Firefox Audio Translation Analyzer brings in-depth monitoring for multilingual meetings. It measures audio quality, translation confidence, and even user engagement across language pairs. Pretty handy, honestly.
Some key things to monitor:
- Latency (usually 2-5 seconds for good systems)
- Audio dropouts and how fast the system recovers
- Translation accuracy scores based on confidence algorithms
- Bandwidth usage and connection quality
These plugins play nicely with Microsoft Translator, Stenomatic.ai, and similar platforms, giving your technical team the data they need during important translation events.

Spectrum Analysis Tools For Frequency Balance Assessment
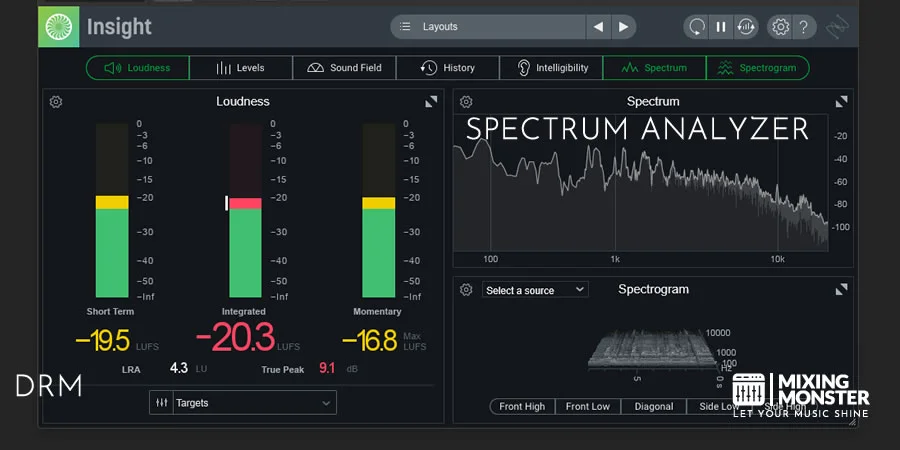
Audio spectrum analyzers help you see how frequencies are distributed in translated speech. They’re great for spotting weirdness in synthetic voices and dialing in audio translator settings across languages.
Real-Time Analyzer Pro provides side-by-side frequency graphs for both the source and translated audio. It flags gaps, odd peaks, and tonal imbalances that might trip up listeners.
SpectraLayers Audio Editor is more hands-on, letting you edit spectral details for translation system calibration. Engineers often use it to tweak synthetic voices until they sound more lifelike.
Frequency ranges you really can’t ignore:
- Human speech fundamentals (80-250 Hz)
- Vowel clarity (250-2000 Hz)
- Consonant definition (2000-8000 Hz)
- Presence and intelligibility (4000-6000 Hz)
Most pro translation services lean on these tools to keep audio quality steady across languages and speaker types.
Correlation Meters And Phase Relationship Management
Phase correlation meters are a lifesaver for detecting timing discrepancies between the original and translated audio. They help you dodge those annoying artifacts from phase shifts or sync errors.
Waves PAZ Analyzer measures stereo correlation and phase in real time. It spits out values from -1 to +1—if you can stay above 0.7, you’re in good shape for clear audio.
iZotope Insight 2 does everything: phase, loudness, and spectral analysis. Translation engineers use it to keep output at broadcast quality.
Phase headaches usually pop up when:
- You’re using multiple mics on the same speaker
- Network delays mess with timing
- Audio processors add unpredictable latency
- Stereo translation outputs get out of sync
If you manage the phase well, listeners get clear audio, even during marathon multilingual sessions.
Mobile Apps And Portable Solutions For Field Testing
Mobile testing apps let you check translation quality out in the wild. They measure how background noise, network conditions, and acoustics affect translation, which you can’t simulate in a studio.
Audio Tools by onebyone turns your phone into a pro-grade analyzer. You can measure noise levels, reverb, and frequency response—basically, all the stuff that impacts translation.
SignalScope Pro brings advanced signal analysis to iOS. Engineers use it to check audio quality, system response times, and document how performance changes from room to room.
In the field, you’ll want to watch:
- Ambient noise levels (measured in dB SPL)
- Network strength and bandwidth
- Speaker-to-mic distance—it matters more than you think
- Room acoustics and how they mess with recognition
These portable tools give your team a reality check before rolling out translation at events or conferences, where clear communication is non-negotiable.

7. Key Takeaways For Audio Translation Mastery
- Professional monitoring setups—including multi-speaker systems, calibrated headphones, and treated rooms—are essential for catching timing, sync, and tonal issues.
- Frequency management ensures clarity: midrange (1–4 kHz) drives speech intelligibility, while careful low-end and high-frequency adjustments keep mixes consistent across devices.
- Critical listening skills like rhythm matching, phonetic accuracy, and emotional consistency separate high-quality translations from amateur results.
- Common pitfalls—such as sync drift, frequency shifts, and processing artifacts—can be avoided through systematic quality control and spectral analysis.
- Advanced mastering techniques (multiband compression, mid-side processing, and loudness compliance) guarantee that translated audio holds up on streaming platforms and real-world playback systems.
- Testing tools and workflows—from spectrum analyzers to mobile field apps—help engineers verify translation accuracy, platform compatibility, and listener experience before release.

FAQ
1) What are the most critical frequency ranges to monitor for optimal audio translation across different playback systems?
Engineers focus on frequencies ranging from 200Hz to 5kHz. This midrange carries most of the vocal intelligibility and clarity that listeners need, no matter what device they’re using.
The 200-500Hz range is tricky. If you miss here, you’ll get muddiness on small speakers and boominess on big ones.
Frequencies above 10kHz are all about air and presence. Earbuds, car speakers, and studio monitors all treat these highs differently.
Bass below 80Hz barely comes through on most consumer gear. Make sure your mix still works when those lows get filtered out or squashed by streaming platform algorithms.
2) How do streaming platform algorithms and compression affect audio translation quality in professional mixes?
Streaming platforms crank up loudness normalization, often chopping dynamic range by 3-6dB. That compression can seriously shift how instruments stack up in a mix, especially when you’re listening on regular consumer gear.
Lossy codecs toss out frequency content above 15-20kHz and use psychoacoustic masking. Sometimes, reverb tails vanish, and stereo width shrinks more than you’d expect.
Loudness targets bounce around depending on the platform. Spotify goes for -14 LUFS, while YouTube sits at -13 LUFS, so engineers really have to check mixes at both to stay in the game.
Compression algorithms don’t play nice with dense harmonic content. When AI audio translation services process busy genres, you might notice extra artifacts sneaking in.
3) What specific monitoring equipment setup provides the most accurate translation assessment for home studio environments?
Near-field monitors, set up approximately 3-8 feet from where you’re sitting, provide the most accurate frequency response for mixing. A triangle layout with 60-degree angles locks in proper stereo imaging—feels almost mathematical, but it works.
It’s a good idea to check mixes on a bunch of different playback systems. Try bookshelf speakers, earbuds, simulated car audio, even phone speakers—each one exposes new quirks.
Adding a subwoofer under 80Hz can uncover low-end translation problems you’d miss otherwise. Just make sure the crossover’s set right so you don’t end up with awkward frequency holes on full-range systems.
Room correction software like Sonarworks or IK Multimedia ARC can help fix acoustic issues. These tools flatten out weird frequency bumps that mess with your translation judgment.
4) How can mixing engineers compensate for poor room acoustics when evaluating audio translation quality?
Mixing on headphones can save you when your room’s working against you. Open-back models like the Sennheiser HD600 or Beyerdynamic DT880 give a reliable frequency response.
Keeping near-field monitors close—about 3-4 feet away—cuts down on room reflections. That way, you hear more of the actual mix and less of the room’s personality.
Throwing some acoustic treatment at first reflection points helps a ton. Bass traps in the corners and absorption panels along the sides can make your space way more neutral.
Reference tracks in the same genre highlight any unusual room-induced frequency anomalies. Comparing your mix to a familiar one often reveals those hidden translation issues.
5) What are the key differences between translation requirements for electronic music versus acoustic recordings?
Electronic music relies heavily on big, synthesized lows, but those can disappear on systems without subwoofers. Producers have to make sure the bass still cuts through when you play it on tiny speakers.
Acoustic recordings need natural reverb and room tone for depth, but those don’t always survive compression or translate the same across every playback system.
Electronic genres push stereo width with synth panning and effects, but that width can collapse to mono on some devices. You’ve gotta check for compatibility or risk losing part of the vibe.
Acoustic instruments typically have expected frequency signatures, whereas electronic sounds can occur anywhere in the spectrum. That means you have to watch for frequency masking and clashing a bit more carefully with electronic stuff.
Dynamic range expectations aren’t even close between these genres. Electronic tracks usually keep things loud and steady, but acoustic mixes might lose their natural dynamics when they get squashed by compression.
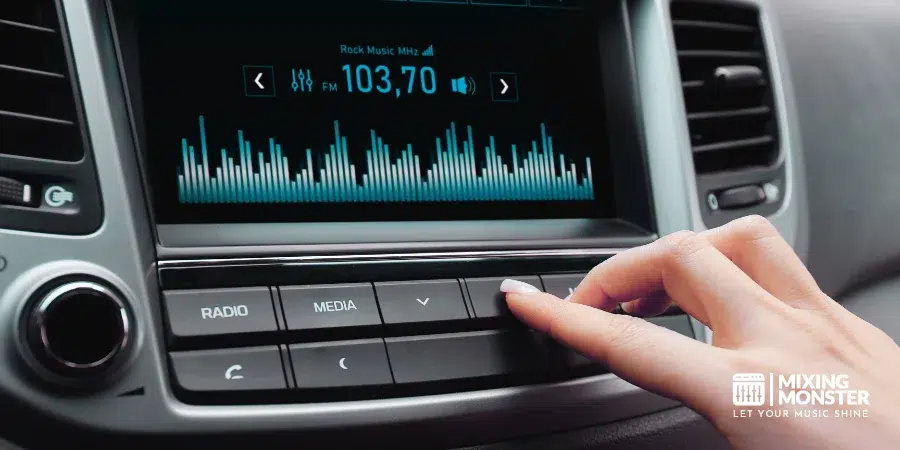
6) How do modern car audio systems impact translation considerations compared to traditional home stereo setups?
Car audio systems really lean into mid-bass frequencies, especially between 80-200Hz. Blame the shape and size of the car cabin for that—mixes that feel full in a studio can come across as thin or hollow once you’re on the road.
And let’s not forget about road noise. It tends to drown out anything below 100Hz or above 8kHz while you’re driving, so engineers have to make sure the crucial parts of a mix still cut through that narrower frequency window.
Modern car systems love their digital signal processing. They’ll slap on automatic EQ curves that can totally mess with the careful frequency balance mixers worked so hard to get right.
Speaker placement in cars? It’s a whole different beast compared to home setups. Since nobody sits directly in the center, vocals that are panned to the middle might drift off to one side, which can be annoying if you notice it.
And then there’s Bluetooth. Audio compression over Bluetooth introduces its own layer of quality loss, so you must factor in both the platform’s compression and any wireless issues that may occur before you even hear the track.

