Home > Blog > Mixing > Mixing Insights
Disclosure: Some of the links below are affiliate links, meaning that at no additional cost to you, we will receive a commission if you click through and make a purchase. Read our full affiliate disclosure here.
Mixing tips can turn your tracks from amateur to surprisingly pro in less time than you’d expect. Whether you’re just starting or have been at it for years, a few solid techniques can really elevate your mixes and help you achieve that polished, radio-worthy sound.
Mixing means blending all the tracks in a recording to make a balanced, cohesive song. You’ll tweak levels, pan, EQ, compress, and add effects to bring out the best in every sound. When you mix well, every part of your song pops through and fits together, making the whole track more powerful and precise.
With the right mixing moves, your productions start to sound deeper, punchier, and way more professional. Try working in mono, get a grip on compression, carve out space for each instrument, and don’t be afraid to use reverb or delay to add some dimension.
Automating things keeps your mixes lively. Oh, and don’t forget to take breaks—ear fatigue is real, and a fresh listen can save you from some questionable decisions.
KEY TAKEAWAYS:
- Mix in mono first—your balance and clarity will thank you
- EQ and compression aren’t just buzzwords; use them thoughtfully to shape your sound
- Automate stuff! Dynamic mixes keep listeners hooked
Table Of Contents
1. Mixing Tip 1: Mix In Mono For Better Balance And Clarity
2. Mixing Tip 2: Use EQ To Create Space For Each Element
3. Mixing Tip 3: Master Compression For Punch And Control
4. Mixing Tip 4: Utilize Reverb And Delay For Depth And Dimension
5. Mixing Tip 5: Automate For Dynamic And Engaging Mixes
6. Key Takeaways For Audio Mixing Tips
FAQ

1. Mixing Tip 1: Mix In Mono For Better Balance And Clarity
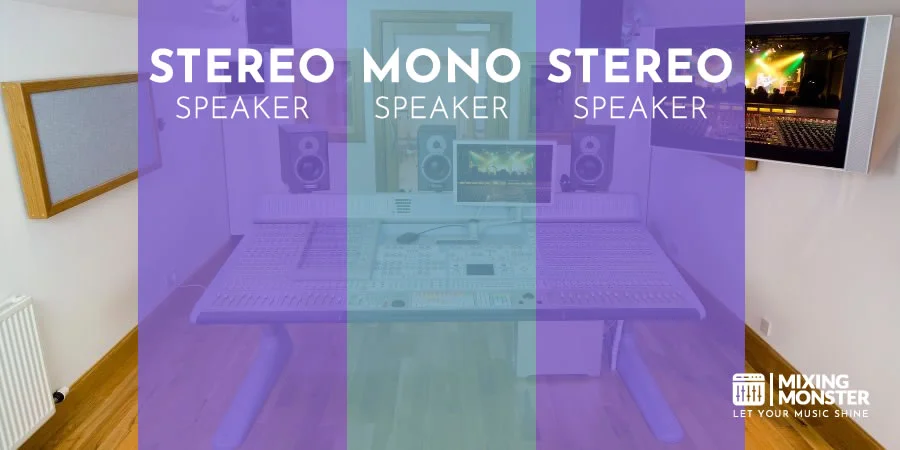
Mixing in mono forces you to spot problems you’d miss in stereo—suddenly, your balance and clarity issues are right in your face. It’s a simple trick, but it really works, and your mix will translate better, regardless of where people listen.
Understanding The Benefits Of Mono Mixing
Mono mixing lets you focus on the essentials. With stereo out of the way, you can actually hear if your elements are fighting each other or if the balance is off.
It’s wild how quickly you’ll notice masking issues in mono. Two sounds that seemed fine in stereo might suddenly blur together.
Most people don’t think about how often music plays back in mono—on phones, Bluetooth speakers, and in clubs—so if your mix holds up in mono, you’re golden almost anywhere.
It’s also just easier to judge levels. When you can’t pan things out of the way, you’re forced to get the core balance right.

How To Set Up Your DAW For Mono Mixing
Start with a quick stereo rough mix so you have something to compare to later.
Then slap a mono plugin on your master bus. Every DAW has a way to do this—hunt around if you’re not sure where it is.
If you’re feeling fancy, grab a mid-side plugin and solo the mid channel; the same result, but a different route.
Set up your monitoring so you can easily switch between mono and stereo without needing to dig through menus every time. It saves so much time.
Some folks even use headphones tuned for mono work. Not a must, but it can help if your room is tricky.
Identifying And Fixing Phase Issues
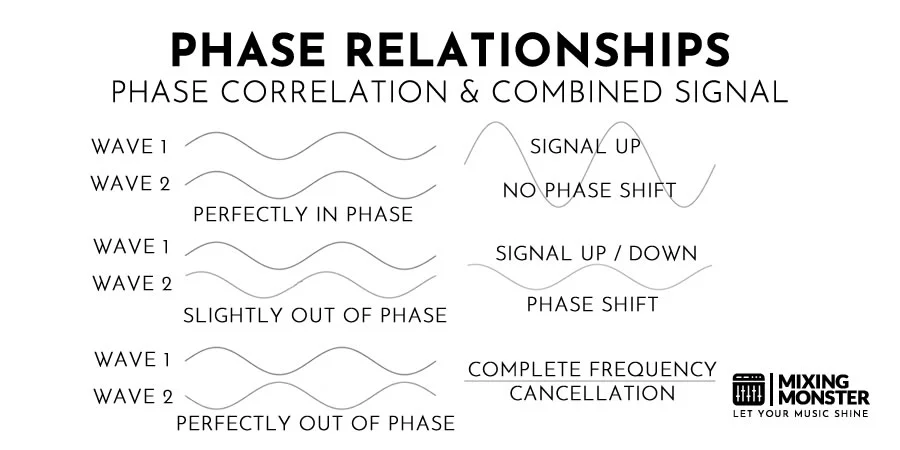
Phase problems jump out in mono. If something vanishes or sounds weirdly thin when you switch, that’s your clue.
Use a correlation meter—if it dips into the negatives, you’ve probably got a phase issue.
Adjust the phase at the source if possible. Move the mics around when recording, or nudge tracks in your DAW to align the transients.
With stereo tracks, try flipping the polarity on one side to see if it improves the sound. If the sound fills out in mono, keep it flipped.
Sometimes, a little surgical EQ on the offending frequencies (especially with a parametric EQ) can fix phasey messes.
Transitioning From Mono To Stereo
Once your mono mix feels tight, start reintroducing stereo. Begin with panning, then layer in stereo effects.
High-pass filters help clean up low-end junk that can mess with stereo width.
Don’t go wild with stereo wideners—too much and you’ll lose mono compatibility fast. Subtlety wins.
Keep flipping between mono and stereo as you go. If it sounds solid in both, you’re on the right track.
Some engineers swear by spending at least half their mixing time in mono. Not a bad habit, honestly.
2. Mixing Tip 2: Use EQ To Create Space For Each Element
EQ lets you carve out a spot for every sound. By knowing your frequency ranges, you can prevent tracks from overlapping.
Identifying Frequency Ranges For Different Instruments
If you can get the frequency spectrum under control, EQ becomes significantly less intimidating. Kicks typically live around 50-100 Hz (plus a click at 2-5 kHz), snares usually range from 200-400 Hz, with a snap up top, and bass usually resides from 60-250 Hz.
Guitars can range from 80 Hz to over 5 kHz. Vocals are present throughout, but the frequency range of 100 Hz to 8 kHz covers most of it, with a notable “present” near 3-5 kHz. Cymbals and hats? They’re mostly 10 kHz and up.
Once you know where things sit, you stop guessing and start making real EQ moves. It’s mostly about keeping stuff from masking each other.
Subtractive EQ Techniques
Cutting is usually better than boosting. Instead of cranking up what you want, pull out what you don’t. It maintains a natural feel and avoids phase weirdness.
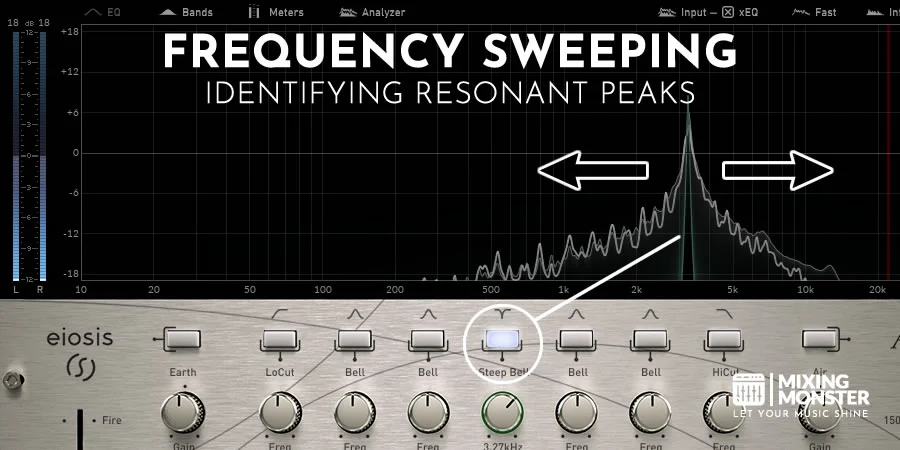
Try this: sweep a narrow EQ boost through the spectrum until something sounds nasty, then cut there. Simple, but it works.
- Find the ugly frequency
- Boost it with a narrow Q
- Sweep around until it’s obvious
- Then cut that spot instead of boosting somewhere else
This approach clears up muddy lows and tames harsh highs—especially on resonant instruments or bright vocals.
Using High-Pass And Low-Pass Filters Effectively
High-pass and low-pass filters are your best friends for decluttering a mix. High-pass filters chop out rumble; low-pass filters smooth out piercing highs.
High-pass almost everything except the material that requires a low end. Like:
- Vocals: 80-100 Hz is usually safe
- Guitars: try 100-120 Hz
- Snare: somewhere in the 100-200 Hz range
Low-pass filters can keep reverb and pads from getting too fizzy. Try these settings:
- Reverb returns: 5-10 kHz
- Drum overheads: 12-15 kHz
- Synth pads: 8-12 kHz
Advanced EQ Techniques: Mid-Side And Dynamic EQ
Mid-side EQ lets you treat the center and sides of your mix differently. Want wider overheads? Boost the highs on the sides. Need to keep bass tight? Cut the lows out of the sides so it stays dead center.
Dynamic EQ is like EQ that only activates when needed. It’s a lifesaver for taming harsh vocals or ringing guitars without always squashing everything.
- Tame sibilance or harshness in vocals
- Control guitar resonances
- Keep the low end from building up too much
With these tools, you can get a slick, professional mix that still feels alive and natural. There’s no one-size-fits-all, so experiment and trust your ears.

3. Mixing Tip 3: Master Compression For Punch And Control
Compression shapes your dynamics and adds the punch you hear in professional mixes. Once you get a handle on compression, your tracks sit better—more polished, but still lively.
Understanding Compression Parameters
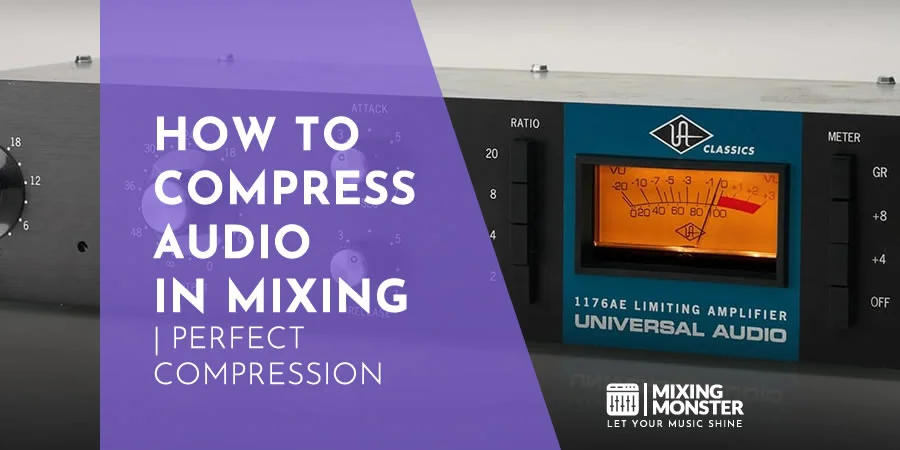
Compression comes down to a few knobs: threshold, ratio, attack, release, and makeup gain. Set the threshold for when compression kicks in, and the ratio for how hard it clamps down.
Attack and release let you shape the sound—fast attack tames peaks, slow release smooths things out. Makeup gain brings your level back up after all that squashing.
Dialing these in helps you control dynamics and give tracks character, whether it’s a single vocal or your whole mix.
Applying Compression To Individual Tracks
Compressing tracks keeps them steady and in their place. Vocals typically prefer a medium attack and release, possibly a 4:1 ratio for a bit of glue.
For drums, a quick attack can tighten them up. Bass? Try a slower attack for more impact, but avoid overexertion.
Listen as you tweak. Too much compression kills the vibe, so use a light touch.
Bus Compression Techniques
Bus compression glues groups or your whole mix together. Start with gentle—low ratios (2:1 or 3:1), barely 1-3 dB of gain reduction.
Use slower attacks to keep transients punchy, and medium releases for added smoothness. Slap it on early if you want to shape how things interact, but don’t crush it—subtlety is everything here.

Parallel Compression For Added Energy
Parallel compression is like cheating—blend a squashed version of your track with the dry one and you get punch and energy without losing dynamics. Drums, vocals, and even the whole mix can benefit.
Just send your signal to a compressor set to “smash,” then mix that back in with the original until it feels right.
It’s all about finding that sweet spot where things sound bigger but not overcooked. Experiment with attack and ratio until it feels right.

4. Mixing Tip 4: Utilize Reverb And Delay For Depth And Dimension
Reverb and delay are your secret weapons for turning flat tracks into something immersive. Used right, they add space and vibe that dry recordings can’t match.
Choosing The Right Reverb Type For Your Mix
Picking the right reverb makes a huge difference. Room reverbs give you intimacy, halls make things epic, and plates bring that classic shimmer to vocals and drums.
Convolution reverbs sound super realistic if you want a natural space. Algorithmic reverbs are more tweakable, allowing you to get creative with your sound.
Honestly, the genre matters a ton—short, snappy reverbs fit rock and pop, but if you’re doing ambient or cinematic, go long and lush. Try a few and see what best suits the mood.

Creating Depth With Pre-Delay And Decay Times
Pre-delay and decay times really shape the sense of depth in a mix. Pre-delay creates a gap between the dry sound and the reverb tail, making things feel clearer and, honestly, more three-dimensional.
Short pre-delay settings—think 20 to 40ms—tend to keep sounds upfront and immediate. If you want to push something back, try longer pre-delays in the 60 to 100ms range. It’s not a strict rule, but it works pretty well most of the time.
Decay time refers to the duration of the reverb’s persistence. Short decays (about half a second to a second and a half) help keep things crisp, especially if the track moves quickly. Longer decays, such as two to five seconds, can make things feel big and lush, but too much of it, and the whole mix just gets washed out.
Honestly, experiment with pre-delay and decay combinations until each part feels right in its spot. There’s no perfect setting—your ears will tell you when you’ve nailed it.
Using Delays For Width And Space
Delays can create a mix and add space without stepping on your reverb. Stereo ping-pong delays can create a sense of movement and expand the stereo field, enhancing the overall listening experience.
For a subtle sense of width, I prefer short delays (20-40ms) panned out to the left and right. You get this nice doubling effect that fattens things up, but it doesn’t scream “delay.”
Longer delays—say, 80 to 250ms—bring in echoes and a bit of rhythmic energy. If you sync them to your track’s tempo, they just fit better and don’t get in the way.
Try using different delay times on each side. It’s a simple trick, but it makes the space feel more interesting and less predictable.
Balancing Dry And Wet Signals
Getting the dry/wet balance right is everything when you want depth but don’t want to lose clarity. It’s easy to go overboard with reverb and delay, so I usually start with things bone-dry and gradually increase the wet level until I notice the desired effect. That’s usually enough.
On vocals and other leads, automation helps a ton. You can dial back the reverb during busy moments and increase it when the situation quiets down. It keeps the important stuff front and center when it matters.
Using sends instead of inserts gives you significantly more control, especially if you want to apply the same effect to multiple tracks. It’s just easier to keep everything sitting together in the same space and make tweaks as you go.

5. Mixing Tip 5: Automate For Dynamic And Engaging Mixes
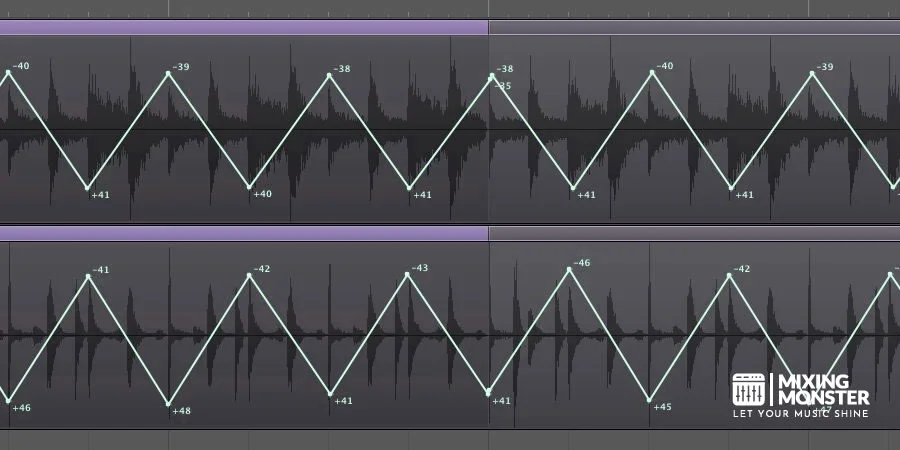
Automation is where mixes start to feel alive. It allows you to shape every detail throughout a song, so things never become static or dull. You can really play with dynamics and keep people listening.
Volume Automation For Consistent Levels
Volume automation is a lifesaver for maintaining steady levels. Vocals, especially, need a lot of attention—they rarely sit right without some fader rides. Vocals almost always require some assistance to remain present without overpowering the other elements.
Engineers ride the fader to boost quiet lines and pull back on the loud stuff. That way, every word cuts through, but nothing jumps out and ruins the balance.
With instrumentals, you can use volume automation to highlight different sections. You may want the guitars to pop in the chorus, or you want to duck them during a solo. It’s all about keeping things interesting and not letting any one part dominate for too long.
EQ Automation For Frequency Balance
EQ automation allows you to adjust the tone as the song progresses. Sometimes a frequency only becomes a problem in certain sections, so why not fix it just for those moments?
You pull some low mids on the guitars when the vocals come in to create space. Alternatively, you can boost a specific frequency for a lead that needs to stand out in the bridge. It’s not about set-and-forget—it’s about responding to what the song needs as it goes.
You can also use EQ automation to shift the overall vibe. Brighten up the chorus, warm up the verse, that kind of thing. It’s subtle, but it adds a lot of life.
Automating Effects For Interest And Movement
Effects automation keeps things moving. If every sound has the same reverb or delay the whole time, it gets old fast. But if you automate those effects, you can make moments stand out.
For example, you might crank up the reverb at the end of a vocal phrase to add a bit of drama. Or automate a delay throw on one word for emphasis. It’s a nice way to add interest without cluttering the whole mix.
Filter sweeps on synths or pads can effectively build tension or allow things to breathe. Especially in electronic music, that kind of movement makes a big difference.
Creating Build-Ups And Transitions With Automation
Automation is tremendous for transitions and build-ups. It’s what makes a chorus hit harder or a drop feel satisfying.
Bypassing plugins for a section can totally change the feel, like dropping a compressor for a bridge to let things open up.
Raising the cutoff on a low-pass filter is a classic build-up trick. As the highs creep in, you get this sense of anticipation that works.
Volume swells on pads or atmospheres can cause sections to glue together. It’s an easy way to keep the energy flowing between verses and choruses.
Automating sends for reverb or delay right before a chorus can make the drop hit even harder. It’s all about timing those moments for the biggest impact.

6. Key Takeaways For Audio Mixing Tips
Audio mixing is a make-or-break step in music production. It takes a good ear, patience, and a lot of practice.
A good mix always starts with solid recordings. If you can get clean, balanced tracks up front, everything else is easier.
Reference tracks are your best friend. They keep you honest about how your mix stacks up and help you avoid getting lost in your own project.
Gain staging matters. Keep those levels in check to avoid distortion or unwanted noise later on.
EQ is where you carve out space for everything. Take your time—sometimes it’s just a small cut or boost that makes instruments fit together.
Some things to keep in mind for mastering audio mixing:
- Use compression carefully to keep dynamics under control
- Add reverb and delay for depth, but don’t overdo it
- Pan things with the intention of opening up the stereo field
- Listen to different volumes so your mix works everywhere
- Take breaks—your ears get tired faster than you think
- Get feedback from people you trust (and don’t take it personally!)
Mastering comes at the end. It’s the polish that gets your track ready for release, whether it’s for streaming, vinyl, or any other format.
If your mix is balanced and tight, mastering goes way smoother. Aim for that before you send your music off for the final touch.
Happy mixing!

FAQ
1) What are the essential techniques for beginners to learn in audio mixing?
Start with EQ, compression, and level balancing. EQ shapes the tone of each track, compression keeps the dynamics in check, and getting the levels right helps everything sit together.
2) Which tools and software are recommended for mixing and mastering music?
People swear by DAWs like Pro Tools, Logic Pro, and Ableton Live. You’ll need basic plugins, such as EQs, compressors, and reverbs. For mastering, tools like iZotope Ozone or Wavelab often come up.
3) How can one enhance their ability to mix different tracks seamlessly?
Honestly, mix a lot. Listen to pro mixes in your genre, try to match them, and don’t be afraid to get feedback. Mixing different styles will also stretch your skills.
4) In what ways can sound be properly balanced during a live DJ set?
Preview tracks in headphones before you drop them in. Monitor gain to prevent distortion. Tweak EQ so things blend. Constantly monitor your main output to maintain a consistent vibe and prevent sudden volume jumps.
5) Are there strategies for achieving the perfect mix in a home studio environment?
Treat your room as well as you can—it helps more than you think. Invest in good monitors or headphones. Take breaks to keep your ears fresh. And always check your mix on different speakers before calling it done.
6) What methods ensure clarity and quality when mixing vocals and instruments?
Dialing in EQ thoughtfully prevents vocals and instruments from clashing or overlapping in frequency. Compression—when you don’t overdo it—lets vocals stay present without jumping out or disappearing. A touch of reverb or delay adds depth, but too much can cause things to blur. Honestly, automating volume and effects as you go can really bring a mix to life, letting each part shine when it needs to.

