Home > Blog > Mixing > Mixing Insights
Disclosure: Some of the links below are affiliate links, meaning that at no additional cost to you, we will receive a commission if you click through and make a purchase. Read our full affiliate disclosure here.
Audio compression is one of the most essential tools in music production, podcasting, and broadcasting. In audio engineering, compression refers to controlling the dynamic range of sound — the difference between the quietest and loudest parts of an audio signal.
An audio compressor reduces the level of sounds that go above a certain point (the threshold) and does so by a certain amount (the ratio). This helps maintain consistency, prevent distortion, and create a more polished, professional mix.
Whether you’re mixing vocals, balancing instruments, or preparing audio for streaming, understanding how thresholds and ratios work is crucial to creating a precise and controlled sound that retains its natural energy.
KEY TAKEAWAYS:
- Threshold sets the level at which compression begins — signals above this point get reduced.
- Ratio determines how much the signal is reduced once it passes the threshold (e.g., 4:1 means that for every 4 dB over the threshold, only 1 dB gets through).
- Higher ratios = heavier compression, helpful in limiting peaks; lower ratios = gentler control, useful for smoothing dynamics.
- The correct settings depend on the source (vocals, drums, podcasts, etc.) and the desired sound — subtle for natural dynamics, strong for punchy or controlled mixes.
Table Of Contents
1. What Is Compression Ratio And Threshold In Audio?
2. Why Compression Ratio Matters In Modern Music Production
3. Compression Threshold Settings Explained For Producers
4. Practical Tips For Using Compression Ratio And Threshold
5. Advanced Techniques For Audio Compression
6. Key Takeaways For Managing Audio Compression And Threshold
FAQ

1. What Is Compression Ratio And Threshold In Audio?
The compression ratio in audio indicates how much the signal is reduced in volume once it reaches a certain loudness level, while the threshold determines exactly when the reduction begins. These two work together, shaping the dynamics and giving you that polished, professional sound.
Defining Audio Compression Ratio In Simple Terms
The compression ratio determines how much the volume decreases when your audio exceeds the threshold. With a 4:1 ratio, for every 4 decibels above the threshold, you only get 1 decibel out.
Lower ratios, such as 2:1 or 3:1, are subtle, keeping things sounding natural. They’re great for acoustic tracks and vocals where you want to keep the original feel.
Crank the ratio up to 6:1 or 8:1 and you get punchier, more controlled results. Pop and hip-hop producers love these settings for their tight, in-your-face sound.
Common Ratio Settings:
- 1:1 – No compression at all
- 2:1 – Gentle, transparent compression
- 4:1 – Medium, more obvious control
- 8:1 – Heavy compression, lots of squashing
- ∞:1 – Limiting, nothing gets past the threshold
The ratio uses input-to-output numbers and really decides how squashed your audio ends up.
Understanding Threshold And Its Role In Audio Dynamics
Threshold is the level where compression kicks in, usually measured in decibels. Anything below it passes through untouched, but once you go above, the compressor jumps into action based on your chosen ratio.
If you set the threshold too low, you’ll squash even the quiet stuff, and everything turns flat and lifeless. Too high, and only the loudest peaks get hit.
Most engineers aim just above the average level to capture the loudest bits while maintaining the natural feel of the performance. That way, you tame the wildest peaks but keep the music’s character.
Threshold Guidelines:
- Vocals: -12 dB to -18 dB for steady presence
- Drums: -6 dB to -12 dB for punch
- Bass: -10 dB to -15 dB for a solid foundation
The threshold and ratio knobs are closely interdependent. Threshold decides when to compress, and ratio determines how much.
How Audio Compression Ratio And Threshold Work Together
Threshold and ratio form a cause-and-effect chain: threshold triggers compression, and ratio sets how hard it hits. Lowering the threshold increases the frequency of compression, while a higher ratio amplifies each event’s impact.
Getting these settings right is everything. Low threshold and gentle ratio? You get subtle control. High threshold and aggressive ratio? You only tame the loudest spikes.
Many engineers start with something like -15 dB threshold and 3:1 ratio, then tweak from there. Rock vocals need -10 dB and 4:1 for punch, while classical music gets away with -20 dB and 2:1 for a lighter touch.
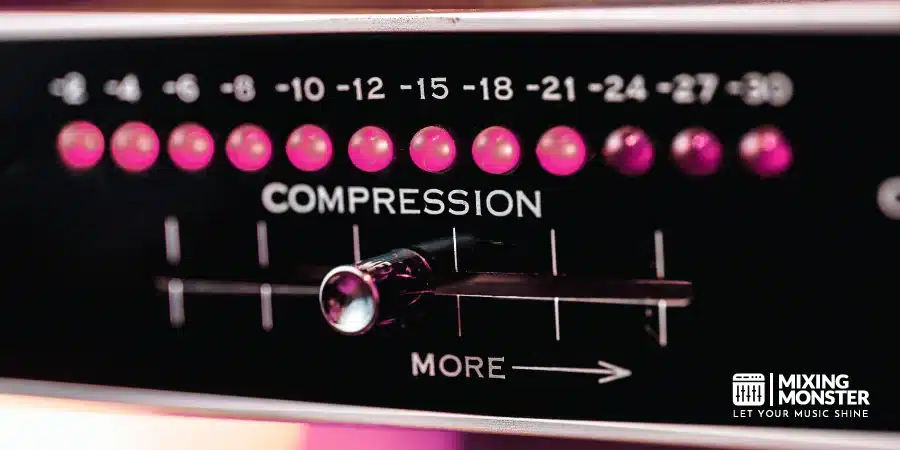
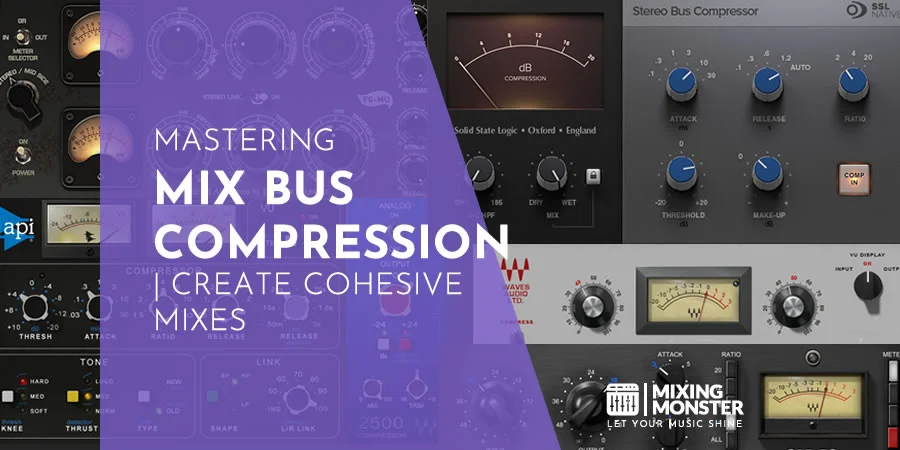
The gain reduction meter indicates the amount of compression achieved once the threshold is exceeded. Lower thresholds or higher ratios mean more gain reduction—simple as that.
Real-World Examples In Audio Mixing And Mastering
For vocals, a -15 dB threshold with a 3:1 ratio usually reins in big singers but lets the softer moments shine through. It’s a good compromise between control and emotion.
On a drum bus, -8 dB threshold and 4:1 ratio can glue the kit together. The settings catch the peaks and add punch without flattening everything.
Bass guitars often have a -12 dB threshold and a 3:1 ratio to maintain a solid low end. This way, every note stays present, and the mix doesn’t get muddy.
Mastering Applications:
- Full mix: -3 dB threshold, 2:1 ratio for subtle glue
- Vocal bus: -10 dB threshold, 3:1 ratio for smoothness
- Drum room: -15 dB threshold, 6:1 ratio for room control
Most mastering compression ratios stay between 2:1 and 4:1 to keep the music lively but under control.
2. Why Compression Ratio Matters In Modern Music Production
Compression ratios dictate how much a compressor reins in loud signals, and this shapes the whole vibe of a mix. The ratio you set can determine whether vocals sit right, if drums punch through, and whether the final track sounds professional or just…meh.

Controlling Dynamic Range For Balanced Mixes
Dynamic range is just the difference between the quietest and loudest parts of your track. Compression ratios give you the tools to manage this range—you can tame peaks but still let the music breathe.
Low ratios (2:1 to 3:1) maintain a gentle and natural feel. These are perfect for acoustic songs and ballads where you want to hold onto every bit of emotion.
Medium ratios (4:1 to 6:1) offer more control, but without making the compression too obvious. Most pop and rock tracks use these on vocals and rhythm to keep things tight but not robotic.
High ratios (8:1 and up) mean serious control—think EDM or hip-hop, where you want everything to hit hard and stay consistent.
| Ratio Range | Dynamic Control | Best Applications |
|---|---|---|
| 2:1 – 3:1 | Light | Acoustic, jazz, classical |
| 4:1 – 6:1 | Medium | Pop, rock, vocals |
| 8:1+ | Heavy | Hip-hop, EDM, drums |
Enhancing Clarity In Vocals And Instruments
Good compression ratios keep important parts from getting lost in a busy mix. Vocals usually sound best between 3:1 and 6:1, letting you control peaks but still keep that human touch.
Lead vocals often sit nicely at 4:1, which holds the loud sections in check but lets quiet, intimate lines come through. That’s what makes a vocal feel alive.
Use backing vocals with lighter compression—2:1 or 3:1. If you go too heavy, they’ll start to sound robotic, losing the subtle differences that make harmonies wide and interesting.
For instruments, bass guitars may get 4:1 to 6:1 for a steady low end. Drums are all over—kicks at 6:1 for punch, snares at 4:1 for crack, and overheads at 2:1 to keep cymbals natural.
Avoiding Over-Compression And Flat Sound
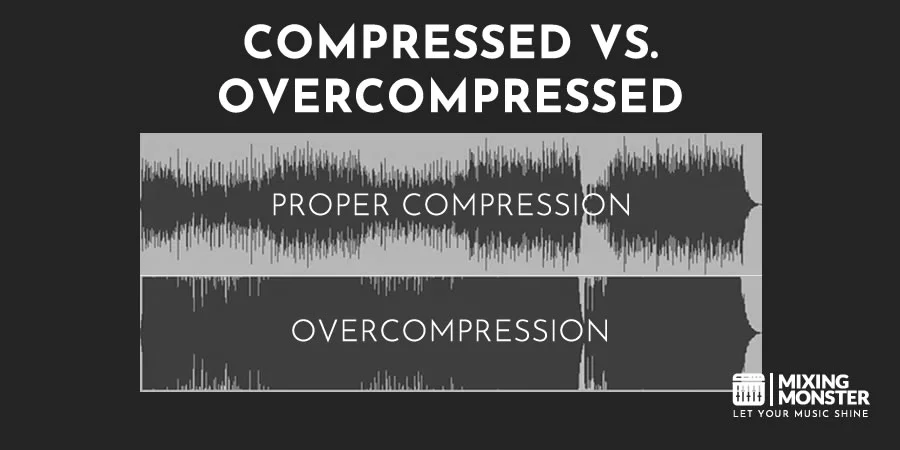
Push ratios above 10:1 and you’ll probably suck the life out of your track. Over-compressed mixes sound squashed, tedious, and exhausting after a while.
If you hear pumping—where the compressor grabs and lets go in a distracting way—you’ve probably gone too far with ratio, threshold, or attack. It’s a dead giveaway.
Warning signs of over-compression:
- Drums lose their punch
- Vocals sound too even, almost fake
- The mix feels flat, no sense of space
- You get tired of listening after just a few minutes
Start with a safe ratio, such as 3:1, and only increase it if necessary. A/B test with and without compression to find that sweet spot where things sound polished but not crushed.
The Impact Of Compression Ratios On Different Genres
Each genre treats compression differently based on its own sound. Hip-hop and trap often employ aggressive ratios to achieve that upfront, punchy vibe, whereas acoustic styles prefer a more natural and dynamic sound.
Electronic music leans hard on 6:1 to 10:1 ratios for a tight, consistent sound. Kick drums and bass synths need to be right up front to keep the groove locked in.
Rock and metal usually stick to 4:1 to 6:1 ratios for most tracks. Drums get hit harder for power, while guitars need just enough compression to keep them lively.
Jazz and acoustic genres prefer 2:1 or 3:1. Here, it’s all about keeping the music expressive and dynamic, so compression stays subtle.
Pop music often lands around 4:1. That’s enough to sound polished and radio-ready, but not so much that it kills the energy.


3. Compression Threshold Settings Explained For Producers
Threshold decides when your compressor actually starts working on the audio. It’s the main control for activating dynamic range reduction, and getting it right allows you to target just the loudest parts while letting quieter moments breathe.
Setting The Right Compression Threshold For Vocals
Vocal compression really comes down to finding that sweet spot for the threshold. You want to control uneven volume but still keep things sounding natural. Usually, a threshold between 18dB and -12dB works for most vocal recordings. This way, the compressor grabs the louder bits but leaves the softer moments alone.
Lead vocals require threshold settings that capture sharp consonants and emotional peaks. Don’t squash the whole performance, though. Try setting the threshold so compression only kicks in for the loudest 20-30% of the vocal.
Background vocals play by different rules. Drop the threshold 3-6dB lower than your lead. That helps keep them steady in the mix and not poking out awkwardly.
Watch your gain reduction meters as you adjust. Shoot for 2-4dB of gain reduction on average, with peaks sometimes hitting 6-8dB if things get really dynamic.
Threshold Adjustment For Drums And Percussion
Drum compression is a whole different beast, thanks to those sharp transients and unpredictable dynamics. Kick drums usually sit well with thresholds between -15dB and -8dB. Of course, it depends on how hot you tracked them and how much punch you’re after.
Snares? Set the threshold around 12dB to -6dB. That way, you tame the main hit but let the ghost notes breathe. Nobody wants a lifeless snare.
Overhead microphones are a bit more delicate. Try thresholds between -20dB and -15dB. You’ll keep the cymbals sounding natural and prevent those nice decays from being crushed.
Room mics like even higher thresholds—think -25dB to -18dB. That lets the ambience come through, but reins in the loudest hits before the room sound gets out of control.
Using Threshold To Manage Loud Peaks
Managing peaks is really about setting the threshold high enough to catch the nasty volume spikes, but not so low that you squash everything. Try putting thresholds 6-10dB above your average signal. That should only grab the worst offenders.
Managing loud peaks works best if you pair higher ratios with careful threshold placement. You get clean peak control without that unmistakable pumping sound.
Transient-heavy sources, such as acoustic guitar or piano, require a delicate touch. Set the threshold to only clamp down on the top 10-15% of the loudest transients. Otherwise, you risk killing the vibe.
Don’t just stare at meters—listen. Use visual metering to help, but trust your ears. The compressor should only jump in for the peaks, not hover over the whole track.

Common Mistakes Beginners Make With Threshold
Setting the threshold too low? That’s a rookie move. You’ll experience constant compression, which will compromise the natural feel. Beginner producers fall into this trap a lot, compressing every single bit instead of just the problem spots.
Over-compression happens when the threshold is always engaged. Instead, aim for compression that comes and goes—let the music breathe!
People often forget that the threshold and ratio work together. If you use a low threshold, stick to a gentle ratio. High thresholds can handle more aggressive ratios without making things sound weird.
Relying on meters too much is another pitfall. Yes, meters are helpful, but your ears should ultimately make the final decision. If it sounds worse, it probably is.
Forgetting to adjust thresholds for different song sections results in uneven dynamics. Automate those changes between verses, choruses, bridges—whatever it takes to keep things smooth.

4. Practical Tips For Using Compression Ratio And Threshold
Getting good at compression means knowing which ratio and threshold combos fit each instrument and mix situation. It’s a process—dial in your settings, pick the right tools, and adapt your approach for mixing versus mastering.
Step-By-Step Guide To Dialing In Audio Compression
First, set your threshold at the track’s average level. That gives you a baseline for how the compressor reacts.
Start with a moderate 2:1 or 3:1 ratio. This keeps things natural but still under control.
Adjust the threshold until your gain reduction meter bounces around 2-4 dB during louder moments. That’s usually enough to keep things tidy without squashing the life out of it.
Listen as you bypass and re-enable the compressor. Does it sound tighter, but still energetic? That’s what you want.
Bump the ratio up to 4:1 or 6:1 if you need more control, or drop it to 1.5:1 for just a touch of smoothing. There’s no magic number—just what works for the track.
Don’t forget makeup gain. Match levels between compressed and uncompressed signals so you can really hear what’s changing.
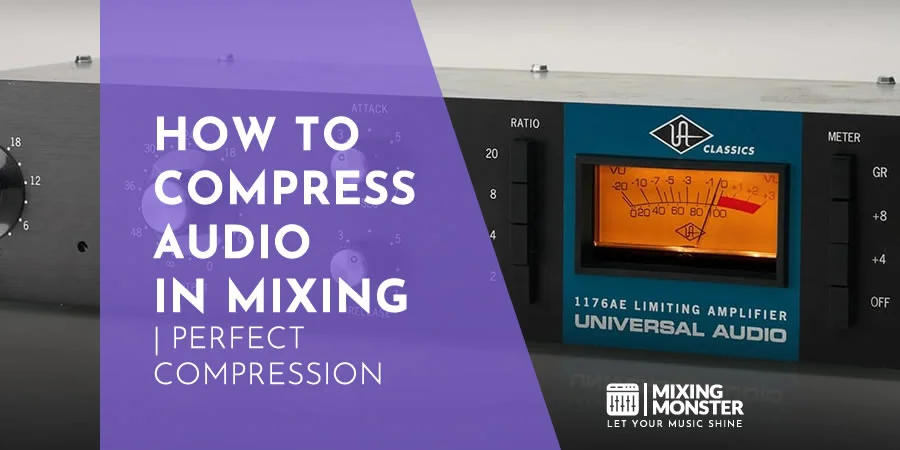
Recommended Compression Ratio And Threshold Settings By Instrument
Vocals need to stay steady but not flat—ratios of 3:1 to 4:1 work well, with thresholds set to catch only the loudest parts.
Drums are a mixed bag. Kick drums are suited for 4:1 to 6:1 ratios for punch, and snares are happy with similar settings for that crisp attack.
| Instrument | Ratio Range | Threshold Setting |
|---|---|---|
| Lead Vocals | 3:1 – 5:1 | -12 to -18 dB |
| Kick Drum | 4:1 – 8:1 | -6 to -12 dB |
| Snare Drum | 3:1 – 6:1 | -8 to -15 dB |
| Bass Guitar | 3:1 – 5:1 | -10 to -16 dB |
| Acoustic Guitar | 2:1 – 4:1 | -15 to -20 dB |
Bass instruments need ratios in the 3:1 to 5:1 range. Set your threshold so it only grabs the strongest notes, not every little nuance.
Acoustic instruments are delicate. Stick to 2:1 or 3:1 ratios to keep things expressive but manageable.
How to Use Compression in Mixing vs. Mastering
Mixing compression is all about getting each track to sit right. Ratios between 2:1 and 6:1 usually do the trick, depending on what needs fixing.
Use compression to smooth out vocals, tame drum transients, or address any other issues that are bothering you. Each track gets its own treatment—no one-size-fits-all here.
Mastering compression takes a lighter touch. Ratios rarely exceed 3:1, and most of the time, you’ll see a ratio of 1.5:1 to 2:1 for that subtle glue effect.
Set the threshold high so that only the most prominent peaks are caught. Mastering isn’t about significant dynamic changes—it’s about cohesion.
Remember, mastering compression hits the whole stereo mix at once. Pay attention to how each frequency range reacts, or things can get messy fast.
Tools And Plugins That Simplify Compression
Hardware-modeled plugins bring classic sounds and handy visuals. They usually have presets that make starting less intimidating.
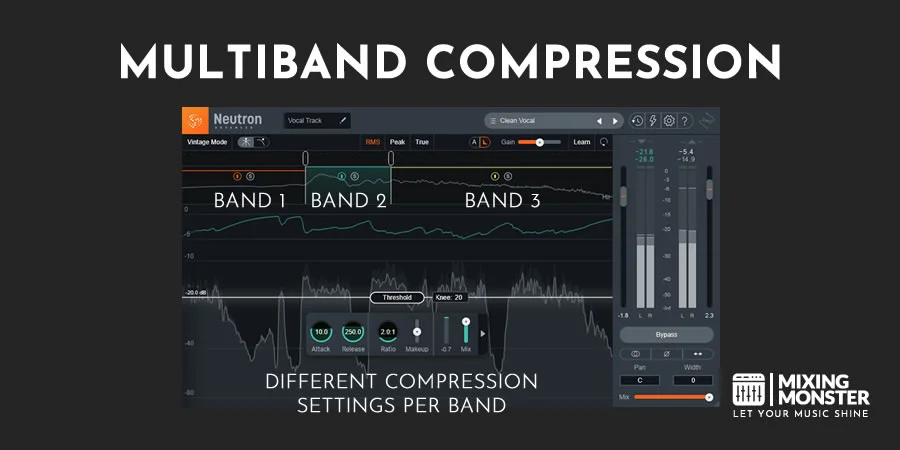
Multiband compressors are excellent for tackling tricky frequencies. You can compress just the muddy mids or harsh highs without affecting the entire signal.
Vintage-style compressors have their own musical vibe and often include automatic makeup gain. They’re great when you want character without a lot of fuss.
Modern transparent compressors shine when you need invisible control. They’ve got precise meters, sidechain filters, and all the bells and whistles you could want.
Plugins with visual gain reduction make it easier to see what’s happening. Real-time meters show exactly when and how much compression you’re getting.


5. Advanced Techniques For Audio Compression
Compression these days isn’t just about basic threshold and ratio moves. There are some wild techniques now—targeting specific frequencies, blending signals, and even using AI for intelligent processing. All this gives engineers more control and opens doors for creative sound design.
Parallel Compression For Modern Mixes
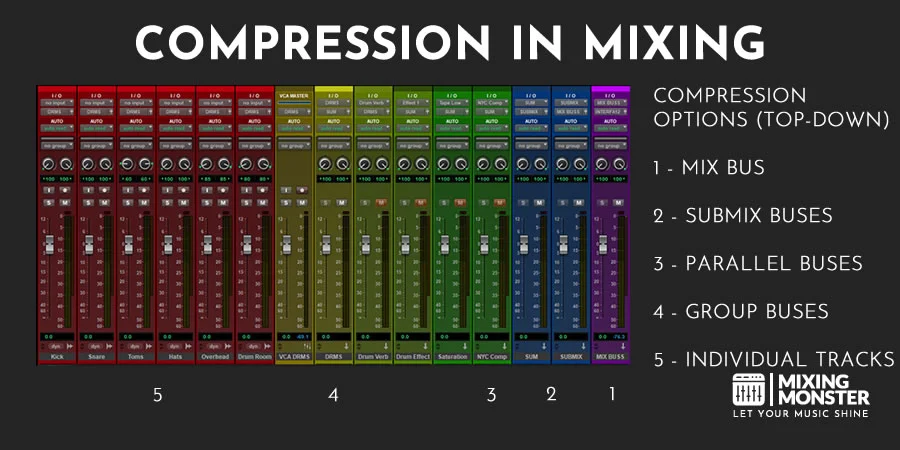
Parallel compression is like having your cake and eating it, too. You blend a squashed duplicate signal with the untouched original. The result? More punch and density, but you don’t lose the natural feel.
Most engineers set up parallel compression by sending audio to an aux bus, then hit it hard—ratios from 10:1 to 20:1, super-fast attack (under 1ms). Blend that back in at maybe 20-40% of the original level. No strict rules, just what sounds good.
Parallel compression works wonders on:
- Drum buses for extra sustain
- Vocals when you want them upfront
- Bass guitar for that solid low end
- Full mixes when you need glue
This technique lets the transients cut through while the body of the sound gets a boost. You can push the compressed signal quite hard and still maintain a musical quality.
Sidechain Compression And Creative Uses
Sidechain compression is a game-changer. Instead of reacting to the track itself, the compressor listens to another source—the sidechain input. That’s how you get those famous ducking and pumping effects.
In electronic music, producers love to use the kick drum as a sidechain input. The bass ducks out of the way every time the kick hits—usually by 3-6dB, with a fast attack and a release around 100-300ms. It’s almost a cliché at this point, but it works.
There are lots of creative options, too. Use vocals to duck reverb for intimate moments, or let percussion trigger compression on pads to add movement. Why not experiment?
Try high-pass filtering the sidechain at 100-200Hz to stop the low end from triggering unwanted compression. Keeps it clean and focused.
Multiband Compression For Precision Control
Multiband compression divides your audio into distinct frequency bands, enabling you to compress each one individually. It’s great when you need to fix specific problem areas without messing up the rest of the mix.
Most folks split bands around 200Hz, 2kHz, and 8kHz, ending up with four zones. Each gets its own threshold, ratio, attack, and release. For example, you can tame muddy low-mids or harsh sibilance without touching the rest.
Common multiband uses:
- Low band (20-200Hz): Smooth out bass with a slow attack and medium release
- Low-mid (200Hz-2kHz): Control resonances with moderate compression
- High-mid (2-8kHz): Tame vocal harshness with quick attack
- High band (8kHz+): Handle sibilance and “air”
Mastering engineers love multiband compression for balancing frequencies across a whole mix. It prevents you from over-compressing areas that don’t require it, which is always a win.

AI-Powered Compression Tools
Artificial intelligence compression systems analyze audio content and automatically adjust parameters based on what they hear. These tools lean on machine learning algorithms trained on professional mixing moves.
AI compressors can adapt attack and release times by detecting transients. They recognize vocals, drums, and instruments, then apply compression curves that fit each source.
Some systems even learn from user tweaks, so their automated decisions get smarter over time. Modern AI compression offers style-based presets that aim to replicate the vibe of classic hardware or specific mixing styles.
The algorithms dig into harmonic content and dynamic range, picking out the processing chain that makes the most sense. You get consistent results across all sorts of input levels, and setup time drops for the usual compression jobs.
But engineers still keep manual override handy for those creative or just plain stubborn moments.

6. Key Takeaways For Managing Audio Compression And Threshold
Threshold determines when compression begins. The threshold acts as a gatekeeper, setting the point where the compressor actually kicks in and starts working on the audio signal.
Lower thresholds compress a greater portion of the signal. If you set the threshold lower, the compressor kicks in more often, allowing it to shape both loud and quiet parts of the track.
Higher thresholds target only peaks. With a higher threshold, the natural dynamics come through, and only the loudest bits get tamed.
| Threshold Setting | Best For | Effect |
|---|---|---|
| Low (-20 dB to -15 dB) | Vocals, acoustic guitars | Controls more of the signal’s dynamics |
| Medium (-15 dB to -10 dB) | Bass, rhythm instruments | Balances control with natural feel |
| High (-10 dB to -5 dB) | Drums, percussion | Catches peaks without over-processing |
Ratio and threshold work together. The interaction between threshold and ratio settings has a significant influence on how the compressor operates and sounds.
Start with conservative settings. Try higher thresholds and lower ratios initially, then adjust them while listening to how the track breathes.
Listen in the context of the whole mix. Always check how your threshold tweaks fit with everything else in the song—sometimes what works solo doesn’t sit right in the big picture.
Avoid over-compression by watching the threshold. If you push the threshold too low and crank the ratio, you may end up with flat, lifeless audio that fails to engage anyone.
Happy compressing!

FAQ
1) What is the difference between compression ratio and threshold in audio?
The compression ratio indicates the degree of gain reduction that occurs when the audio exceeds the threshold. With a 4:1 ratio, for every 4 dB you go over the threshold, only 1 dB gets through.
The threshold is just the level where compression starts to work. Anything below it gets left alone, while anything above gets squashed according to the ratio.
Together, these two shape the dynamic range. The threshold is the trigger, and the ratio determines how aggressively you clamp down on the loud sounds.
2) How do I choose the best compression ratio for vocals?
For most vocals, ratios between 3:1 and 6:1 usually do the trick. If you want to keep things natural, stick with 2:1 or 3:1 for a lighter touch.
Use a ratio of 4:1 to 6:1 if you need vocals to stay consistently audible, especially in dense mixes where they can get lost. The genre and style matter a lot here—pop and rock lean higher, while jazz and acoustic stuff often sound better with less compression.
3) What happens if the threshold is set too low in an audio compressor?
If you set the threshold way too low, the compressor never lets up—it grabs even the quietest vocal moments and background noise. That usually ends up sounding squashed and unnatural, with all the life squeezed out.
You may also experience unusual artifacts, such as pumping or breathing. The compressor keeps working, and the vocals lose those little dynamic touches that make them feel real.
Plus, if you’re not careful, you’ll start hearing more room noise or hiss, since those get compressed right along with the vocal. Not exactly what you want.
4) What are the optimal compression ratios for mastering music?
For mastering, gentle ratios—maybe 1.5:1 up to 3:1—usually keep things musical while still gluing the mix together. You want to preserve the vibe, not flatten it.
Multiband compressors can be more surgical, using a ratio of 2:1 on the lows and 1.5:1 on the highs for a more balanced result. Parallel compression is another trick, mixing an uncompressed signal with a heavily compressed one (sometimes up to 10:1) to add density without killing the punch.
5) How do audio compression ratio and threshold settings affect loudness in a track?
When you push higher ratios and lower thresholds, you increase perceived loudness by reducing the dynamic range and raising the average level. Quiet stuff comes up, peaks get tamed, and everything feels a bit more in-your-face.
The threshold decides which parts of the track get hit. Lower it, and you squash more of the signal for a louder but sometimes less expressive result.
Don’t forget makeup gain. After compressing, you’ll probably need to bring the level back up so the track sits right—be sure to watch out for clipping or distortion.
6) What are common mistakes when setting audio compression thresholds?
Engineers sometimes set thresholds way too low, and that crushes the natural dynamics. Suddenly, everything gets squashed—no peaks, no valleys, just a flat, kind of lifeless sound.
When that happens, the music can lose its spark and emotional punch. Who wants a recording that feels robotic?
There’s also the issue of not fully considering how threshold and ratio settings interact. If you go with a low threshold and crank the ratio, you’re likely going to end up with some heavy-handed compression.
On the other hand, a high threshold paired with a gentle ratio might barely affect the signal at all. It’s easy to misjudge how much you’re actually affecting the audio if you don’t pay attention here.
Some folks forget to watch the gain reduction meters, which makes dialing in the right threshold a bit of a guessing game. Keep an eye on those meters and aim for about 2-5 dB of reduction during the louder sections.

