Home > Blog > Studio Gear > Home Studio Gear

Disclosure: Some of the links below are affiliate links, meaning that at no additional cost to you, we will receive a commission if you click through and make a purchase. Read our full affiliate disclosure here.
FL Studio has revolutionized the music production landscape. It empowers creators worldwide to produce professional-quality tracks without requiring expensive studio equipment. Whether you’re a beginner looking to create your first beat or an experienced producer seeking advanced tools, this powerful digital audio workstation offers everything you need to bring your musical ideas to life.
FL Studio is a comprehensive digital audio workstation developed by Image-Line. It enables users to compose, arrange, record, edit, mix, and master music on their computers. Originally known as FruityLoops before 2003, the software features a graphical user interface designed for intuitive music creation using its pattern-based sequencing system.
FL Studio supports various audio formats, including WAV, MP3, and OGG, while offering powerful plugins like Vocodex Vocoder and DirectWave sampler. Available in multiple versions starting at just $99, it’s become the production environment of choice for millions of musicians across genres.
The beauty of FL Studio lies in its balance between accessibility and depth. Beginners appreciate its user-friendly interface and pattern-based workflow, while professionals rely on its advanced MIDI editing, automation capabilities, and high-quality mixing tools.
With the addition of FL Studio Mobile for Android and iOS devices, your productions can continue wherever inspiration strikes.
KEY TAKEAWAYS:
- FL Studio provides a complete music production environment with an intuitive workflow for beginners while offering professional-grade tools for experienced producers.
- The software supports numerous audio formats and includes powerful built-in plugins like Vocodex and DirectWave for comprehensive sound design possibilities.
- FL Studio’s mobile applications allow seamless music creation across devices, enabling producers to develop their ideas anywhere.
Table Of Contents
1. What Is FL Studio And How To Get Started
2. FL Studio’s Essential Workflow Explained
3. Music Production Fundamentals In FL Studio
4. Mixing And Mastering Your Tracks In FL Studio
5. Advanced Production Techniques In FL Studio
6. Troubleshooting Common FL Studio Issues
7. Key Takeaways For FL Studio Mastery
8. FAQ

1. What Is FL Studio And How To Get Started
FL Studio is a powerful digital audio workstation (DAW) developed by Image-Line that offers comprehensive music production capabilities. It provides users with tools for composing, arranging, recording, mixing, and mastering high-quality music tracks.

Understanding FL Studio's Core Features
FL Studio comes in different editions with varying capabilities, including Fruity, Producer, and Signature versions. Each offers expanding functionality for various production needs.
The DAW is built around four main windows: the Playlist (arrangement view), Piano Roll (MIDI editor), Channel Rack (pattern sequencer), and Mixer (audio processing). These components work together to create a complete production environment.
FL Studio includes built-in virtual instruments, effects plugins, and sample manipulation tools. It supports third-party VST plugins, expanding its capabilities even further.
One standout feature is FL Studio’s lifetime free updates policy – once you purchase it, you will receive all future updates for that edition at no additional cost.
System Requirements And Installation Process
FL Studio runs on Windows and macOS systems, with mobile versions available for iOS and Android devices. For optimal performance, your system should have:
- Windows 10/11 or macOS 10.13.6 or higher
- 4GB RAM minimum (8GB+ recommended)
- 4GB free disk space
- Sound card with ASIO support (Windows) for low latency
Installation is straightforward:
- Download the installer from the official Image-Line website
- Run the installer and follow the on-screen instructions
- Select desired components and plugins
- Activate your license using your account credentials
Navigating The Main Interface Windows
You’ll see several key interface elements when you first open FL Studio. The Channel Rack holds your instruments and samples vertically for easy pattern creation.
The Playlist window lets you arrange patterns into a complete song. Patterns created in the Channel Rack appear as blocks you can arrange on the timeline.
The Piano Roll is where you edit notes, providing a piano keyboard on the left and a grid for placing notes. It allows precise control over pitch, timing, velocity, and other parameters.
The mixer handles audio routing and effects processing with individual tracks for each instrument. Each mixer track includes slots for adding effects plugins in your signal chain.

Setting Up Your First Project
To start creating music, begin by experimenting with the Channel Rack. Add an instrument by clicking the + button and selecting from the browser.
Set your project tempo and time signature at the top of the window. The default 4/4 signature at 140 BPM works well for many genres, but you can adjust it.
Create a basic drum pattern using the step sequencer in the Channel Rack. Click grid positions where you want drums to hit – typically kicks on beats 1 and 3, snares on 2 and 4.
Add a melody using the Piano Roll by right-clicking your instrument in the Channel Rack and selecting “Piano roll.” Draw in notes by clicking on the grid or record live with a MIDI controller.
Once you have created patterns, arrange them in the playlist by dragging them from the Channel Rack. Complete beginners should focus on mastering these basic workflows before exploring advanced features.
2. FL Studio's Essential Workflow Explained
FL Studio offers a straightforward yet powerful workflow that enables producers to move from idea to finished track efficiently. The process follows a logical progression from adding sounds to arranging them into a complete composition, with several key tools that streamline music creation.

Adding Instruments To Your Project
The Channel Rack forms the foundation of your FL Studio project. It hosts all your instruments, including VST plugins, samples, and native FL instruments like Sytrus or Flex.
To add an instrument, right-click in the Channel Rack and select the desired plugin from the menu. Alternatively, browse through the Browser panel on the left side and drag instruments directly into your project.
FL Studio organizes instruments in the Channel Rack vertically, making it easy to view all sound sources simultaneously. Each instrument can be routed to a dedicated mixer track for individual processing.
The step sequencer at the bottom of the Channel Rack allows for quick pattern creation using a grid-based interface. This is particularly useful for drum programming, where precise timing is essential.
Creating Patterns And Sequences
The Piano Roll is FL Studio’s main MIDI editor, where you can create melodies, chords, and complex musical phrases. Access it by right-clicking on an instrument and selecting “Piano roll.”
FL Studio’s Piano Roll offers several powerful features:
- Note editing: Place, move, resize, and delete notes with precision
- Scale highlighting: Identify notes in your chosen scale
- Ghost notes: View notes from other instruments for better harmonization
- Piano typing keyboard: Use your computer keyboard as a virtual piano
Patterns in FL Studio act as containers for musical ideas. The Pattern Selector allows you to easily create multiple patterns and switch between them. This pattern-based workflow encourages experimentation and iteration.
Use internal controllers to automate parameters within your patterns for advanced control, creating dynamic and evolving sounds.

Arranging Tracks In The Playlist
The playlist is where individual patterns transform into a complete arrangement. It offers a horizontal timeline view where you can place pattern clips, audio, and automation.
To begin arranging, drag patterns from the Pattern Selector into the playlist. Each pattern can be placed multiple times and edited independently.
FL Studio’s Playlist supports multiple tracks, making it ideal for complex multi-track music projects. Tracks can be grouped, colored, and renamed for better organization.
Key Playlist features include:
- Time markers: Set reference points for sections like verse or chorus
- Playlist tracks: Organize different elements vertically
- Clip consolidation: Render multiple clips into a single audio file
- Automation clips: Create visual representations of parameter changes
Working With Samples And Audio Clips
FL Studio excels at sample manipulation and editing—import audio by dragging files directly into the Playlist or Channel Rack.
Audio clips in the playlist can be stretched, chopped, reversed, and processed with various effects. Right-click any audio clip to access a range of editing options like time-stretching or pitch-shifting.
FL Studio’s slice mapping allows you to chop samples into individual hits and trigger them via MIDI for loop-based production. This is especially useful for working with drum breaks or vocal samples.
FL Studio also offers powerful organization features for audio tracks, including automatic mixer channel association and automation clip creation. This helps maintain a clean, efficient workflow even in complex projects.

3. Music Production Fundamentals In FL Studio
FL Studio offers a comprehensive environment for music creation with intuitive workflows for beat-making, melody creation, sound design, and recording. The platform’s flexibility allows producers of all skill levels to develop professional-quality tracks using digital and analog sources.
Beat Making Techniques
Creating beats in FL Studio starts with the Channel Rack and Step Sequencer, allowing precise rhythm programming. Add drum samples to the Channel Rack by right-clicking and selecting your sounds from the browser.
Use the Step Sequencer’s grid to place hits on specific beats—lighter notes for ghost hits and full brightness for accented beats. The grid defaults to 16 steps but can be expanded for more complex patterns.
Adjust velocities by right-clicking on steps and using the velocity slider for more natural-sounding drums. The Pattern editor lets you create multiple patterns arranged in the playlist.
FL Studio’s FPC (Fruity Pad Controller) provides a pad-based interface for finger drumming with velocity layers and multiple articulations per pad. For sample slicing, FL Slicex loop slicer excels at breaking loops into individual hits that can be rearranged.

Melody And Harmony Creation
FL Studio offers multiple approaches to creating melodies and harmonies. The Piano Roll is the central tool for drawing, recording, or importing notes as MIDI data.
For chord progressions, use the Stamp tool to place predefined chords quickly. Right-click on the Piano Roll and select “Stamp” to access chord presets or create custom stamps. Scale highlighting helps stay in key by showing which notes belong to your selected scale.
Harmonies can be built using the Ghost Notes feature, which displays notes from other channels in a faded color. This visual aid helps create complementary melodic lines. For more complex arrangements, the Score Editor provides traditional notation.
FL Studio supports unlimited instrument channels, allowing producers to layer multiple synthesizers and samplers. The browser provides quick access to scales and chord progressions that can be dragged directly to the Piano Roll.
DirectWave sampler and Sytrus synthesizer provide extensive sound options for melodic elements. Use MIDI import/export to transfer melodic ideas between projects or from other software.
Sound Design Basics With Native Plugins
FL Studio includes powerful synthesizers and effects for creating custom sounds. Sytrus, a versatile FM synthesizer, excels at creating everything from bells to bass sounds through frequency modulation, ring modulation, and subtractive synthesis.
3xOsc offers a more straightforward three-oscillator design perfect for beginners learning synthesis fundamentals. DirectWave Full Sampler allows the creation of multi-layered instruments from recorded audio for sampling.
Sound shaping begins with ADSR envelopes (Attack, Decay, Sustain, Release) found in most FL Studio generators. Adjust these parameters to control how sounds evolve—shorter attacks for percussive sounds and longer releases for pads.
FL’s mixermixer provides extensive signal processing with built-in effects like parametric EQ, compression, and reverb. Create effect chains by adding plugins to mixer tracks and adjusting wet/dry balance to taste.
Automation is key to dynamic sound design—right-click any parameter and select “Create automation clip” to vary settings over time. FL Edison provides advanced audio editing and processing for creating unique sound materials.

Recording Audio And MIDI
FL Studio provides robust recording capabilities for both audio and MIDI. For audio recording, first assign an input in the mixer. Select a track, click the arrow in the top left, and choose your microphone or instrument input.
Arm the track by clicking the record button on the mixer channel. The Edison editor can be loaded into a mixer slot for more detailed recording and editing options. Edison allows non-destructive editing, noise reduction, and beat slicing.
For MIDI recording, first select the instrument channel in the Channel Rack. Click the record button in the transport controls, then play your MIDI controller. Through easy controller mapping, FL Studio supports external MIDI control with most hardware devices.
After recording, quantization tools help align notes to the grid. Select recorded notes in the Piano Roll and press Alt+Q. For more natural-sounding performances, adjust the quantization strength to preserve some human timing variations.
Multi-track audio recording is possible by arming multiple mixer tracks simultaneously. This works great for recording live bands or various microphones. Song Mode allows arranging recorded audio clips and MIDI patterns into a complete track in the playlist.


4. Mixing And Mastering Your Tracks In FL Studio
Creating professional-sounding music in FL Studio requires mastering mixing and mastering processes. These crucial steps transform raw recordings into polished tracks ready for distribution.
Proper Leveling Techniques
Proper leveling forms the foundation of a good mix. Start by keeping your master channel clear of effects during the mixing stage. Instead, route everything to separate mixer channels and create groups for better organization.
Aim to maintain headroom by keeping levels below 0 dB. Most mixer channels should peak between -18 and -6 dB to prevent clipping. This provides ample space for the mastering phase.
Use the mixer’s volume faders to balance elements rather than adjust individual instrument volumes. Start with the most critical elements (typically drums and bass) and build your mix around them.
Consider using compression to control volume fluctuations for dynamic elements like vocals or guitars. FL Studio’s built-in Fruity Compressor or Limiter plugins work effectively for this purpose.

Using The Mixer Channel Rack Effectively
The FL Studio mixer offers powerful routing capabilities that enhance workflow. Each channel can host 10 effects, allowing for complex processing chains. The slot order matters – typically, EQ comes first, followed by dynamics processors, and then time-based effects.
Create dedicated send channels for effects like reverb and delay to maintain consistency and reduce CPU load. This technique allows multiple instruments to use the same effect with individual send amounts.
Color-code-related tracks and use descriptive names for easy navigation—group similar instruments (drums, synths, vocals) using the routing system.
Enable plugin delay compensation to prevent timing issues when using processor-intensive effects. This ensures all tracks remain perfectly synchronized despite varying processing times.
Essential Effects And Processing
EQ is critical for creating space in your mix. Use parametric EQ to cut unwanted frequencies before boosting desirable ones. FL Studio’s Parametric EQ 2 provides visual feedback that helps identify problem areas.
Apply compression judiciously to control dynamics. For guitars, the Hardcore guitar effects suite offers amp simulation and effects designed specifically for guitar processing.
The chorus adds width and dimension to synths and vocals. FL Studio’s Fruity Chorus provides multiple algorithms for different textures.
For spatial effects, reverb creates a sense of environment. Consider shorter reverb times (0.8-1.2s) for rhythmic elements and longer times (2-4s) for atmospheric sounds.
The Maximus multiband maximizer is ideal for controlling specific frequency ranges independently. It excels at taming harsh frequencies while preserving transients.

Final Mix Preparation
Before mastering, conduct a final mix check across multiple playback systems. Listen on headphones, studio monitors, and consumer speakers to ensure the mix translates well.
Export stems (individual tracks or groups) if you plan to have your music professionally mastered. This gives mastering engineers maximum flexibility.
If mastering yourself, create a dedicated mastering chain on a fresh project. Import your stereo mix and apply the following processing order:
- Subtle EQ adjustments
- Multiband compression
- Stereo enhancement (if needed)
- Limiting for volume
Target an integrated loudness of -14 LUFS for streaming platforms. Use FL Studio’s built-in loudness meter to measure your final output accurately.

5. Advanced Production Techniques In FL Studio
FL Studio offers a range of sophisticated techniques that can elevate your productions to professional quality. Mastering these advanced approaches allows producers to create more dynamic, polished, and complex compositions with greater control and precision.
Automation And Expression Control
Automation in FL Studio provides precise control over nearly any parameter in your project. Advanced automation can be implemented through automation clips, which allow you to draw custom curves for parameters like volume, filter cutoff, or effect mix levels.
Recording automation in real-time is another powerful approach. Right-click a parameter, select “Link to controller,” and manipulate the control during playback to capture natural-feeling changes.
To create non-linear responses for more expressive control, utilize tension and channel pressure settings in automation clips. This is particularly effective for creating realistic instrument performances.
Multi-link mapping lets you control several parameters with a single automation clip, perfect for complex sound transitions. This technique is invaluable for creating evolving soundscapes or dramatic builds.
Sidechain Compression Methods
FL Studio offers multiple sidechain compression techniques beyond the standard ducking effect. The most direct method uses Fruity Limiter or Fruity Compressor with external sidechain inputs through the mixer routing system.
Peak Controller provides flexible envelope shaping for more precise control and can be linked to any parameter. This technique allows for creative applications beyond typical bass/kick relationships.
Advanced producers often use volume automation via Fruity Volume instead of compression for cleaner, more customizable results. This approach prevents unwanted compression artifacts.
Ghost triggering is another technique where a hidden signal triggers the sidechain but isn’t audible. This allows for rhythmic movement independent of your actual drum pattern.
For multiband sidechaining, use Maximus to apply different sidechain amounts to specific frequency ranges, keeping the low end tight while allowing higher frequencies to remain present.

Working With Third-Party Plugins
FL Studio’s flexible architecture accommodates various VST versions (VST2/VST3) and VSTi instruments. In the Plugin Manager, you can organize plugins into custom folders and assign favorites for quicker workflow.
Consider bouncing to audio with the “Render to audio clip” function when using CPU-intensive third-party instruments. This preserves processing power while maintaining mix flexibility.
FL Studio’s wrapper settings allow plugin behavior to be fine-tuned. Adjusting buffer sizes can reduce latency or improve stability for problematic plugins.
Bridging options help isolate unstable plugins, preventing crashes from affecting your entire project. This is especially useful when working with older plugins not designed for modern systems.
Bridge communication settings can solve compatibility issues with plugins that require special processing handling. Advanced producers often create template projects with their favorite third-party plugins already configured.
Performance Mode And Live Applications
FL Studio’s Performance Mode transforms the DAW into a dynamic live performance tool. Clips can be grouped and triggered in various patterns, ideal for electronic music performances.
MIDI mapping in Performance Mode allows hardware controllers to trigger clips, adjust effect parameters, and control playback. This creates an intuitive hands-on experience for live shows.
The advanced looping capabilities let you prepare different sections of your track (intro, verse, chorus) as separate clips. These can be triggered on the fly for seamless transitions during live sets.
FL’s audio recording can be used alongside Performance Mode for vocalists and instrumentalists. This enables live audio processing through effects like FL Vocodex for creative vocal transformations.
Configure custom macros to control multiple parameters simultaneously during performance. This technique is perfect for dramatic filter sweeps or transitional effects that simultaneously impact several elements.
6. Troubleshooting Common FL Studio Issues
FL Studio users commonly encounter technical challenges that can disrupt the creative workflow. Resolving these issues quickly requires understanding the most frequent problems related to performance, compatibility, audio configuration, and project management.
CPU Optimization Strategies
FL Studio can become resource-intensive when working with complex projects. To reduce CPU load, enable Smart Disable in the audio settings to automatically deactivate unused plugins. This simple change can dramatically improve performance.
Right-click on the CPU meter to access performance monitoring options that help identify problematic plugins. Consider resetting FL Studio settings, which can solve many seemingly impossible performance issues.
Increase the buffer length in Audio Settings (F10) to reduce CPU strain, which will increase latency. For maximum efficiency, bounce CPU-heavy instruments to audio when no further editing is needed.
Disable unnecessary visual effects by pressing F10 and navigating to the General Settings tab. Features like smooth scrolling and high-quality interfaces consume valuable resources.
Plugin Compatibility Problems
Plugin incompatibility is a frequent source of FL Studio crashes and errors. Before installing new plugins, verify they match your FL Studio version (32-bit vs. 64-bit). Mismatched architecture is a leading cause of stability issues.
When encountering plugin problems, run a diagnostic by selecting Help > Diagnostics from the menu. This tool will gather technical information about your system and the issue for the support team.
Keep plugins organized in dedicated folders and use FL Studio’s “Manage Plugins” feature to scan and verify their functionality. Disable problematic VSTs temporarily to identify which ones may be causing conflicts.
Users with recurring plugin issues should consider purchasing the Signature or All Plugins Bundle, which includes fully integrated and tested native plugins with unlimited technical support.

Audio Driver Configuration
Audio driver issues often manifest as crackling, pops, or complete audio dropouts. FL Studio works best with ASIO drivers for low-latency performance. Download and install ASIO4ALL if your audio interface doesn’t include dedicated ASIO drivers.
Configure buffer settings appropriately:
- Lower buffer size: Reduces latency but increases CPU usage
- Higher buffer size: Decreases CPU usage but increases latency
Persistent audio problems require reinstalling drivers or switching to a different audio interface. Experiment with varying device options in the Audio Settings (F10) to find the most stable configuration.
Disable Windows system sounds when using FL Studio to prevent unexpected audio interruptions. This can be done through the Windows Control Panel under Sound settings.
Project Backup And Recovery
FL Studio’s autosave feature helps prevent data loss, but manual backups are essential. Enable “Auto Backup” in Project Settings and specify your preferred backup interval. The default is every 5 minutes.
Create a dedicated backup folder outside your main FL Studio directory to ensure project recovery if your system crashes. External hard drives or cloud storage provide additional safety.
FL Studio creates multiple backup files with different extensions:
- .flp: Main project file
- .flb: Backup file
- .zip: Compressed project with samples
When experiencing recurring crashes, try opening your project in Safe Mode by holding Shift while launching the file. This loads the project with disabled plugins, allowing you to identify problematic elements.
7. Key Takeaways For FL Studio Mastery
FL Studio mastering can be approached in 5 simple steps, making it accessible even for beginners. Don’t be intimidated by the process. With practice, you can achieve professional-sounding results.
The most important aspect of mastering is developing your listening skills. According to music producers on Reddit, mastering is 95% listening, good ears, and experience, not just about using fancy plugins.
FL Studio’s stock plugins are completely capable of professional mastering. You do not need to invest in expensive third-party tools when starting.
Stereo imaging and spatial enhancement in FL Studio are essential skills. These techniques are described as “painting with sound” and help create immersive audio landscapes.
FL Studio 21.2 now includes AI-powered mastering capabilities. This feature helps prepare music for major streaming platforms like Spotify and Apple Music.
The online user community for FL Studio is extensive and supportive. Forums, YouTube tutorials, and Reddit groups provide valuable feedback and techniques for mastering.
Many experienced producers test their masters using pre-release betas of FL Studio updates. This provides access to cutting-edge features before they’re officially released.
Finding the key to samples is crucial for harmonically consistent productions. FL Studio 20 offers simple tools to identify sample keys, helping beginners and intermediate users.

8. FAQ
1) What are the differences between FL Studio versions?
FL Studio comes in several editions to suit different production needs and budgets. The Fruity Edition provides basic sequencing and arrangement tools but lacks audio recording capabilities.
The Producer Edition adds audio recording and editing features, making it suitable for complete music production. It’s one of the most popular versions among intermediate producers.
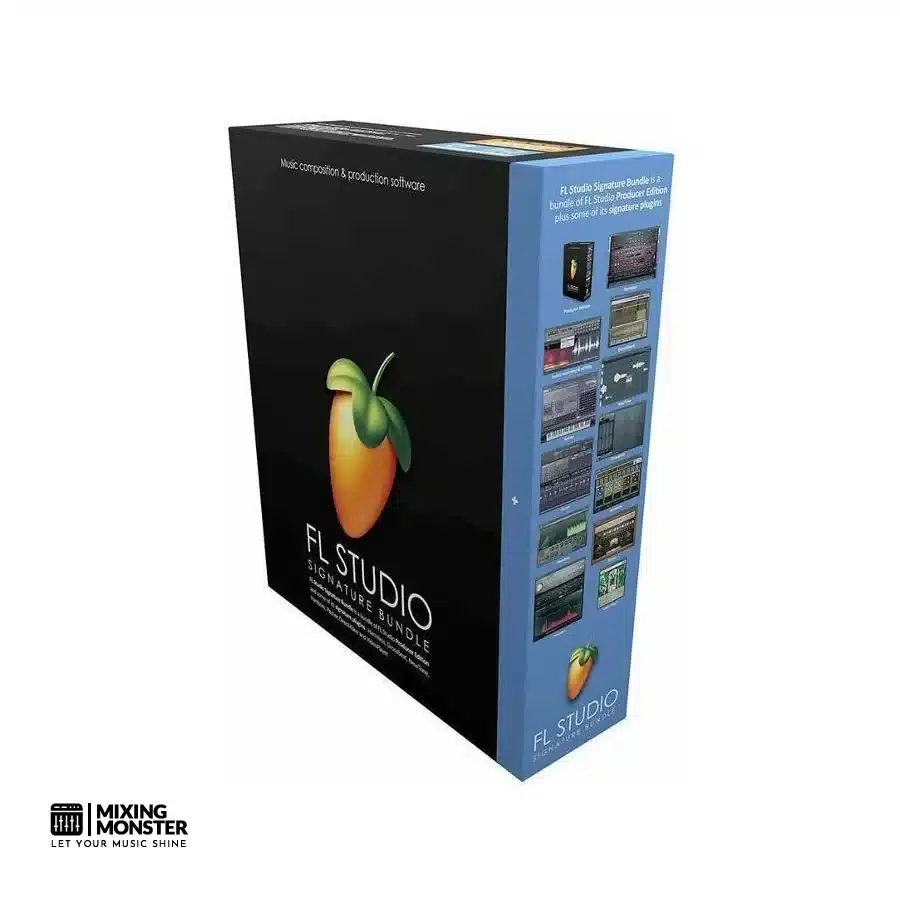
The Signature Bundle includes additional plugins like Gross Beat, Harmless, and NewTone, providing more sound design options. The All Plugins Edition contains every native plugin Image-Line offers, giving users maximum creative flexibility.
2) Can you upgrade from an older version of FL Studio to a newer one?
Yes, Image-Line offers lifetime free updates for all FL Studio purchases. This means once you buy any edition, you’ll receive all future updates of that edition at no additional cost.
Users can also upgrade from lower editions to higher ones by paying only the price difference. This upgrade path provides flexibility as producers’ needs evolve.
The upgrade process is simple through your Image-Line account, where all purchases and available updates are tracked and managed.
3) How does FL Studio Mobile differ from the desktop version?
FL Studio Mobile is a streamlined version designed for iOS and Android devices. It focuses on mobility while maintaining core production capabilities.
The mobile version uses a touch-optimized interface with resizable controls but offers fewer plugins and features than the desktop version. It includes a selection of instruments, effects, and audio recording capabilities.
Projects can be transferred between FL Studio Mobile and desktop versions, allowing producers to start ideas on mobile and finish them on desktop.
4) What are the system requirements for running FL Studio?
FL Studio requires Windows 8.1, 10, or 11 (64-bit versions) or macOS 10.13.6 or higher. Both platforms need a minimum of 4GB RAM, though 8GB or more is recommended for serious production.
A 2GHz Intel Pentium 4 / AMD Athlon 64 processor or better is required, with multi-core processors strongly recommended for running multiple plugins simultaneously. Additional disk space is needed for content libraries and sample packs.
For optimal performance, Image-Line suggests using an ASIO-compatible audio interface to minimize latency during recording and playback.
5) Is a trial version of FL Studio available, and what are its limitations?
Image-Line offers a comprehensive FL Studio demo that includes all features of the All Plugins Edition. This allows users to test the complete software before purchasing.
The trial version has only two limitations: projects cannot be reopened after saving, and exported audio contains brief interruptions. Otherwise, all features, plugins, and functionality are fully operational.
The FL Studio trial has no time limit, allowing potential buyers to thoroughly explore the software at their own pace before deciding which edition suits their needs.
6) What are the key features introduced in the latest version of FL Studio?
Recent updates to FL Studio have focused on improving workflow efficiency and expanding creative tools. The Pattern Clips feature allows for a more flexible arrangement, enabling patterns to exist directly in the playlist.
The updated browser provides better organization and faster access to samples, presets, and plugins. You can now access AI-powered mastering capabilities through FL Cloud integration.
Enhanced MIDI functionality includes MPE support for expressive performances with compatible controllers. The Piano Roll has also received updates for more intuitive note data editing and automation.
Related Articles
Featured Articles


You Might Also Be Interested In