Disclosure: Some of the links below are affiliate links, meaning that at no additional cost to you, we will receive a commission if you click through and make a purchase. Read our full affiliate disclosure here.
Recording with a microphone looks easy. However, the gap between amateur and professional audio is all about those little details. If you’ve got the right gear, some solid technique, and a basic grasp of your recording environment, you can pull off studio-quality sound, no matter your budget or experience.
When recording with a microphone, several factors influence your final output. The type of microphone matters significantly—condenser microphones offer sensitivity ideal for vocals and acoustic instruments, while dynamic microphones are better suited for handling louder sources. Your recording environment also affects sound quality, with echo and background noise being common challenges.
It’s not just about hitting record—editing and processing can take your audio from decent to excellent. Whether you’re podcasting, creating YouTube videos, recording music, or conducting remote interviews, mastering your mic technique will make your content stand out. If you’re recording in the field, portable recorders with built-in mics or external inputs can get you out of a jam.
KEY TAKEAWAYS:
- Select the appropriate microphone type for your recording, and take steps to control your environment for a clean sound.
- Plug in your mic properly and position it in a sweet spot to capture the best sound possible for your project.
- Consider using digital audio workstations or online tools to record, edit, and process your audio if you want your audio to sound professional.
Table Of Contents
1. Recording With A Microphone: Essential Equipment
2. Setting Up Your Recording Environment For Optimal Sound
3. Mastering Microphone Technique For Different Applications
4. Digital Audio Workstations And Recording Software
5. Processing Your Microphone Recordings For Professional Results
6. Troubleshooting Common Microphone Recording Issues
7. Advanced Microphone Techniques
8. Key Takeaways For Perfect Microphone Recording
FAQ

1. Recording With A Microphone: Essential Equipment
Getting set up to record isn’t just grabbing any mic and hoping for the best. Your microphone is the star of the recording setup, but don’t overlook the supporting cast—other gear matters too if you want your audio actually to sound professional.

Dynamic Vs. Condenser Microphones: Choosing The Right Type
Dynamic microphones are robust and thrive in loud settings, which is why you often see them on stage, used for drums or amplifiers. They don’t need phantom power and can take a beating without distorting.
Condenser microphones, on the other hand, are all about sensitivity and detail. They shine with vocals and acoustic instruments, but they do need phantom power (usually 48V) from your audio interface or preamp.
If you’re tracking vocals, a large-diaphragm condenser usually gives you that rich, present sound most folks want. Small-diaphragm condensers? Those are great for capturing the vibe of acoustic instruments or a room.
Having both types around is ideal. But if you’re on a budget, think about what you’ll record most—loud stuff, go dynamic; detailed acoustic work, pick a condenser.

USB Vs. XLR Connections
USB microphones are incredibly simple to use: plug them into your computer, and you’re good to go. They’ve got built-in preamps and converters, so you don’t need extra gear.
XLR mics use three-pin cables and require an audio interface to convert their analog signal into a format that your computer can understand. This gives you more room to upgrade and usually better sound.
Connection Comparison:
| Feature | USB Microphones | XLR Microphones |
|---|---|---|
| Setup | Simple, plug-and-play | Requires interface |
| Upgradeability | Limited | Highly expandable |
| Sound Quality | Good | Excellent |
| Cost | Lower initial investment | Higher with interface |
If you want to upgrade over time, XLR is the way to go. With USB, you’re limited by what you buy until you replace it entirely.
Microphone Accessories That Improve Sound Quality
A pop filter is a must for vocals—it stops those harsh blasts of air from “p” and “b” sounds. Keep it a couple of inches from your mic for best results.
Shock mounts are your friend, especially with sensitive condensers. They prevent vibrations from the stand or desk from contaminating your recording with low-end rumble.
A solid mic stand allows you to maintain consistent placement. Boom stands are more flexible than the straight-up kind.
Reflection filters help tame the sound in an untreated room. They clamp on behind your mic and soak up those annoying reflections bouncing back at you.
If you’re recording outside, windscreens are non-negotiable. They’ll keep wind noise from wrecking your take.
Budget-Friendly Vs. Professional Grade Mic Options
You don’t have to spend a fortune to get started. Mics in the $100-200 range from Audio-Technica, Rode, or Shure are surprisingly solid for beginners—great value for the money.
If you step up to the $300-500 range, you’ll notice better build and sound quality. At that level, you can definitely get pro results if you know what you’re doing.
Once you’re looking at $500 and up, you’re into serious professional territory—think studio workhorses that last for years. The difference can be subtle, but it’s there if you listen closely.
Most people are better off starting with a good, affordable microphone and interface than blowing their entire budget on a single high-end microphone. Upgrade as you determine what you truly need.
2. Setting Up Your Recording Environment For Optimal Sound
If you want pro audio, you have to get your recording environment dialed in. That’s how you keep unwanted noise out and let your vocals or instruments shine.

Room Acoustics: Treating Your Space For Professional Results
Reflections and echoes can really trash your sound. Look around for hard surfaces, such as windows, bare walls, or hardwood floors. They’re usually the troublemakers.
Acoustic panels, diffusers, and bass traps help keep those reflections in check. Place stick panels on the walls beside you and behind your microphone for a noticeable difference.
If you’re on a tight budget, bookshelves full of books can scatter sound nicely. Heavy curtains and carpets help too—seriously, it doesn’t have to look fancy to work.
You’re not trying to kill every reflection—just find a balance. Too much treatment and your room sounds dead; too little and everything’s muddy and washed out. It’s a bit of a Goldilocks thing.
Microphone Placement Techniques For Different Scenarios
Where you put your mic changes everything. For vocals, set the mic just above your mouth and about 6-8 inches away. That usually gives a good balance and helps with those pesky plosives.
Always throw a pop filter in front to cut down on air blasts and keep spit off your mic. For instruments, play around with distance and angle until you find what sounds right for you.
Some go-to placements:
- Acoustic guitar: Aim the mic 6-12 inches from where the neck meets the body
- Piano: Over the strings for grands; near the soundboard for uprights
- Drums: Overheads for cymbals, close mics for each drum, plus a room mic if you want some space
Mic type matters, too. Condensers are great for vocals and acoustics; dynamics are better for loud stuff. Simple as that.
Eliminating Background Noise And Interference
Nothing kills a recording faster than background noise. Start by shutting off anything noisy—fans, AC, fridges, whatever you can control.
Try to record when things are quiet—early mornings or late at night are ideal times. A noise gate in your software can help cut out low-level background hiss.
To prevent digital interference, keep your microphone cables away from power cables. Use balanced XLR cables whenever possible—they’re just better at rejecting noise.
Monitor your levels to prevent clipping. Stay out of the red; aim for peaks around -6dB so you have room to tweak things later.
Mobile Recording Solutions For On-The-Go Professionals
Recording on location? That’s a whole different beast. Lavalier mics are great in noisy environments since they’re positioned close to your mouth, minimizing a lot of background noise.
Portable recorders with built-in mics give you flexibility on the go. If you want to get fancy, opt for one with XLR inputs and bring your own microphone.
Outdoors, wind is your enemy. Foam windscreens are fine for light breezes, but if it’s gusty, go for a furry “deadcat” windshield.
Reflection filters or portable isolation shields can help you create a little bubble of good sound, even in a bad room. Just clamp them to your mic stand and you’re set.
And don’t forget headphones. Constantly monitor as you record—you don’t want to discover problems after you’ve packed up and left.

3. Mastering Microphone Technique For Different Applications
Every recording situation is a little different, and adjusting your microphone technique can make a significant difference. Sometimes it’s not about buying new gear—it’s just about using what you have a little smarter.

Vocal Recording Techniques For Singers And Voice Artists
For singers, microphone distance makes a huge difference—usually, keeping about 6-8 inches away yields a balanced tone and helps tame the proximity effect (the extra bass that occurs when you’re too close to the mic).
Voice actors should maintain a consistent distance of 4-6 inches from the mic, keeping that distance steady throughout the entire session. Staying put like this keeps the volume from jumping around and saves a ton of hassle when you’re editing later.
Pop filter placement:
Pop filters are typically positioned 2-3 inches in front of the mic—this is a non-negotiable requirement if you want to avoid those annoying plosives (p, b, t sounds).
Angles actually matter more than most folks think:
- Try placing the mic just above your mouth, aimed down about 10-15°
- Got a raspy voice? A 45-degree angle can take the edge off harshness
- For deep voices, going a little off-axis helps dial back the boominess
Don’t be afraid to mess with distance for vibe—move in closer for those breathy, intimate moments, or back off for belting out big choruses.
Podcast And Interview Recording Best Practices
When it comes to podcasts, consistent mic technique really pays off. Keep microphones approximately 4-6 inches from each speaker’s mouth, and strive to maintain this distance consistently for everyone on the show.
Multi-person setup options:
- Individual microphones: Honestly, give everyone their own mic—it’s easier.
- Shared microphone: If you have to share, put it right between the speakers
- Mobile recording: A central omnidirectional mic on something stable works in a pinch
Cutting down on background noise isn’t just about gear. Try to avoid touching the mic while recording, and use shock mounts or sturdy stands whenever possible.
For remote interviews, remind your guests to:
- Speak right into the mic
- Keep their distance consistent
- Turn off notifications and silence their phones
- Pick a quiet spot with as little echo as possible
Keep an eye on your input levels—aim for peaks between -12 dB and-6dB. That way, you’ll dodge clipping but still get a strong enough signal.
Instrument Miking Strategies For Musicians
Every instrument has its quirks, so mic placement matters. For acoustic guitar, try two mics: one 3-6 inches from the sound hole, and another at the 12th fret. You’ll get a nice, balanced tone that way.
Electric guitar amps? Here’s what usually works:
- Close-miking (1-2 inches): Lots of direct sound, heavy on the bass
- Distance-miking (6-12 inches): Picks up more of the room’s vibe
- Blended approach: Use both for a fuller, more interesting sound
For drums, the basics look like this:
- Kick drum: Place the mic inside or just outside the resonant head
- Snare: Put the mic 1-2 inches above the rim, angled 45° toward the center
- Overheads: Use a matched pair of condensers for stereo
Play around with how close or far your mics are—closer means a drier, tighter sound, while backing off brings in more of the room’s character.

ASMR And Specialized Audio Recording Approaches
ASMR enthusiasts require ultra-sensitive microphones and a delicate touch to capture all those subtle, tingly sounds. Use high-sensitivity condenser mics about 1-3 inches from the source—don’t be afraid to get close.
Binaural recording is a whole other world. It means setting up two mics about 7 inches apart (roughly ear distance), and sometimes even using a dummy head with ear-shaped channels for that super-realistic 3D effect. You really have to keep the stereo field intact when you’re recording and mixing this stuff.
If you’re recording whispers or mouth sounds, position the mics slightly off-center from the mouth. That way, you’ll avoid plosives but still maintain intimacy.
Tactile sounds—think tapping, scratching, or crinkling—require you to position the mic right up close, approximately 1-2 inches away. Try stereo setups for a wider image, and always use proper mounting to keep handling noise out of your recordings.
Seriously, monitor with headphones the whole time so you don’t miss those little details.

4. Digital Audio Workstations And Recording Software
A good Digital Audio Workstation (DAW) is the heart of any recording setup. It’s where you capture, edit, and shape your audio. These days, you can pick from free, beginner-friendly options or go all-in with pro software loaded with advanced mixing, mastering, and processing tools.
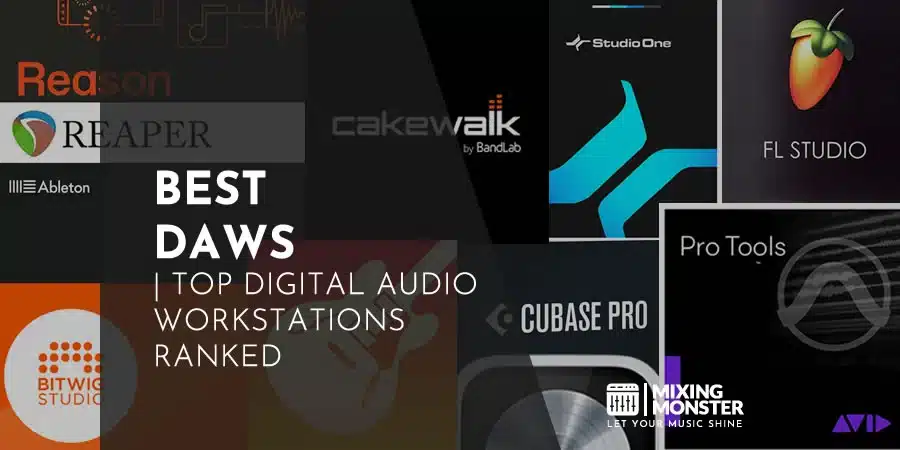
Top DAW Options For Different Skill Levels
If you’re starting, Audacity is a no-brainer. It’s free, open-source, and handles basic recording and editing without much fuss. Podcasters and newcomers love it for a reason.
Intermediate folks often move up to Apple GarageBand—it’s free on Macs and comes packed with virtual instruments and loops. When you’re ready for more, Logic Pro is a natural next step.
Pros have their favorites, too:
- Avid Pro Tools: Pretty much the gold standard in big studios
- Ableton Live: Electronic musicians swear by its live performance features
- Logic Pro: Apple’s pro DAW with a ton of bang for your buck
- FL Studio: Beatmakers love the lifetime free updates
- Reaper: Affordable, super customizable, and doesn’t hog resources
Steinberg Cubase receives a lot of love from composers for its MIDI capabilities, and Cockos Reaper delivers professional features at a price that’s hard to argue with.
AI-Enhanced Recording Features That Save Time
Modern DAWs are becoming increasingly intelligent, and AI tools are automating some of the more tedious tasks. Automatic noise reduction now eliminates background noise in real-time, so you don’t have to remove it manually later.
AI-driven pitch correction isn’t just about robotic auto-tune anymore. It can gently nudge vocals into tune while preserving the performer’s character, whether you use it live or in post-production.
Many DAWs now come with AI mixing and mastering tools that analyze your audio and suggest EQ, compression, and panning adjustments. Even if you’re new to mixing, these features can get you closer to a pro sound without hours of guesswork.
Bright comping is a lifesaver—these tools automatically pick the best bits from multiple takes and stitch them together. You’ll spend way less time piecing things together by hand.
Instrumentalists can use AI transcription to turn performances into editable MIDI or notation. It’s surprisingly handy for tweaking parts or making sheet music from an improvised jam.
Cloud-Based Collaborative Recording Platforms
Cloud-based DAWs have revolutionized remote collaboration. Now, you and your bandmates (or podcast co-hosts, or whoever) can all work on the same project from different places. BandLab offers free cloud-based recording with built-in social tools for finding collaborators, which is a pre-release feature.
Most of these platforms run right in your browser, so you don’t have to install anything. Changes sync automatically, so everyone’s always working on the latest version—no more hunting for the correct file.
Integrated chat and comment tools let you leave feedback tied to specific spots in the project, making it way easier to communicate. Version history means you can always roll back if someone makes a mess (it happens).
Storage depends on the plan you pick:
- Free tiers: Usually between 5-20GB
- Pro tiers: 50GB or more
- Enterprise: Custom storage and team management
Security has also improved significantly. Pro platforms encrypt your files and transfers, so your unreleased tracks stay safe. Some even let you record offline and sync everything up when you’re back online, which is a lifesaver if your internet connection is spotty.
Mobile Apps For Professional-Quality Recordings
Mobile recording apps have evolved significantly from their initial focus on simple voice memos. Now you’ve got GarageBand for iOS, BandLab, and others offering multitrack recording and effects right on your phone or tablet.
You can connect professional audio interfaces via USB-C or Lightning, providing high-quality preamps and converters for authentic studio sound. Most mobile DAWs handle all sorts of audio formats so that you can move files easily between mobile and desktop setups.
Why go mobile? Here’s what stands out:
- Portability: Record ideas wherever you are, no excuses
- Immediacy: Fire it up and start recording—no fuss
- Accessibility: Way cheaper than building a full studio
Some advanced mobile DAWs even support plugins so that you can use your favorite effects on the go. Cloud sync keeps your projects backed up and ready to access on any device, which is incredibly convenient.
If you’re into field recording, these apps often automatically tag your files with location and metadata, making it much easier to organize environmental sounds for sound design work.

5. Processing Your Microphone Recordings For Professional Results
Capturing audio is just the start. If you want your recordings to sound polished and professional, you’ll need to process them. That’s where the magic happens—raw audio turns into something people actually want to listen to.
Essential EQ Techniques For Clean, Clear Audio
EQ is where you lay the foundation. Start with a high-pass filter set to 80-100Hz to eliminate low-end rumble. It’s a quick way to clean things up without messing with the core of most voices.
For vocals, try a gentle cut around 200-300Hz to nix the mud. Boosting a bit in the 2-3kHz range brings out clarity, and a hint of lift at 10-12kHz adds that nice airy touch.
- When in doubt, cut instead of boost
- Narrow Q for cuts, wider Q for boosts
- Tweak EQ slowly—2 or 3dB at a time does the trick
- Always A/B test by flipping between processed and raw audio
Monitor your input level while Equalizing. Too much boosting can distort things fast, so good gain staging is your friend for a clean, strong signal.
Compression And Dynamics Processing Explained
Compression controls the dynamic range by shrinking the gap between your loudest and quietest moments. Most folks start with a moderate ratio (2:1 to 4:1), then nudge the threshold down until you’re seeing about 3-6dB of gain reduction on peaks.
Attack settings decide how fast the compressor clamps down. If you go for a quick attack (1-10ms), you’ll tame transients, but you might also lose some punch. Release times (50-300ms) shape how natural or squashed the result feels—so tweak carefully.
For podcasts and voiceovers, consider using a multiband compressor to target specific frequency ranges independently. This provides more audio quality control without the pumping effect of heavy single-band compression.
Compression Parameters:
| Parameter | Function | Typical Range |
|---|---|---|
| Threshold | Sets level where compression begins | -10dB to -30dB |
| Ratio | Amount of compression applied | 2:1 to 8:1 |
| Attack | Speed of compression engagement | 1-50ms |
| Release | Time to return to uncompressed state | 50-500ms |
For podcasts and voiceovers, consider using a multiband compressor to target specific frequency ranges independently. This provides more audio quality control without the pumping effect of heavy single-band compression.
Noise Reduction And Restoration Tools
Background noise can really detract from a recording. Spectral noise reduction tools analyze and eliminate steady annoyances, such as computer fans or HVAC hums.
De-essers tackle those harsh S sounds—sibilance—by compressing only the high frequencies. Set the threshold with care; push too far and you’ll make things sound lispy, not just smoother.
Common Noise Issues and Solutions:
- Room reflections: Try subtle reverb reduction
- Mouth clicks: Reach for click removal plugins
- Plosives: Use a high-pass filter on the worst spots
- Electrical hum: Notch out 50/60Hz and its harmonics
If you have gnarly noise problems, consider using specialized processing tools like iZotope RX or Waves Restoration. Just don’t overdo it—use the minimum processing necessary to keep things sounding authentic.
Adding Effects And Spatial Enhancement
Well-placed effects can make a recording pop, but it’s easy to go overboard. With spoken word, stick to a bit of reverb for space—short early reflections, not long tails. That keeps it natural.
Delays are cool for adding width, but subtlety’s your friend. Sometimes, a 15-25ms slapback, panned opposite at low volume, can give you that stereo vibe without phase weirdness.
Select your output format based on the destination where you’re sending the audio. WAV (24-bit/48kHz) is best for editing. MP3 (256kbps or higher) is fine for sharing or uploading—don’t go too low on bitrate.
Effect Chain Order:
- Corrective processing (EQ, de-essing)
- Dynamic processing (compression)
- Spatial effects (reverb, delay)
- Limiting (for consistent loudness)
Less is more when it comes to effects. The aim? Enhance your mic’s natural sound, not turn your voice into something unrecognizable.
6. Troubleshooting Common Microphone Recording Issues
Even with solid gear, recording issues sneak up on you. Spotting and fixing these problems quickly saves a ton of time and headaches.

Fixing Plosives, Sibilance, And Breath Sounds
Plosives (those p and b pops) and sibilance (s, sh) are classic vocal headaches. To dodge plosives, angle your mic slightly off to the side—not dead-on in front of your mouth.
Always use a pop filter. Stick it 3-4 inches from the mic to catch those air blasts. If you’re dealing with plosives in a finished take, a high-pass filter at 80-100Hz can help clean it up.
For sibilance:
- Fire up a de-esser plugin in post
- Experiment with mic placement
- Try softening your consonants as you speak
To reduce breath sounds, keep your distance from the microphone steady. Later, you can use a noise gate or manually remove the worst breaths for a cleaner track.
Addressing Room Resonance And Echo Problems
Room acoustics can make or break your sound. Bare, untreated spaces bounce sound around, leaving you with hollow, echoey recordings and weird frequency dips.
The best fix? Acoustic treatment:
- Absorption panels on your walls to soak up reflections
- Bass traps in the corners for those pesky low frequencies
- Diffusers to scatter sound in a more natural way
If you can’t do permanent treatment, try:
- Recording in smaller rooms with soft stuff—couches, curtains, whatever
- Building a quick vocal booth with blankets or mattresses
- Using a directional mic to block out more of the room
If you have to record in a challenging space, position yourself facing away from hard surfaces and try close-mic techniques to capture more direct sound and less room echo.

Resolving Digital Artifacts And Distortion
Digital artifacts and distortion usually indicate that your gain staging’s off or something’s wrong with your gear. Clipping happens when your input’s too hot—your interface can’t handle it, and you get nasty distortion.
To avoid clipping:
- Set recording levels so your peaks hover between -12 dB and 6dB
- Throw on a limiter as a safety net if you’re worried
- Keep an eye on your meters while recording
If you’re hearing clicks or pops, your buffer size might be too low. Bump it up in your DAW settings—it’ll add some latency, but it’s worth it to kill the noise.
Static or weird noises? Check your cables and ports—sometimes it’s just a bad connection. You might also be picking up interference from:
- Cheap, unshielded cables
- Other electronics are sitting too close
- Ground loop gremlins
If you’re on a USB mic, try plugging into a different port. Some ports deliver cleaner power than others.
Maintaining Equipment For Consistent Performance
Routine care keeps your gear in good condition and your recordings clean. Gently clean mic diaphragms and grilles with the right products to remove dust and moisture that can interfere with your sound.
Check cables once a month for:
- Bends, breaks, or kinks
- Loose plugs
- Signals are cutting in and out
For USB microphones and interfaces, keep drivers and firmware up to date to avoid software issues. When you’re not using microphones, stash them in cases with desiccant to prevent humidity damage.
Jot down your best setups—where you put the mic, your preamp/interface settings, and how you arranged the room. Having a go-to setup makes troubleshooting way easier if something goes wrong later. Swap out windscreens and pop filters now and then, too—they get gross and can muffle your sound over time.
7. Advanced Microphone Techniques
Advanced mic techniques open up more depth, realism, and detail in your recordings. It’s about clever placement, pairing mics, and sometimes using new tech. These methods enable engineers to craft immersive, accurate sounds and elevate vocals to the next level.
Multi-Microphone Recording Setups And Stereo Techniques
Using more than one microphone gives you a wider, richer sound than a solo setup. What are the main stereo techniques?
- X/Y Configuration: Two cardioid mics set at 90-135° with their capsules lined up, so you dodge phase issues
- A/B (Spaced Pair): Two mics set apart, catching timing and level differences for a more natural stereo feel
- ORTF Technique: Two cardioids at 110°, spaced 17cm apart—pretty much how our ears are set
- Blumlein Pair: Two figure-8 mics at 90°, great for tight stereo imaging
Each one offers a distinct stereo flavor. Selecting the right microphones is crucial—a matched pair typically ensures consistency.
Keep enough space between mics to avoid phase cancellation but still get that stereo width. For instruments like piano or drums, blend close mics for detail with distant ones for a roomy vibe.
Spatial Audio Recording For Immersive Content
Spatial audio lets you drop listeners right into a 3D sound world. It’s getting huge for VR, AR, and other immersive projects.
Ambisonics records sound from every direction simultaneously, utilizing specialized microphone arrays. The Ambisonic B-format encodes sound into four channels (W, X, Y, Z) for pressure and direction.
First-order Ambisonics utilizes tetrahedral microphones, such as the Sennheiser AMBEO or Zoom H3-VR. Higher-order Ambisonics packs in even more detail but requires more sophisticated setups.
Watch out for proximity effect—if you get too close to directional mics, you’ll get boomy bass and mess up your spatial image.
For more flexibility when mixing, advanced techniques often combine object-based audio (individual sources) with ambient spatial recordings. It’s a delicate balancing act.
Binaural Recording Methods For Realistic Sound
Binaural recording is all about capturing audio the way we actually hear it—so when you stick on headphones, it’s like you’re right there. Super immersive, especially for ASMR or nature stuff.
The classic method is dummy head recording, which involves placing microphones in fake ear canals on a mannequin head. You receive all those subtle acoustic cues from the head and ears that make things sound realistic.
Other options:
- In-ear binaural mics you actually wear
- Simulated binaural using clever processing on regular stereo
- Virtual binaural rendering from multi-channel setups
The quality you get depends largely on how accurate the ear models are and where you place the microphones.
Binaural shines with natural ambiences, live gigs, and ASMR. It’s not ideal on speakers—stick with headphones for the whole experience.

Voice Modeling And AI-Enhanced Microphone Technology
AI-enhanced microphones are shaking up audio capture, blending clever algorithms into the process while you record—or after, if you prefer.
Adaptive noise cancellation relies on machine learning to isolate and eliminate unwanted noise while preserving the natural sound of your voice. It can distinguish between your speech and random background sounds as you talk.
Dynamic processing automatically adjusts settings like gain, EQ, and compression, responding to the input it receives. Voiceover professionals really appreciate AI tools that help keep levels steady, even if you move around the mic a bit.
Neural voice modeling takes recordings from basic gear and gives them the polish of high-end microphones. Some systems even let you change up voice characteristics or patch up rough recordings—pretty wild, honestly.
These days, microphones with built-in DSP chips handle audio processing before your recording software even sees it. Thanks to advanced microphone techniques, you can make quick adjustments on the fly—tasks that used to consume hours of post-production time.
8. Key Takeaways For Perfect Microphone Recording
Selecting the right microphone is crucial for producing high-quality recordings. Audio transparency and directionality should be at the top of your list if you’re looking for a vocal mic that delivers professional results.
The environment matters significantly. Try to record in a quiet location—free from humming AC units, street noise, and annoying chair squeaks. Condenser mics pick up everything, so a bit of acoustic treatment goes a long way.
Proper microphone placement changes everything. Get the mic at just the appropriate distance—close enough for clarity and warmth, but not so close you end up with plosives or harsh “s” sounds.
Monitor your audio levels closely while recording to ensure optimal sound quality. You want a strong enough signal to capture details, but not so hot that it distorts. Stay out of the “red zone”—that’s just asking for trouble.

Essential recording tips:
- Pop filters help tame plosives
- Stay a steady distance from the mic—consistency pays off
- Soften room acoustics with blankets or foam
- Drink water—your voice will thank you
- Always run a test recording before diving in
If you want to sound like a pro, pay attention to your mic technique. Expert placement often means speaking slightly off-axis to achieve a smoother tone and maintaining a steady volume throughout.
Mics with high SPL (Sound Pressure Level) handling are worth considering—they’re more forgiving if you’re recording loud instruments or voices, and you won’t end up with ugly distortion.
Happy recording!

FAQ
1) What is the best way to record high-quality audio with a microphone?
Start by placing your microphone in the ideal spot. Get close enough for transparent sound, but not so close that you get distortion or those popping “p” sounds.
Select a microphone that suits the type of recording you’re doing. Condenser mics typically excel at capturing vocals and acoustic instruments, while dynamic mics can withstand the impact of loud sources.
Pop filters are a must for vocals. Treat the room a bit—soft furnishings help absorb weird echoes. Set your gain right: too high, and you’ll get nasty distortion; too low, and you’ll boost noise when you try to fix it later.
2) Which software is recommended for recording and editing microphone audio on a PC?
Audacity remains a go-to option for free, straightforward recording and basic editing. It’s simple yet surprisingly capable, especially for those just starting.
If you want the big guns, DAWs like Adobe Audition, Reaper, and Pro Tools offer comprehensive recording, editing, and mixing capabilities. They’re packed with advanced tools for noise reduction, multitrack work, and all the nitty-gritty tweaks you might need.
Reaper and Cockos are budget-friendly but punch above their weight. They offer professional features without the financial burden of Pro Tools or Logic Pro.
3) How can I record audio using a microphone on an Android device?
Most Android phones come with a voice recorder app that handles basic jobs just fine. Open it up, hit record, and talk into the mic.
For better quality, consider using apps like Easy Voice Recorder Pro or Audio Recorder. They allow you to experiment with sample rates, file types, and even perform basic editing.
Plugging in an external mic—via a USB OTG adapter or a 3.5mm jack, if your phone still has one—makes a massive difference in sound quality.
4) What are some practical tips for reducing background noise when recording with a microphone?
Pick a quiet spot and get rid of anything noisy—fans, AC, open windows. Even hanging up a blanket or slapping up some foam can help kill room reflections.
Directional mics (cardioid) do a great job of picking up just what’s in front and ignoring the rest. Super handy for keeping out unwanted noise.
Stay close to the mic and talk at a steady volume. That boosts your signal-to-noise ratio, so your voice cuts through and background stuff fades away.
5) Is it possible to record microphone audio online, and which platforms are best suited for this purpose?
Yeah, you can record online. Platforms like Soundtrap, Audacity Web, and Bandlab allow you to record directly from your browser—no installation needed. Recordings are saved in the cloud, allowing you to access them from anywhere.
Zoom, Microsoft Teams, and similar tools have built-in recording capabilities, which are handy for meetings or interviews. You get audio files without extra fuss.
For podcasts, Zencastr, Riverside.fm, and Squadcast are top picks. They record each person on a separate track, making editing much easier if you’re working remotely.
6) Can a smartphone be used as a reliable voice recorder, and what apps facilitate the best recording quality?
Modern smartphones can produce high-quality audio recordings, especially when paired with the right app. Voice Record Pro (iOS) and Hi-Q MP3 Voice Recorder (Android) come to mind—they have some neat features, such as adjustable sample rates and various ways to export your files.
If you plug in an external microphone, you’ll notice a significant improvement in sound quality. Lavalier mics that connect through the headphone jack or Lightning/USB-C port usually sound significantly better than relying solely on the phone’s built-in mic.
Still, there are a few drawbacks. Phones pick up a lot of handling noise, and storage fills up faster than you’d expect. It helps to place your phone on a tripod or stand so you don’t have to touch it.
Backing up to the cloud or adding extra storage can save you some headaches if you’re recording longer content.
Related Articles

Featured


You Might Also Be Interested In