Home > Blog > Mixing > Mixing Insights
Disclosure: Some of the links below are affiliate links, meaning that at no additional cost to you, we will receive a commission if you click through and make a purchase. Read our full affiliate disclosure here.
Ever wonder what really happens after the director yells “cut”? That’s when the real magic starts. The raw footage you see on set doesn’t just become a film by itself—there’s a whole invisible craft that shapes it into something audiences actually want to watch (and hear!).
Post-production encompasses all activities that occur after filming concludes, including editing, sound design, visual effects, and color grading. Professionals with different specialties come together, tweaking and polishing until rough cuts turn into finished masterpieces.
No matter if you’re cranking out indie films, ads, or TikToks, getting a grip on post-production can take your stuff from “meh” to “wow.” It’s this weird mix of tech know-how and creative vision, and there’s almost no limit to how much you can shape a story or vibe through the post process.
KEY TAKEAWAYS:
- Post-production turns raw footage into something people actually want to watch—editing, sound, effects, all of it
- Collaboration and a bit of technical wizardry are pretty much required for anything that feels professional
- Modern post-production tools let you push storytelling further than ever with digital magic
Table Of Contents
1. Setting Up Your Post Production Workflow
2. Post Production Audio Cleanup And Restoration
3. Post Production Audio Editing Fundamentals
4. Post Production Mixing Process
5. Post Production Mastering Essentials
6. Export and Delivery
7. Key Takeaways for Audio Post-Production
FAQ

1. Setting Up Your Post Production Workflow
Honestly, a messy workflow is a nightmare. If you want your editing process to go smoothly (and who doesn’t?), you need some structure. It’s not just about avoiding chaos—good systems mean fewer headaches and less wasted time hunting for files you just saw yesterday.
Project Organization And File Management
Solid data management is the unsung hero behind every smooth edit. Start with a simple, repeatable folder setup for every project: stash your raw video, audio, graphics, and project files in their own spots.
File naming isn’t glamorous, but it saves your sanity: something like ProjectName_AssetType_Version (say, Commercial_Interview_V1). Throw in a date if it helps you keep track.
Most editing apps let you prep a master template with bins for:
- Raw footage
- Audio assets
- Graphics and effects
- Sequences
- Exports
Keep a record of edit decisions with EDL (Edit Decision List) files. Store them out of the way from your main project files, so you can actually find them when you need to backtrack.
Technical Specifications And Standards
Before you even start cutting, lock down your frame rates, resolution, and codecs. Trust me, scrambling to match specs later is a pain. Typical pro standards:
Video Specifications:
- Resolution: 1920×1080 or 4K (3840×2160)
- Frame Rate: 23.98, 24, 25, or 29.97 fps
- Codec: ProRes 422, DNxHD, or H.264
Audio Requirements:
- Sample Rate: 48kHz
- Bit Depth: 24-bit
- Channels: Stereo or 5.1 surround
Set up project presets in your editor so everyone on the team is (literally) on the same page.
Quality Control Checklist Creation
Don’t skip quality checks. Make a checklist and actually use it—it’ll save you from embarrassing mistakes later.
Technical Aspects:
- Check video levels and color
- Listen for audio peaks, normalize as needed
- Double-check frame rates match
- Make sure export settings are correct
Content Review:
- Spelling on graphics/titles (seriously—double check!)
- Music rights cleared
- Did you actually implement client notes?
- Timeline makes sense, no weird jumps
Backup And Storage Solutions
Cloud storage is a lifesaver for backups and remote work. Always keep at least three copies of your files—one local, one on a server or NAS, and one in the cloud. Paranoid? Maybe, but you’ll thank yourself someday.
Use automated backup tools for daily incremental saves. Spread your backups across:
- Local RAID drives
- Network-attached storage (NAS)
- Cloud storage (Google Drive, Dropbox, whatever works)
Label archived projects with enough information that future-you (or your team) can find them: client, date, specs, and so on.
And yeah, version your files. It’s not exciting, but it’s a lifesaver when you need to roll back.
2. Post Production Audio Cleanup And Restoration
Audio post can be surprisingly tedious, but wow, does it make a difference. Cleaning up unwanted sounds and making the good stuff shine is what separates amateurs from pros. Bad audio can ruin even the prettiest video—no joke.
Noise Reduction And Removal
Restoration tools are your best friends for dealing with hums, buzzes, and other annoyances. Editors use plugins to remove specific types of noise, sometimes obsessively and surgically.
Constant background noise? Noise gates can help. Random bumps or coughs? You’ll probably need to go in manually and fix those.
Most DAWs have basic noise reduction, but for nasty problems, you’ll want dedicated restoration software. Sometimes you can’t fix it all, though—be realistic.
Dialogue Cleanup And Enhancement
Voice enhancement plugins are a lifesaver for muddy or inconsistent dialogue. If it’s awful, you might have to re-record lines in the studio (ADR). Not always fun, but it works.
EQ is massive for making speech clear—nudge the correct frequencies and suddenly everything’s understandable. De-essers are key for taming harsh “S“ sounds, too.
Compression helps smooth out the loud and quiet parts so dialogue doesn’t jump all over the place.
Room Tone Management
Room tone is one of those things nobody notices… unless it’s missing. Always grab a minute of ambient sound at each location. It fills awkward gaps and covers up edits.
If you forgot or it’s unusable, Foley artists can recreate ambience in the studio. Sometimes that’s even better than what you got on set.
Layering different room tones can add subtle depth and realism—worth experimenting with.
Phase Correction
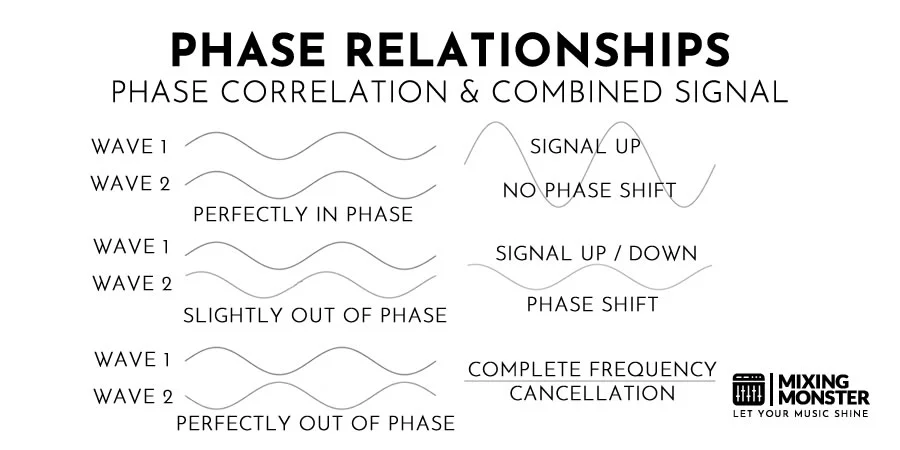
Phase issues—ugh. When multiple mics record the same thing at slightly different times, you get weird hollow sounds. It’s tricky to spot, but you’ll hear it if you listen closely (or look at the waveforms).
Use phase alignment tools to nudge tracks back in sync. The fixing phase makes your mix sound full instead of thin or “off.”
Good phase relationships are crucial, especially for stereo or surround mixes. Don’t skip this step!

3. Post Production Audio Editing Fundamentals
Editing audio is about shaping raw takes into something that actually sounds intentional. You’re fixing timing, smoothing out transitions, making dialogue pop, and weaving in effects. Professional audio post is equal parts art and science, honestly.
Timing And Rhythm Adjustment
DAWs make it (almost) easy to nudge clips around until they line up perfectly. Snap-to-grid helps, but sometimes you need to trust your ears.
Time stretching and compression let you fit dialogue or music to the picture without messing up pitch. Super handy for syncing lines to lips or beats to cuts.
Quantization is excellent for music or rhythmic effects, but sometimes it can make things sound robotic. For film, frame-accurate editing is usually the way to go.
Crossfades And Transitions
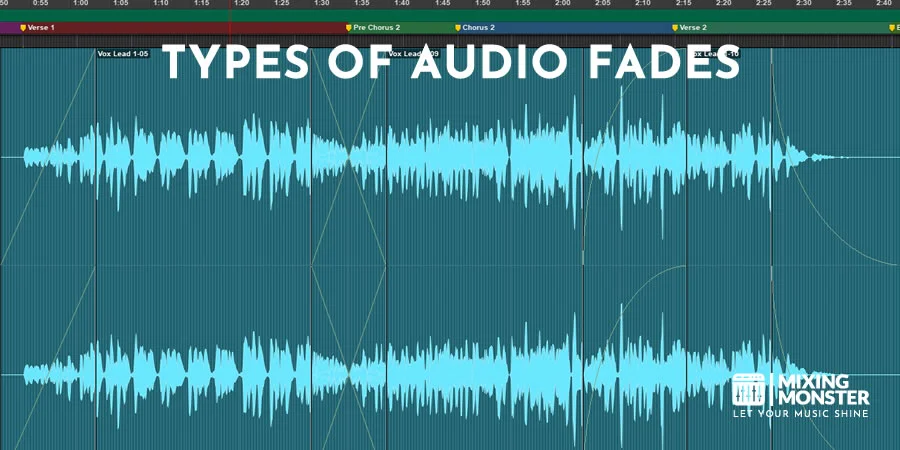
Hard cuts between audio clips are usually a no-go. Short crossfades (like 5-20ms) eliminate clicks, while longer ones can create a mood or conceal awkward edits.
There are a bunch of fade shapes: linear, exponential, and S-curve. S-curves often sound the most natural for music, while exponential fades can be nice for dialogue. Play around and see what fits.
Sound designers love layering and crossfading elements to build up complex transitions. It’s an art form.
Dialogue Editing Techniques
Polished dialogue is all about details. Cut out the weird breaths, clicks, and background junk, but don’t make it sound robotic. Keep it human.
Must-have dialogue tools:
- Noise reduction plugins
- De-essers
- EQ for clarity
- Volume automation
Often, you’ll stitch together multiple takes to get the best performance. Matching room tone is key, so the edits don’t stand out.
Sound Effects Integration
Pro sound editors rarely use a single effect by itself. Even a simple door slam might be layered from several recordings for just the right punch.
Libraries are helpful, but custom Foley adds realism. Pro Tools and Adobe Audition have great tools for syncing effects to picture.
When mixing in effects, keep an ear out for:
- Volume balance
- Where the sound “sits“ in the space
- Making sure effects don’t mask each other
- Adding just enough reverb to match reality

4. Post Production Mixing Process
Mixing is where everything finally comes together. It’s the stage where you shape the final sound—balancing levels, EQing, compressing, and placing everything in space. Good mixing makes the difference between “pretty good“ and “wow, that sounds legit.”
Balance And Level Setting
Start by dialing in volume levels for every track. Proper gain staging matters—if you skip it, you’ll end up with distortion or noise issues later.
Set relative levels so the critical stuff (usually dialogue) stands out, but music and effects still support the story. It’s a juggling act.
Use peak and VU meters to keep an eye on your signals. No one likes buried dialogue or blaring music drowning everything out.

EQ And Frequency Management
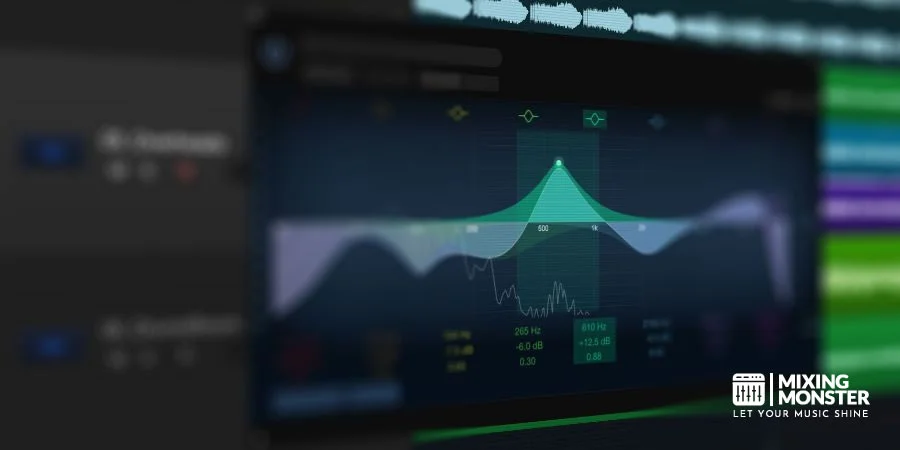
EQ is your primary tool for carving out space. Cut muddy frequencies, boost what needs to shine. Parametric EQs are fantastic for targeting specific trouble spots.
High-pass filters clear out low-end rumble; low-pass filters tame ear-piercing highs. The goal? Make sure each sound has its own space in the mix.
Every instrument and voice lives in a particular frequency zone. Careful EQ keeps them from stepping on each other.
Compression And Dynamic Control
Compressors smooth out the loud and quiet parts, making everything more consistent. Dynamic range matters—a little goes a long way, but too much can squash the life out of your mix.
Tweak attack and release so you keep the punch but avoid pumping or weird artifacts. Sometimes you’ll stack two or three compressors for different reasons.
Parallel compression can add punch without killing the natural feel. And limiters? They’re your safety net against digital clipping and sudden spikes.

Spatial Effects And Placement
Reverb and delay add space and vibe. You can fake anything from a tiny room to a cathedral—don’t overdo it unless you want things to sound dreamy or distant.
Panning is huge for width and separation. Place sounds across the stereo (or surround) field so everything isn’t just stacked in the middle.
Great mixers pay close attention to how sounds interact with the “room” and each other. The right spatial tricks can really pull the audience in and make the whole thing more emotional—if you ask me, that’s where the magic happens.

5. Post Production Mastering Essentials
Proper mastering isn’t just about ticking off technical boxes—it’s about really listening and catching the little things across all the essential audio parameters. A professional mastering engineer pays close attention to loudness, frequency balance, and making sure every format is happy, but never at the expense of the music’s soul.
Loudness Standards Compliance
Audio post-production folks have to stick to specific loudness standards—LUFS (Loudness Units Full Scale) is the go-to for most platforms these days.
Streaming giants usually want -14 LUFS, but if you’re prepping for broadcast TV, you’re aiming closer to -23 LUFS. It’s a bit of a moving target depending on where your mix is headed.
Set your true peak limiter at -1 dB. That’s standard to avoid nasty digital clipping. Compression? Sure, but don’t squash the life out of it—just enough to keep things even and punchy.
Loudness meters are your friends here. They’ll show you integrated loudness, short-term, and those pesky momentary peaks. If you’re not checking these, you’re likely wondering whether your mix will pass muster.
Final EQ And Audio Processing
This is where the mastering engineer really earns their keep. Subtle EQ tweaks make all the difference for tonal balance—think about low-end clarity (20-250 Hz), midrange bite (250 Hz-2 kHz), and those airy highs (2-20 kHz).
Multiband compression is handy for taming unruly frequencies without stomping on the whole mix. And stereo imaging? It’s a balancing act—make it wide, but don’t lose mono compatibility.
Phase correlation meters help you keep the stereo field in line. Sometimes a touch of saturation or harmonic excitement can bring warmth and vibe, but it’s easy to overdo it.
Format-Specific Audio Requirements
Every delivery format comes with its own list of demands. Film and TV want discrete 5.1 or 7.1 channels, with the proper downmix coefficients (don’t skip this, or you’ll have a mess later).
Streaming platforms are all about stereo files locked at -14 LUFS. Game audio? That’s a whole other beast—adaptive stems and interactive layers are the norm.
Vinyl’s tricky: phase issues and too much low end can ruin your cut. CDs are a bit old school now, but Red Book standards and PQ codes still matter if you’re doing them.
Audio Quality Assurance
You’ve got to listen to a bunch of speakers and headphones—what sounds great in the studio might fall flat elsewhere. Reference tracks are a lifesaver for keeping your ears honest.
Use analyzers to hunt down artifacts, phase weirdness, or odd frequencies. Null testing is a solid way to double-check encoding and conversions.
Here’s a quick QC checklist:
- Check channel configurations
- Are start and end times on point?
- Hunt for unwanted noise
- Make sure fades are smooth
- Test for format compliance
- Don’t forget mono compatibility
6. Export and Delivery
When it’s time to export and deliver, the technical specs are strict—no shortcuts—audio formats, metadata, and archiving all need to hit industry standards. Video files have to be formatted just right, or you’ll get them bounced back. It’s a lot, honestly.
Audio File Format Requirements
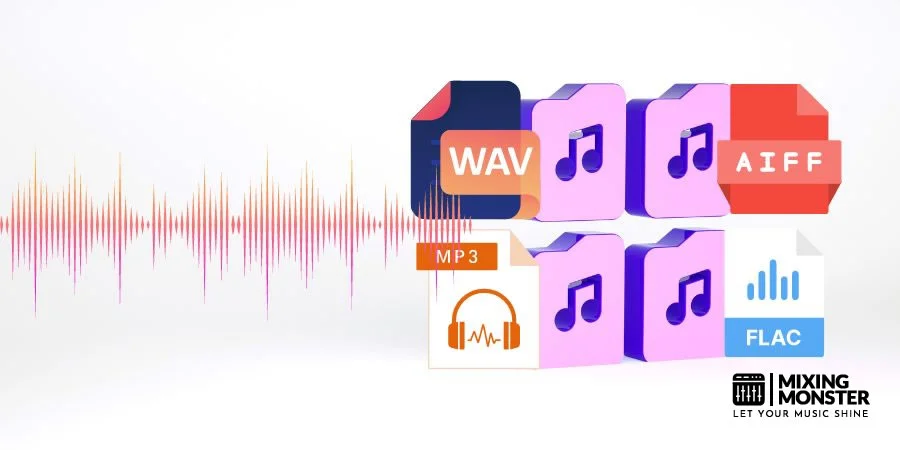
Deliver your audio as 24-bit WAV files at 48kHz for broadcast. No MP3s or compressed stuff—uncompressed audio is the rule for pro work.
For stereo, split out the left and right channels. If you’re working in 5.1, you’ll need six separate files, one for each channel.
Keep your stems organized—dialogue, music, effects—label everything clearly so no one’s guessing what’s what.
Audio Metadata Standards
Metadata matters more than you’d think. You’ll need ISRC codes, copyright information, and technical specifications embedded. BWF headers should have precise timestamp data if you want frame-accurate sync.
ID3 tags? Fill them out entirely:
- Track title
- Project name
- Creation date
- Technical details
- Version numbers
Delivery Specifications
Final video exports have to hit all the platform specs—resolution, codec, bit rate. ProRes 422 HQ is a broadcast staple, but H.264 is everywhere for digital stuff.
For graphics and motion, don’t forget:
- Alpha channel intact
- Color space matches
- Frame rates line up
- Resolution fits the bill
End credits are a pain, but must follow network rules for timing and format. Double-check before sending anything off.
Archive Management
Post-production assets need to be organized for the long haul. That means labeling project files, raw footage, and renders so you’re not lost six months later.
Good backup plans include:
- Storing in more than one place
- Cloud redundancy (just in case)
- Regular integrity checks
- Detailed asset lists
Archive packages should have both high-res masters and smaller reference files. It’s a pain now, but you’ll thank yourself later.

7. Key Takeaways for Audio Post-Production
- Clean audio is non‑negotiable — even stunning visuals can’t save a project with muddy dialogue or distracting noise. Good audio post makes the story feel professional and immersive.
- Workflow and organization matter — structured file management, backups, and version control keep projects moving smoothly and prevent costly mistakes.
- Editing is both technical and creative — from noise reduction to dialogue stitching, every adjustment shapes how the audience feels and understands the story.
- Mixing is where the magic happens — balancing dialogue, music, and effects, while managing EQ, compression, and spatial placement, creates a polished, cinematic soundscape.
- Mastering ensures consistency everywhere — loudness standards, final EQ, and format compliance guarantee your audio translates well across platforms, speakers, and delivery formats.
- Delivery isn’t just exporting — it’s about meeting strict technical specs, embedding proper metadata, and archiving assets for the long haul.
Audio post-production is the invisible glue that transforms raw sound into a seamless, emotional experience. Nail it, and your project instantly jumps from “amateur“ to “broadcast-ready.”

FAQ
1) What is the recommended order of audio post-production steps?
Begin with dialogue editing and cleanup—get those vocals sitting right—next, layer in sound effects and Foley for realism. Add music scoring and ambience to set the mood. Then it’s time for the central mix of all elements.
If you need ADR, do it now. Then wrap up with final mix, mastering, and a round (or two) of QC checks.
2) How long should each stage of post-production take?
Dialogue editing usually takes 2-3 days per hour of finished content. Sound design and effects? Budget 3-5 days. Music can be 2-3 days, and the final mix often eats up 4-7 days, especially if clients want tweaks.
Big, VFX-heavy projects can drag out for months. A really complex post-production workflow—think features—might run several months, no joke.
3) Which tools are essential for professional audio post-production?
Pro Tools is still the king of DAWs in post. Quality monitors and a treated room are non-negotiable if you want to make good calls.
Plugins like iZotope RX are a must for dialogue cleanup. Hardware controllers? They’re not required, but they make mixing way smoother.
4) What qualifications are required to pursue a career in post-production?
Some technical training in audio engineering or sound design is a solid start. You’ll need to know your way around DAWs and signal processing, for sure.
Getting hands-on with post-production as an intern or assistant is invaluable. Understanding film language and storytelling helps with creative calls, too.
5) How do you maintain quality throughout the post-production chain?
Use clear file naming and keep everything organized. Stick to consistent monitoring levels and reference tracks so your ears don’t get tricked.
Regular QC checks between stages catch problems before they snowball. And always, always back up your work—losing files is the worst way to learn about revision control.
6) What are the most common audio delivery formats?
Stereo PCM files at 48kHz/24-bit are still the go-to for most broadcast and streaming projects. You’ll see 5.1 surround mixes pop up a lot when it comes to theatrical releases—expected, right?
These days, Dolby Atmos and other immersive formats are catching on, especially for high-end stuff. And then there are stem deliveries, which—let’s face it—make things a lot more flexible when it’s time to sort out the final distribution.

