Home > Blog > Studio Gear > Home Studio Gear

Disclosure: Some of the links below are affiliate links, meaning that at no additional cost to you, we will receive a commission if you click through and make a purchase. Read our full affiliate disclosure here.
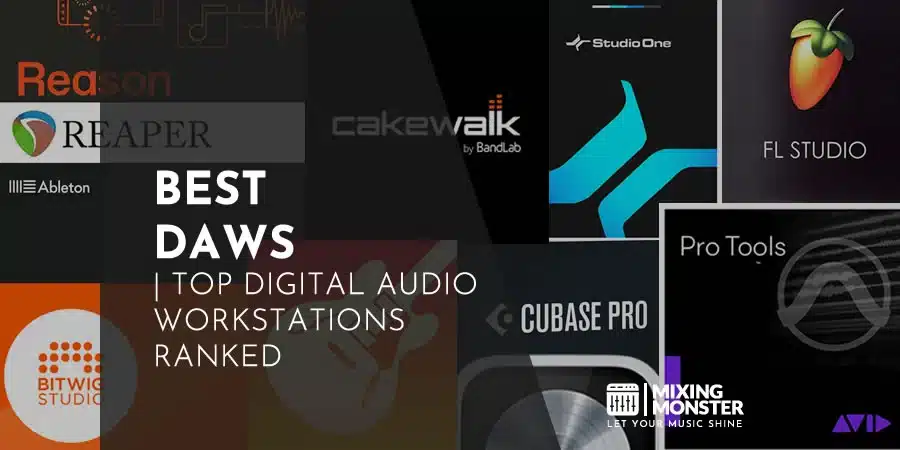
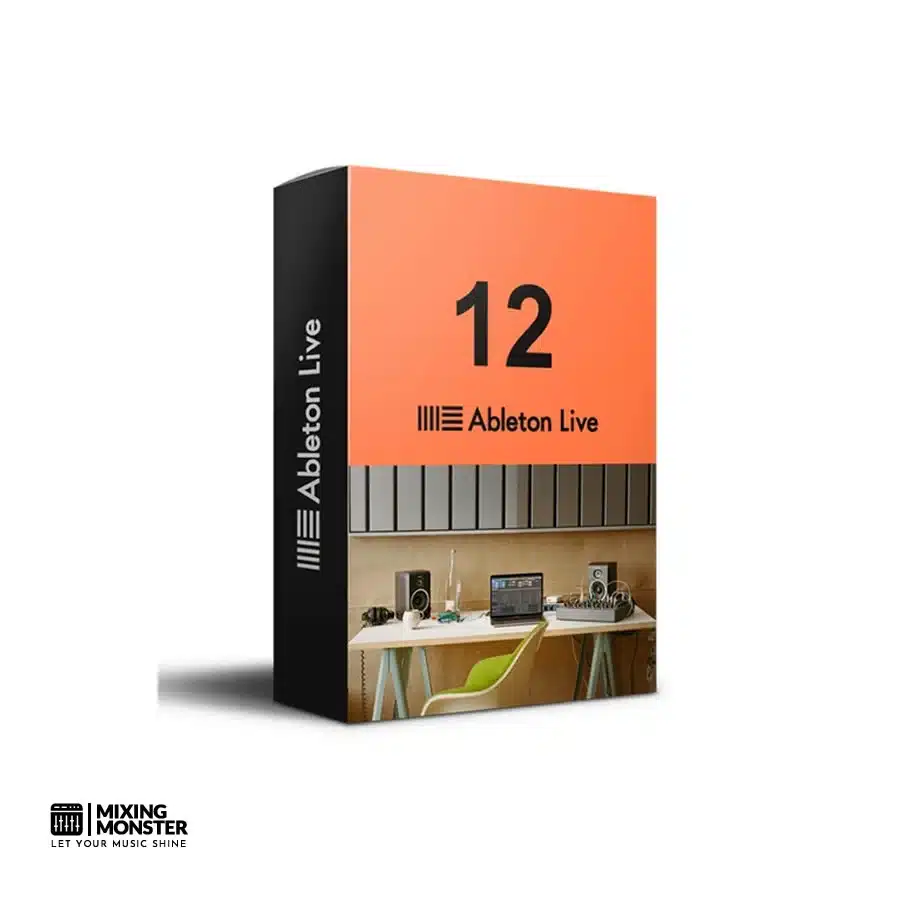
Are you tired of traditional music production software that feels limiting? Enter the world of Ableton Live, a revolutionary digital audio workstation that has transformed how musicians create, perform, and produce music across genres.
Ableton Live is a digital audio workstation (DAW) developed by the German company Ableton for both macOS and Windows platforms. Ableton Live has a unique dual-view interface featuring Session and Arrangement views, allowing for spontaneous creation and traditional linear composition. It has become one of the industry standard DAWs for electronic music production and live performance, offering seamless integration with hardware controllers like Push.
The software combines recording, composing, mixing, and performing capabilities in one comprehensive package. Whether you’re a complete beginner or an experienced producer looking to elevate your skills, Ableton Live offers an intuitive yet deep workflow that grows with you.
Ableton Live features a comprehensive suite of virtual instruments, effects, and sampling tools, enabling unlimited creative possibilities.
With its straightforward installation process and beginner-friendly interface, even newcomers can quickly start making professional-sounding music while discovering new production techniques.
KEY TAKEAWAYS:
- Ableton Live combines innovative session-based and traditional linear workflows in one powerful music production environment.
- The intuitive interface accommodates beginners and professionals with a comprehensive suite of instruments, effects, and sampling tools.
- Seamless hardware integration and performance capabilities make Ableton Live ideal for studio production and live musical performances.
Table Of Contents
1. What Is Ableton Live And Why It’s Revolutionary
2. Getting Started With Ableton Live For Beginners
3. Mastering Ableton Live’s Core Production Tools
4. Advanced Ableton Live Production Techniques
5. Optimizing Performance and Workflow in Ableton Live
6. Integrating Hardware With Ableton Live
7. Ableton Live New Features
8. Mastering In Ableton Live
9. FAQ
1. What Is Ableton Live And Why It's Revolutionary
Ableton Live is one of the most influential digital audio workstations (DAWs) in modern music production, fundamentally changing how electronic music is created and performed. Its innovative interface and flexible workflow have made it a standard tool for producers, DJs, and live performers across genres.
The History and Evolution of Ableton Live
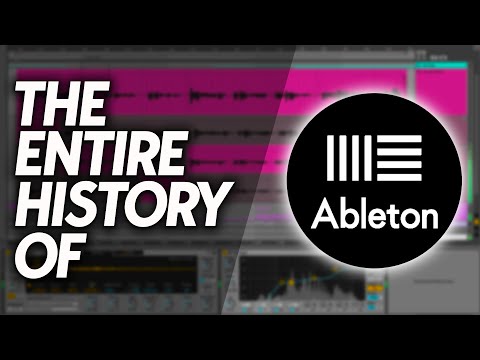
Ableton Live first appeared in 2001. It was created by German company Ableton and founded by Gerhard Behles and Robert Henke. Initially launched as a simple loop arrangement tool, Live quickly evolved into a complete DAW.
The software was revolutionary because it was designed specifically with live performance in mind, unlike traditional DAWs that focused primarily on recording and mixing.
Ableton has expanded its capabilities through multiple versions while maintaining its unique approach. Version 5 introduced MIDI sequencing, version 8 added groove extraction features, and version 10 improved workflow with features like Capture MIDI. The current version offers a complete suite of instruments, effects, and recording capabilities.
What distinguished Ableton was its perspective on music creation as a real-time, flexible process rather than a linear recording task. This philosophy has influenced how an entire generation approaches electronic music production.
Session View vs. Arrangement View Explained
Ableton’s dual-view interface represents its most groundbreaking innovation. Session View enables nonlinear composition with clips arranged in a grid format that can be triggered independently. This view is perfect for experimentation, improvisation, and live performance.
Arrangement View offers a traditional timeline-based approach where music flows from left to right. It’s ideal for recording, detailed editing, and linearly finalizing productions.
The genius of Ableton lies in how these views interact. Users can:
- Record improvisations from Session View directly into Arrangement View
- Move freely between both perspectives during the creation
- Utilize Session View for live performance while maintaining Arrangement View for structure
This revolutionary Session View changed how producers think about composition, enabling a workflow that blends composition and performance in previously impossible ways.
Key Features That Set Ableton Live Apart
Ableton Live’s unique approach extends beyond its dual-view interface with several standout features. The software is a massive modular environment rather than just a recording platform.
Warping capabilities allow for time-stretching and manipulating audio with unprecedented flexibility. This feature lets producers sync samples to project tempo without changing pitch, fundamentally altering how sample-based music is created.
Max for Live integration provides a powerful programming environment inside Ableton, enabling custom device creation and extending the software’s functionality infinitely.
Push controller hardware offers tight integration with the software, giving tactile control that bridges the gap between software and traditional instruments.
Other distinctive features include:
- Intuitive MIDI mapping for hardware controllers
- Real-time audio effects processing
- Powerful automation capabilities
- Cross-session sample management

Who Should Use Ableton Live?
Ableton Live serves diverse users across the music production spectrum.
Electronic music producers benefit most directly from its workflow, particularly those working with loop-based composition or performing live.
DJs transitioning to production find Ableton’s session view intuitive for arranging tracks and performing with them.
Live performers gain unprecedented flexibility with the ability to rearrange songs on the fly, trigger samples, and process audio in real time.
Sound designers leverage Live’s extensive audio manipulation tools and Max for Live integration to create unique sonic palettes.
Starting at $99 for the Intro version, with Suite offering the complete package, Ableton provides options for various budgets.
The learning curve can be steeper than some competitors, but the investment pays off for those seeking a tool that transforms electronic music creation. Ableton Live particularly shines for creators who blur the lines between studio production and live performance.
2. Getting Started With Ableton Live For Beginners
Ableton Live offers a powerful yet approachable platform for music production. The following guide covers essential first steps to help new users navigate the software efficiently and begin creating music without unnecessary complexity.
Setting Up Your First Ableton Live Project
When launching Ableton Live, you’ll be greeted with a template selection screen. For beginners, the “Empty Project” option provides a clean slate. Click “Create” to open a new session.
To save your project, press Ctrl+S (Windows) or Cmd+S (Mac) and choose a location on your computer.
You should create a dedicated folder to keep all your Ableton projects organized.
The default view is “Session View,” which is great for creating loops and experimenting. Switch to “Arrangement View” by pressing Tab when you’re ready to structure your song linearly.
Projects in Ableton are called “Live Sets” and have the file extension .als. Get started with Ableton Live by creating a simple beat using the built-in drum samples to familiarize yourself with the workflow.

Understanding The Ableton Live Interface
Ableton’s interface consists of several key areas: the Browser, Session/Arrangement area, Detail View, and the Device/Clip View. The browser on the left contains all your instruments, effects, and samples.
The main workspace changes depending on which view you’re in. Session View (grid-based) is perfect for improvising and building loops, while Arrangement View (timeline-based) is ideal for traditional song arrangement.
The Detail View at the bottom shows either clip information or the mixer, depending on your selected selection. Toggle between views using the buttons in the bottom right corner.
Key Interface Elements:
- Browser: Access to all sounds and devices
- Clip View: Edit MIDI and audio
- Device View: Add and adjust effects
- Mixer: Control volume and routing
Understanding Ableton’s unique dual-view approach is crucial for effective music production.
Essential Keyboard Shortcuts To Speed Up Workflow
Keyboard shortcuts dramatically accelerate your Ableton workflow. Learning these common shortcuts will save countless hours of production time.
Navigation Shortcuts:
- Tab: Switch between Session and Arrangement View
- Ctrl+Alt+B (Win) / Cmd+Option+B (Mac): Show/hide browser
- Ctrl+Alt+L (Win) / Cmd+Option+L (Mac): Show/hide detail view
Editing Shortcuts:
- Ctrl+D (Win) / Cmd+D (Mac): Duplicate selection
- Ctrl+Z (Win) / Cmd+Z (Mac): Undo
- Ctrl+Y (Win) / Cmd+Y (Mac): Redo
Recording and playback shortcuts are essential for capturing your musical ideas quickly. Use the Spacebar to start/stop playback and Shift+Spacebar to continue from the stopped position.
For MIDI editing, use B to switch to draw mode and A to return to select mode. These fundamental shortcuts will become second nature with regular practice.
Configuring Audio and MIDI Preferences
Proper setup of audio and MIDI preferences is critical for reliable performance—access preferences by pressing Ctrl+ (Windows) or Cmd+ (Mac).
Select your audio interface from the driver type dropdown in the Audio tab. For Windows users, ASIO drivers provide the best performance. Set your buffer size between 128-512 samples for a good balance between latency and stability.
The MIDI tab allows you to enable your connected MIDI controllers. Enable Track and Remote for each device you want to play and control Ableton.
Recommended Audio Settings:
- Sample Rate: 44.1kHz for most projects
- Buffer Size: 256 samples (increase if experiencing audio dropouts)
- Input/Output Device: Your audio interface
Test your configuration by creating a MIDI track, adding an instrument, and playing notes. If you experience latency or dropouts, increase the buffer size.


3. Mastering Ableton Live's Core Production Tools
Ableton Live provides powerful production tools that form the backbone of any music creation workflow. The platform’s unique session and arrangement views offer complementary approaches to composing, recording, and performing music with professional results.

Working With Clips, Scenes, and Launching
Clips are the fundamental building blocks in Ableton Live, serving as containers for audio or MIDI data. They can be arranged in both Session and Arrangement views, each offering distinct workflow advantages.
In Session View, clips are organized into vertical scenes that can be triggered simultaneously, perfect for live performance and improvisation. The Launch buttons allow for flexible playback control, with customizable launch quantization settings ensuring clips start with your project’s ideal time.
Using keyboard shortcuts like Shift+Enter to launch scenes or Ctrl+Space (Cmd+Space on Mac) to stop all clips to maximize efficiency. The Follow Action feature enables automatic clip sequencing, creating evolving patterns without manual intervention.
Clip Properties Tips:
- Use warp markers to adjust the timing of audio clips
- Adjust clip launch quantization individually for creative timing effects
- Color-code-related clips for visual organization
- Utilize clip envelopes for parameter automation within specific clips
Recording Audio and MIDI in Ableton Live
Ableton Live excels at capturing both audio and MIDI performances with minimal setup.
Select an input channel, arm the track for recording, and set appropriate monitoring options (Off, In, or Auto).
The platform supports multitrack audio recording with unlimited tracks (hardware permitting), making it ideal for simultaneously recording bands or multiple sound sources. Group tracks help organize complex recording sessions by allowing collective processing of related elements.
MIDI recording offers both step and real-time input methods. The MIDI Editor precisely controls note placement, velocity, and duration.
Ableton’s MIDI transformations like scale, chord, and arpeggiator effects expand creative possibilities without requiring advanced music theory knowledge.
Comping, introduced in Ableton Live 11, streamlines the recording workflow by allowing multiple takes of the same part. The best sections from each take can be easily combined into a perfect composite performance.

Essential Mixing Techniques in Ableton Live
Ableton’s mixing capabilities center around its flexible channel routing and powerful built-in audio effects. The mixer provides precise control over volume, panning, and sends, with color-coded peak meters for visual feedback.
EQ Eight offers surgical sound shaping with eight parametric bands and multiple filter types. Using the spectrum analyzer helps identify problem frequencies that need attention. The Glue Compressor, modeled after classic bus compressors, excels at binding mix elements together.
Key Mixing Techniques:
- Use return tracks for shared effects like reverb and delay
- Implement sidechain compression for dynamic ducking effects
- Group similar elements (drums, vocals) for collective processing
- Utilize the Utility device for stereo width control
Live’s automation system allows for precise control over any parameter. This enables dynamic mixes that evolve throughout a track.
Automation and Sound Design Fundamentals
Automation brings static sounds to life by introducing movement and evolution. In Ableton, automation can be applied to virtually any parameter, from volume and panning to device-specific controls.
The platform offers two automation approaches: clip envelopes (within individual clips) and arrangement automation (spanning the entire timeline). Both methods use breakpoint editing for precise control, with additional options for curves between points.
The sound design in Ableton leverages the platform’s powerful instruments and effects chain capabilities. Instrument Racks allow for layering sounds and creating complex splits based on velocity or key ranges. Audio effect racks enable parallel processing paths for advanced signal manipulation.
The groove engine provides rhythmic flexibility by extracting timing and velocity information from audio samples. These grooves can then be applied to other elements, imparting a human feel to programmed parts. Experiment with groove pool settings like timing, randomization, and velocity to find the perfect pocket for your tracks.

4. Advanced Ableton Live Production Techniques
Ableton Live offers sophisticated tools for producers seeking to elevate their music production. Mastering these advanced techniques can transform basic tracks into professional-quality productions with distinctive sonic characters and polished arrangements.

Creating Dynamic Arrangements in Ableton Live
Dynamic arrangements keep listeners engaged throughout your track. Use Session View to experiment with different arrangement ideas before committing to Arrangement View.
Implement automation lanes for volume, filters, and effect parameters to create movement and tension. Automate the Utility device’s gain or a filter’s cutoff frequency during builds and transitions for dramatic effect.
Utilize Clip Envelopes to program micro-variations in MIDI notes, creating more organic progressions. The Velocity Chance feature adds human-like variability to programmed drum patterns, especially effective with hi-hats.
Experiment with Tempo Following to create tracks that breathe naturally, slightly increasing tempo during chorus sections and decreasing during breakdowns. Max for Live’s Probability tools can introduce controlled randomness into your arrangements, preventing repetitive sequences.
Mastering Ableton's Built-in Effects and Instruments
Ableton’s native instruments and effects offer powerful sound design capabilities that producers often overlook. The Wavetable synthesizer provides deep sound design possibilities through its flexible oscillators and modulation matrix.
Create unique sounds by combining multiple instruments in an Instrument Rack with chain selectors for dynamic switching. Native synths are optimized for CPU efficiency and integrate seamlessly with Live’s workflow.
For mixing, try these advanced processing chains:
- EQ Eight → Glue Compressor → Saturator for robust bass sounds
- Auto Filter → Chorus → Echo for atmospheric pads
- Drum Buss → Dynamic Tube for punchy percussion
Experiment with MPE (MIDI Polyphonic Expression) compatibility in Wavetable and Sampler for nuanced control when using compatible controllers. Process familiar instruments through creative effect chains to develop signature sounds that stand out in your productions.

Sound Design Workflows and Techniques
Effective sound design in Ableton starts with smart sampling techniques. Record and manipulate found sounds using a Simpler or Sampler with advanced envelope controls and warping algorithms.
Create evolving textures by layering multiple instances of similar sounds with slight variations in processing:
- Layer a clean sound with processed versions
- Apply different effects to each layer
- Use macro controls to adjust various parameters simultaneously
Experiment with adding human feel to hi-hats and other percussion using groove templates and velocity variation. Utilize Sound Similarity analysis to find complementary samples that blend well together.
Save your custom sound design chains as templates for future use. Explore Max for Live devices that transform audio unexpectedly, like granular processors and spectral tools that deconstruct and rebuild sounds from their component frequencies.
Sidechaining and Advanced Processing Methods
Sidechaining techniques extend far beyond the standard kick-to-bass compression. Use frequency-dependent sidechaining to duck only specific frequency ranges, keeping low-end tight while preserving mid-range presence.
Create dynamic effects by sidechaining reverb and delay sends to the dry signal, allowing impacts to bloom during quieter passages and recede during busy sections. This maintains clarity while adding depth to your mix.
Implement parallel processing through Return tracks or Audio Effect Racks:
- Parallel compression for powerful drums without losing transients
- Parallel distortion for adding harmonics while preserving the original signal
- Multiband processing for targeted frequency enhancement
Experiment with MIDI generators that respond to audio input, creating reactive accompaniment. Try using Envelope Followers to extract movement from one sound and apply it to effect parameters on another track for organic modulation.

5. Optimizing Performance and Workflow in Ableton Live
Maximizing efficiency in Ableton Live requires strategic management of resources and thoughtful organization of your production environment. The right optimization techniques can dramatically improve both creative flow and technical performance.
CPU Management and Performance Optimization
Ableton Live’s performance depends heavily on how you manage system resources. Start by increasing your buffer size in Audio Preferences when producing. Larger values reduce CPU load but increase latency. For tracking or live performance, lower the buffer for minimal latency.
Freeze tracks that aren’t being actively edited to save significant CPU resources. This temporarily converts processor-intensive tracks to audio, freeing up resources for other tasks.
Use Automatic Plugin Delay Compensation to ensure all tracks remain properly synchronized when using plugins with different processing latencies. This feature prevents phase issues and timing misalignments.
Consider selectively turning off devices or tracks that are not currently needed. Right-click on devices or tracks and use the “Disable” option rather than deleting them—this preserves your settings while freeing up resources.
When using multiple VST3 and VST2 plugins, organize them strategically. VST3 plugins typically offer better performance and resource management than older VST2 versions.
Creating Custom Templates and Racks
Starting projects with tailored templates saves substantial time. Create default templates with your preferred track configurations, routing, and favorite devices already in place.
Customize your device defaults by configuring a device how you typically use it, then right-click and select “Save as Default Preset.” Every new instance will load with your preferred settings.
Group and save elements you frequently use together. Create Effect, Instrument, and Drum Racks with your go-to combinations and macro controls for quick access and manipulation.
Use color coding within your racks to visually organize chains. This makes navigation much faster, especially in complex projects with multiple processing layers.
Store your most-used racks in the browser’s User Library section for immediate access across all projects. This creates a personalized toolkit that evolves with your production style.
Organization Tips for Complex Projects
Implement a consistent naming convention for all tracks, clips, and scenes. Clear labeling significantly improves navigation speed when working with dozens or hundreds of elements.
Use track groups liberally to organize related elements. For example, group all drums, all synths, all vocals, etc., then use color coding to distinguish between groups visually.
Optimize your workflow by setting up return tracks for common effects like reverb and delay. This approach saves CPU resources and creates mix coherence by sending multiple tracks to the same effect.
Master keyboard shortcuts to speed up your process dramatically. Focus on learning shortcuts for actions you perform frequently, such as duplicating clips (Ctrl+D) or toggling device activation (0).
Create a dedicated “Ideas” section in your project using locators or scene markers. This provides a designated space for experimental elements without cluttering your main arrangement.

Collaboration Features and Exporting Options
Ableton Link enables seamless synchronization between multiple devices running Link-enabled applications. This technology allows for stable tempo synchronization without a complex MIDI setup, which is ideal for jamming or collaborative performance.
When sharing projects, use the “Collect All and Save” feature to ensure collaborators have all necessary samples and resources. This packages external files into your project folder.
For collaboration across different DAWs, learn strategic exporting techniques. Export stems with consistent start points and include pre-roll where necessary to preserve time-based effects.
Utilize Audio Unit support when collaborating with Logic Pro users, as this format provides the most reliable cross-platform compatibility between macOS-based DAWs.
Establish clear file naming protocols when collaborating (e.g., ProjectName_TrackName_Version1.2). This prevents confusion and helps maintain version control throughout the production process.
6. Integrating Hardware With Ableton Live
Ableton Live offers robust hardware integration capabilities that enhance workflow and creative possibilities. The software’s design accommodates various external devices, from controllers to synthesizers, allowing producers to build personalized studio and performance setups.
Setting Up Controllers and MIDI Devices
MIDI mapping in Ableton Live is straightforward and powerful. To begin, connect your MIDI device via USB or a MIDI interface, then navigate to Live’s preferences to ensure it’s recognized.
The MIDI Map Mode (accessible by pressing Ctrl+M/Cmd+M) allows for quick assignment of hardware controls to virtually any parameter in Live. Enter MIDI Map Mode, click the desired parameter, and move the physical control you wish to assign.
For more organized setups, consider using Control Surfaces. Go to Preferences > Link/MIDI tab and configure your hardware in the Control Surface section. This provides deeper integration with supported devices.
Many controllers come with pre-configured templates for Ableton. For custom setups, Live’s integrated hardware support ensures compatibility with devices from various manufacturers.

Push 2 and Push 3 Integration Techniques
Push controllers represent Ableton’s flagship hardware integration, offering deep, seamless control over Live’s features. These devices function as production centers that reduce the need to look at your computer screen.
When connected, Push automatically maps to Live’s key functions. The color-coded pads provide visual feedback about clips, notes, and scales. Browse and load instruments, effects, and samples directly from Push using its intuitive browsing system.
Push’s step sequencer is particularly powerful for rhythm programming. Use the touch strip for pitch bends or as a modulation source. For melodic content, configure the pads to display various scale modes to simplify music theory concepts.
Custom setups are possible through Max for Live, which allows advanced users to create specialized functionality for Push. This extensibility makes Push exceptionally versatile for studio production and live performance contexts.
External Hardware Synths and Drum Machines
Incorporating hardware synthesizers and drum machines with Ableton is easy. Begin by connecting your instruments to a sound capture audio interface and a control MIDI interface.
To set up external synths, create an External Instrument device in Live. This combines MIDI output routing with audio input reception in one convenient device. Configure the MIDI output channel to match your hardware synth’s settings and select the appropriate audio input channels.
For drum machines, use External Instrument devices for each sound or create a Drum Rack with External Instruments. This approach allows for individual processing and mixing of each drum voice.
Recording hardware is simple with Ableton’s External Instrument device. Record the audio directly or use MIDI clips to trigger your hardware during mixdown. For complex setups, create instrument racks with macro knobs to control multiple parameters simultaneously.
Creating a Hybrid Setup for Live Performance
A hybrid Ableton setup combines software flexibility with hardware tactility for dynamic live performances.
Start by organizing your Live set with a performance-oriented structure. This is typically scene-based for easy navigation during shows.
Map essential controls to physical hardware for real-time manipulation.
Controllers like Novation Launchpad or Akai APC can trigger clips, while MIDI controllers modify effects parameters.
Configure Follow Actions to create automatic progressions when needed.
Create dedicated audio tracks for hardware synths with monitoring set to “In.” This allows you to integrate your hardware synths seamlessly with your Ableton workflow.
Consider using effect racks with performance-oriented macro assignments for one-knob control over complex processing chains.
Stability is crucial for live performance.
Freeze CPU-intensive tracks when possible and test your setup thoroughly.
Always have a backup plan for hardware failure. Duplicate critical external instrument parts with software alternatives if space permits.
7. Ableton Live New Features
Ableton Live 12 introduces numerous enhancements that significantly improve music production workflows.
The update brings refined interfaces, powerful new devices, expanded MIDI capabilities, and thoughtful improvements to existing tools.
Major Interface and Workflow Improvements
Live 12’s interface has been streamlined for better productivity and creative flow.
The redesigned browser makes finding instruments, effects, and samples faster with improved categorization and search functionality.
One standout addition is the “Bounce to New Track” feature in Live 12.2. This allows producers to instantly create new audio tracks from MIDI or existing audio, maintaining creative momentum during sessions. This eliminates the need for manual track creation and sample importing.
The arrangement view now includes enhanced automation tools, making detailed sound design more intuitive.
Clip editing has also been refined with improved warp markers and more precise editing capabilities.
Users will appreciate the updated color coding system and customizable interface elements that help organize complex projects more effectively.

New Instruments and Effects Overview
Live 12 expands its sonic palette with several innovative devices.
The updated Saturator and Limiter plugins offer greater control over dynamics and distortion.
The Limiter now features a smoother release curve, improved metering, and Mid/Side routing options for more transparent mastering.
The Hybrid Reverb combines convolution and algorithmic reverb technologies, providing unprecedented spatial effects ranging from realistic rooms to otherworldly atmospheres.
Spectral time introduces frequency-based time manipulation for unique textural and rhythmic effects.
Live 12 Suite includes the Performance Pack with designed live expression and improvisation instruments. With responsive controls and minimal latency, these tools bridge the gap between studio production and stage performance.
Several existing devices have also received significant updates, offering new sound design possibilities without requiring third-party plugins.
Enhanced MIDI and Audio Capabilities
MIDI functionality has been significantly expanded in Live 12, empowering producers with more expressive control.
MPE (MIDI Polyphonic Expression) support has been improved, allowing for more nuanced performances with compatible controllers.
Audio processing capabilities now include advanced time-stretching algorithms that preserve transients better than previous versions.
This results in more natural-sounding pitch and tempo adjustments, which are beneficial for vocals and acoustic instruments.
The new comping workflow streamlines the recording process by making combining the best parts of multiple takes easier. This is particularly valuable for vocal recording sessions.
Live 12 also features enhanced sidechain functionality with more flexible routing options and improved visualization, making complex dynamic processing more intuitive and precise.
Update Path and Upgrade Considerations
Current Ableton users can choose from three editions: Intro, Standard, and Suite, with Suite offering the complete collection of instruments and effects.
Live 11 users benefit from discounted upgrade pricing across all editions.
The system requirements have increased slightly with Live 12, particularly regarding CPU performance. However, the software has been optimized to run more efficiently on modern hardware with improved multi-core utilization.
Users should note that projects created in Live 12 cannot be opened in previous versions.
It’s recommended to save backup copies of important projects before upgrading. The migration process for existing projects is generally smooth, with automated conversion of device settings.
Ableton offers a generous 90-day trial period for Live 12 Suite, allowing producers to thoroughly test compatibility and new features before upgrading.
8. Mastering In Ableton Live
Mastering in Ableton Live is the final polish on your track and should not be used to fix major mix issues. Focus on getting a solid, balanced mix before beginning the mastering process.
The mastering chain typically includes essential tools like EQ, compression, stereo imaging, and limiting.
Ableton’s native devices are powerful enough for professional mastering, with many producers using only Ableton Live devices for their entire mastering chain.
Effective Mastering Workflow:
- Reference your mix against commercial tracks
- Apply subtle EQ adjustments
- Add gentle compression
- Control dynamics with multiband compression
- Enhance stereo width carefully
- Apply to limit loudness
Live performance presents unique mastering challenges.
Unlike finished productions, you cannot fully master a live set because you don’t know exactly which clips or sounds will be used during the performance.
Ableton Live 12 introduces enhanced mastering capabilities that beginners can leverage.
New users should consider exploring dedicated beginner-friendly mastering tutorials to learn the fundamentals.
For more comprehensive mastering techniques, producers can explore expert guides specifically designed for Ableton that cover advanced tools and best practices to achieve professional sound quality.

9. FAQ
1) How do I install Ableton Live on my computer?
Installing Ableton Live follows a straightforward process. After purchasing, you’ll receive a serial number and download link via email.
Download the installer from the Ableton website and run it on your computer. Follow the on-screen instructions to complete the installation.
For authorization, you can choose between online or offline methods.
Online authorization requires an internet connection, while offline authorization generates a challenge code you can use on another computer with internet access.
2) What are the features of Ableton Live Lite compared to the full version?
Ableton Live Lite is a scaled-down version bundled with various hardware controllers and audio interfaces. It offers core functionality but with limitations.
Live Lite restricts you to 8 tracks (instead of unlimited in full versions), fewer included instruments and a smaller sound library. It lacks advanced features like Max for Live and many professional production tools.
For a comprehensive comparison, check the feature comparison chart on Ableton’s website, which details the differences between Intro, Standard, and Suite editions.
3) What are the system requirements for running Ableton Live 12?
Ableton Live 12 requires recent operating systems and adequate hardware specifications.
For Windows, you need Windows 10 (64-bit) or later with an Intel Core i5 processor or AMD equivalent.
Mac users need macOS 10.15 or later with an Intel Core i5 or Apple Silicon processor.
Both platforms require 8GB RAM minimum (16GB recommended) and 3GB of free disk space for the basic installation.
Additional space is needed for sound libraries, which can require 70GB+ for the full Suite version. A display resolution of 1366×768 or higher is also recommended.
4) How does Ableton Live's workflow compare with other DAWs like Pro Tools?
Ableton Live‘s workflow centers around two main views: Session and Arrangement. Session view offers a nonlinear, loop-based approach ideal for live performances and experimentation.
The arrangement view provides a traditional timeline-based recording and editing environment similar to other DAWs.
This dual-view system distinguishes Live from competitors like Pro Tools, focusing primarily on linear recording.
Live excels at spontaneous creativity and electronic music production, while Pro Tools is often preferred for traditional recording, mixing, and post-production workflows.
5) Can Ableton Live be used professionally for music production?
Ableton Live is widely used by professional producers, composers, and performers across multiple music genres. Many chart-topping tracks and albums are produced entirely in Ableton Live.
Its flexible workflow accommodates everything from electronic dance music to film scoring. The Suite edition includes professional-grade instruments, effects, and Max for Live, providing extensive sound design capabilities.
Live’s stability and performance features also make it a popular choice for live performances and touring musicians who incorporate technology into their shows.
6) Which edition of Ableton Live should I purchase to get started?
The best edition depends on your needs and budget. Ableton Live Intro is the most affordable option, providing essential features for beginners.
The Standard edition offers unlimited audio and MIDI tracks. It also includes more instruments and effects. This edition suits serious producers who don’t need Max for Live.
Meanwhile, the Suite provides everything the Standard edition includes, plus Max for Live. It also has additional instruments, effects, and a massive sound library.
Many users start with Intro or Standard and upgrade later, as Ableton offers upgrade pricing. You may also qualify for educational discounts if you’re a student or teacher.
Related Articles
Featured Articles


You Might Also Be Interested In